I've been making this recipe for years, but for some reason, it's never made it on to the blog.
As far as slow cooker recipes go, this one is a little more time intensive and hands on than some. However it is well worth it. Originally, this is to be served over lettuce. We like it better over some rice noodles though.
This will serve 6 - 8.
Thai Chicken and Noodles
adapted from Williams-Sonoma The New Slow Cooker
1 (3 1/2-lb) chicken cut into 11 pieces (2 thighs, 2 drumsticks, 4 breast portions plus 2 wings and backbone. Save the wings and backbone for chicken stock)
2 T olive oil
1 stalk lemongrass, trimmed, cut in half lengthwise, and cut into thick (1/4") slices
1/2 lg yellow onion, finely chopped
5 cloves garlic, minced
1/4 c dry white wine
1/4 c fish sauce
1/2 c chicken stock or water
2 T olive oil
1 T soy sauce
juice of 1 lime
2 t red wine vinegar
1 t peeled and minced ginger
salt
4 green onions, thinly sliced (optional)
2 T fresh cilantro, coarsely chopped
8 oz rice noodles
lime wedges
Season chicken all over with salt and pepper. In a large pan over medium high heat, warm 2 T olive oil. Add the chicken, in batches to prevent overcrowding, to the pan and sear until golden brown on all sides, about 8 minutes. Set aside and sear remaining chicken.
Pour off most of the fat in the pan, leaving 1 - 2 T. Return the pan to medium-high heat. Add the lemongrass and onion and sauté for 5 minutes or until onion is golden. Add the garlic and cook for an additional minute. Pour in wine, fish sauce, and chicken stock and stir to dislodge any browned bits from the bottom. Season with a bit of salt and pepper and transfer mixture to a large (6 qt) slow cooker. Stack the chicken on top. Cover and cook on low setting for 3 - 5 hours (mine is done usually around 3 1/2 - 4 hrs, but my slow cooker is not as slow as some), or until chicken is very tender.
When chicken is finished cooking, bring a large pot of salted water to a boil. Add the rice noodles and cook until al dente. Drain and place in serving dish.
While the water comes to a boil, transfer cooked, tender chicken to a plate and let cool slightly. Pull off skin and remove meat from the bones. (At this point, I discard the skin. I transfer the bones, plus the neck and wings, and juices left in the slow cooker to a large pot. I cover with water and let simmer on the stove for several hours for a nice flavorful chicken stock). Shred the chicken with 2 forks or your fingers. Place chicken in a serving bowl.
Combine olive oil, soy sauce, juice of 1 lime, red wine vinegar, and minced garlic. Shake vigorously in a jar, blend in a mini food processor, or use an immersion blender to combine vinaigrette. Pour half of vinaigrette over chicken along with green onions, if using, and cilantro. Toss well. Taste and add more vinaigrette if desired (I almost always desire more). Serve chicken over cooked rice noodles. Accompany with lime wedges.
Showing posts with label Cilantro. Show all posts
Showing posts with label Cilantro. Show all posts
Sunday, May 18, 2014

Wednesday, November 6, 2013
Banh xeo or Vietnamese Crepes
Plenty by Yotam Ottolenghi continues to please!

I decided this would be a good recipe based on the three daikon radishes that had been sitting in my crisper drawer for 6 months. I figured it was time they were used, especially since we are due to get fresh daikon in box soon.
Let me start by telling you, I am not a crepe maker. I've attempted it twice now, and well, both times things haven't gone well. This time resembled the first time. My crepes were too thick and sticking to the pan--they ended up as scrambled crepes instead of the real deal. Thankfully, this time I had someone to bail me out.
As I stood, baffled, over the crepe pan, Curtis walked into the house in his biking clothes. He had biked home from work and came over to see what I was doing. "Your batter is too thick," he informed and then moved me out of the way and took over. Whew. In no time, he had the batter at the right consistency, heated up a second pan, and cranked up the heat on the first pan. Before long, he was flipping crepes off the crepe pan (into the air--all fancy like) and pulling beautiful crepes off both the crepe pan and cast iron skillet.
That's one of the great things about being married. Sometimes, when one of us is floundering, the other one call bail us out.
We learned a few things here:
•The pan temperature needs to be very hot. The cast iron skillet works better than the crepe pan because it holds the heat better.
•The batter needs to be very thin.
•A single batch is probably plenty, but a double batch worked perfectly because there was a lot of room for trial and error.
•The electric griddle we use for making pancakes would probably work beautifully for this recipe.
Once we got the crepes off the pan in crepe shape, we served them straight the kids. I was nervous we the filling wouldn't satisfy the kids or the taste of the crepes would throw them off. Nope! They loved the crepes. J ate three and the other two each ate two. The crepes tasted wonderful and the sauce was fabulous (the boys even ate the sauce. M boycotts sauces on principal, unless we're talking maple syrup).
 This recipes calls for enoki mushrooms. I tried two stores (HEB and Whole Foods) and couldn't find them. I finally found a cute bundle of them at our closest Asian grocery store. I'd like to use them, but need to have the energy and time to go to multiple stores to source them. If you want to add a meat, you can cooks some shrimp or prawns to add to the fillings. HEB had the rice flour--which makes the recipe vegetarian (if you substitute sweet soy sauce for the fish sauce) and gluten free.
Serves 4 -5.
Bahn xeo or Vietnamese Crepes with Fresh Vegetables and Herbs
adapted a hair from Plenty by Yotam Ottolenghi
Crepes
1 1/3 c rice flour
1 egg
1/2 t salt
1 t ground turmeric
1 3/4 c (1-13.66 oz can) unsweetened coconut milk
a bit of sunflower oil
Sauce
2 1/2 T lime juice
1 1/2 T sesame oil
1 T brown sugar
1 T rice wine vinegar
1 T (or more, to taste) fish sauce (nuoc mam) or sweet soy sauce
2 t grated fresh ginger
1/2 t salt
1 garlic clove, crushed (optional)
1 fresh red chile, finely chopped (optional)
Filling
1- 2 large carrots, peeled and thinly shredded
1 daikon radish, peeled and thinly shredded
4 green onions, sliced on an angle
1 fresh green chile, cut into long thin strips
1 1/2 c snow peas (or more--we love these), cut into long thin strips
1/2 - 1 c cilantro leaves, roughly chopped
1/3-2/3 c basil leaves (preferably Thai basil), roughly chopped
1/4 c mint leaves, roughly chopped
1 c mung bean sprouts
1 c enoki mushrooms
Blend the rice flour, egg, salt, and turmeric in a large bowl. Slowly whisk in the coconut milk, whisking well to avoid a lumpy batter. Add more coconut milk or water (put water in the coconut milk can to get all the coconut milk out) until the batter is the consistency of light cream. Set aside to rest.
Prepare the filling ingredients if you haven't already done so. Put each filling in it's own bowl so people can choose what they want.
Whisk together all the sauce ingredients and adjust the flavor adding more red chile if using or fish sauce (if using). Set aside.
To cook the crepes, add more coconut milk or water to the batter if it has thickened while resting. Heat up a large nonstick frying pan (or a cast iron skillet or an electric griddle--the electric griddle doesn't let you swirl the crepe batter around though, which is kinda fun). The pan should be pretty hot. Add a little sunflower oil. Put some batter in the pan, if not using an electric griddle, swirl it around to cover the surface. Once the bottom is golden brown, carefully turn the crepe over. If the crepe isn't cooked enough or the pan isn't hot enough, the crepe will probably stick and you'll end up with scrambled crepes. Remove from pan and repeat with remaining batter.
Place a crepe on each plate and top desired fillings in the middle of it (like a taco!). Drizzle some sauce over top and fold or roll up. If desired, drizzle some extra sauce over top.
I decided this would be a good recipe based on the three daikon radishes that had been sitting in my crisper drawer for 6 months. I figured it was time they were used, especially since we are due to get fresh daikon in box soon.
Let me start by telling you, I am not a crepe maker. I've attempted it twice now, and well, both times things haven't gone well. This time resembled the first time. My crepes were too thick and sticking to the pan--they ended up as scrambled crepes instead of the real deal. Thankfully, this time I had someone to bail me out.
As I stood, baffled, over the crepe pan, Curtis walked into the house in his biking clothes. He had biked home from work and came over to see what I was doing. "Your batter is too thick," he informed and then moved me out of the way and took over. Whew. In no time, he had the batter at the right consistency, heated up a second pan, and cranked up the heat on the first pan. Before long, he was flipping crepes off the crepe pan (into the air--all fancy like) and pulling beautiful crepes off both the crepe pan and cast iron skillet.
That's one of the great things about being married. Sometimes, when one of us is floundering, the other one call bail us out.
We learned a few things here:
•The pan temperature needs to be very hot. The cast iron skillet works better than the crepe pan because it holds the heat better.
•The batter needs to be very thin.
•A single batch is probably plenty, but a double batch worked perfectly because there was a lot of room for trial and error.
•The electric griddle we use for making pancakes would probably work beautifully for this recipe.
Once we got the crepes off the pan in crepe shape, we served them straight the kids. I was nervous we the filling wouldn't satisfy the kids or the taste of the crepes would throw them off. Nope! They loved the crepes. J ate three and the other two each ate two. The crepes tasted wonderful and the sauce was fabulous (the boys even ate the sauce. M boycotts sauces on principal, unless we're talking maple syrup).
Serves 4 -5.
Bahn xeo or Vietnamese Crepes with Fresh Vegetables and Herbs
adapted a hair from Plenty by Yotam Ottolenghi
Crepes
1 1/3 c rice flour
1 egg
1/2 t salt
1 t ground turmeric
1 3/4 c (1-13.66 oz can) unsweetened coconut milk
a bit of sunflower oil
Sauce
2 1/2 T lime juice
1 1/2 T sesame oil
1 T brown sugar
1 T rice wine vinegar
1 T (or more, to taste) fish sauce (nuoc mam) or sweet soy sauce
2 t grated fresh ginger
1/2 t salt
1 garlic clove, crushed (optional)
1 fresh red chile, finely chopped (optional)
Filling
1- 2 large carrots, peeled and thinly shredded
1 daikon radish, peeled and thinly shredded
4 green onions, sliced on an angle
1 fresh green chile, cut into long thin strips
1 1/2 c snow peas (or more--we love these), cut into long thin strips
1/2 - 1 c cilantro leaves, roughly chopped
1/3-2/3 c basil leaves (preferably Thai basil), roughly chopped
1/4 c mint leaves, roughly chopped
1 c mung bean sprouts
1 c enoki mushrooms
Blend the rice flour, egg, salt, and turmeric in a large bowl. Slowly whisk in the coconut milk, whisking well to avoid a lumpy batter. Add more coconut milk or water (put water in the coconut milk can to get all the coconut milk out) until the batter is the consistency of light cream. Set aside to rest.
Prepare the filling ingredients if you haven't already done so. Put each filling in it's own bowl so people can choose what they want.
Whisk together all the sauce ingredients and adjust the flavor adding more red chile if using or fish sauce (if using). Set aside.
To cook the crepes, add more coconut milk or water to the batter if it has thickened while resting. Heat up a large nonstick frying pan (or a cast iron skillet or an electric griddle--the electric griddle doesn't let you swirl the crepe batter around though, which is kinda fun). The pan should be pretty hot. Add a little sunflower oil. Put some batter in the pan, if not using an electric griddle, swirl it around to cover the surface. Once the bottom is golden brown, carefully turn the crepe over. If the crepe isn't cooked enough or the pan isn't hot enough, the crepe will probably stick and you'll end up with scrambled crepes. Remove from pan and repeat with remaining batter.
Place a crepe on each plate and top desired fillings in the middle of it (like a taco!). Drizzle some sauce over top and fold or roll up. If desired, drizzle some extra sauce over top.
Saturday, August 31, 2013
King Ranch Casserole
Back in the day, I taught at a public school. While public school lunches are notorious for their nastiness (that pizza? those hamburgers? Neither live up to their names), there were two days I would always buy....enchilada day and King Ranch day. The enchiladas....oh my...greasy truck stop...two enchiladas loaded with extra jalapenos and a side of beans on top of my cornbread. (I don't even want to know the calorie count). The King Ranch Casserole was....ugh...too good for words.
These days, my kids' school still has enchilada day, and I try to go whenever they do (it's only once a month, usually a Thursday, unlike pizza which is almost every Monday). However, King Ranch Casserole has gone by the wayside....one to be remembered, "back in the good old days" (unlike the stewed tomatoes and pimiento cheese sandwich not good days).
Last week, I remembered King Ranch Casserole. I googled it and was disappointed. Then, I remembered my favorite site for all recipes Texan: The Homesick Texan. Not only did the Homesick Texan rise the challenge, the recipe contained no directions that sounded like "open up a can of..." and had no corn!!
Mmm....bliss in my oven in the middle of August. My King Ranch craving was met and I knew I would at least post one more recipe to this blog before I took another 9 month break. M loved this. I made it a hair too spicy, so the boys didn't eat it quite as well. Next time, I'll dial down the spice a little...or maybe not, then I'd get more to myself.
This serves 8 - 10 (or 12. It makes an 11x7" pan).
King Ranch Chicken Casserole
adapted ever so slightly from the Homesick Texan, because the recipe was almost perfect
1 1/2 lbs of boneless, skinless chicken (I used thighs. They're cheaper and more flavorful)
6 t lime jiuce
4 t chile powder (I like New Mexico blend--great flavor and not too spicy)
1/4 c olive oil
4 T butter
1/2 onion, diced
1 red bell pepper, diced
1 poblano (optional--may want to taste the poblano first to see how much of it you want to use), diced
3 cloves garlic, minced
2 T flour
1 t cumin
1 c chicken broth
1/2 c half and half or heavy cream
1 14-oz can diced tomatoes (or a 10-oz can of Rotel or 2 c fresh tomatoes plus 1/4 c diced jalapeños)
1/3 c plain yogurt or sour cream
1/2 c cilantro, chopped
10 corn tortillas
3 c cheese, cheddar or a mix of pepper jack and cheddar
Season the chicken with 4 t lime juice, 2 t chile powder, and a dash of salt. In a skillet over medium heat, cook the chicken in the olive oil for 10 minutes per side or until cooked through. When chicken is cooked through, remove from heat and shred when it is just cool enough to handle. Season with salt and pepper as needed. Set aside (you should have about 3 c of chicken).
Melt the butter in a saucepan over medium heat. Add the onions and both peppers. Cook for 10 minutes or until onions have softened. Add the garlic, flour, cumin, and remaining 2 t of chile powder. Cook for 1 minute, stirring constantly. Add the chicken broth and cook until mixture has thickened. Stir in the half and half and tomatoes. Cover the pot and simmer 15 minutes, stirring occasionally. After 15 minutes, stir in the sour cream, remaining 2 t lime juice, and 1/4 c cilantro. Season with salt and pepper. Remove from heat.
Soften the tortillas (either dry--over a comal or in a little oil in a black skillet). Ladle 1/2 c of the sauce into the bottom or a 11x7 pan (you can use and 9x13 pan, it will just not be as thick). Top with 5 tortillas, tearing tortillas as needed to be sure the entire pan is covered. Add half the chicken, followed by 1/2 the sauce, 1/2 the remaining cilantro, and 1 1/2 c grated cheese. Repeat the layers, ending with the cheese.
Cook uncovered in a preheated 350 degrees oven for 30 minutes or until brown and bubbling. Serve immediately, topping with sour cream, salsa, and more cilantro as desired.
These days, my kids' school still has enchilada day, and I try to go whenever they do (it's only once a month, usually a Thursday, unlike pizza which is almost every Monday). However, King Ranch Casserole has gone by the wayside....one to be remembered, "back in the good old days" (unlike the stewed tomatoes and pimiento cheese sandwich not good days).
Last week, I remembered King Ranch Casserole. I googled it and was disappointed. Then, I remembered my favorite site for all recipes Texan: The Homesick Texan. Not only did the Homesick Texan rise the challenge, the recipe contained no directions that sounded like "open up a can of..." and had no corn!!
Mmm....bliss in my oven in the middle of August. My King Ranch craving was met and I knew I would at least post one more recipe to this blog before I took another 9 month break. M loved this. I made it a hair too spicy, so the boys didn't eat it quite as well. Next time, I'll dial down the spice a little...or maybe not, then I'd get more to myself.
This serves 8 - 10 (or 12. It makes an 11x7" pan).
King Ranch Chicken Casserole
adapted ever so slightly from the Homesick Texan, because the recipe was almost perfect
1 1/2 lbs of boneless, skinless chicken (I used thighs. They're cheaper and more flavorful)
6 t lime jiuce
4 t chile powder (I like New Mexico blend--great flavor and not too spicy)
1/4 c olive oil
4 T butter
1/2 onion, diced
1 red bell pepper, diced
1 poblano (optional--may want to taste the poblano first to see how much of it you want to use), diced
3 cloves garlic, minced
2 T flour
1 t cumin
1 c chicken broth
1/2 c half and half or heavy cream
1 14-oz can diced tomatoes (or a 10-oz can of Rotel or 2 c fresh tomatoes plus 1/4 c diced jalapeños)
1/3 c plain yogurt or sour cream
1/2 c cilantro, chopped
10 corn tortillas
3 c cheese, cheddar or a mix of pepper jack and cheddar
Season the chicken with 4 t lime juice, 2 t chile powder, and a dash of salt. In a skillet over medium heat, cook the chicken in the olive oil for 10 minutes per side or until cooked through. When chicken is cooked through, remove from heat and shred when it is just cool enough to handle. Season with salt and pepper as needed. Set aside (you should have about 3 c of chicken).
Melt the butter in a saucepan over medium heat. Add the onions and both peppers. Cook for 10 minutes or until onions have softened. Add the garlic, flour, cumin, and remaining 2 t of chile powder. Cook for 1 minute, stirring constantly. Add the chicken broth and cook until mixture has thickened. Stir in the half and half and tomatoes. Cover the pot and simmer 15 minutes, stirring occasionally. After 15 minutes, stir in the sour cream, remaining 2 t lime juice, and 1/4 c cilantro. Season with salt and pepper. Remove from heat.
Soften the tortillas (either dry--over a comal or in a little oil in a black skillet). Ladle 1/2 c of the sauce into the bottom or a 11x7 pan (you can use and 9x13 pan, it will just not be as thick). Top with 5 tortillas, tearing tortillas as needed to be sure the entire pan is covered. Add half the chicken, followed by 1/2 the sauce, 1/2 the remaining cilantro, and 1 1/2 c grated cheese. Repeat the layers, ending with the cheese.
Cook uncovered in a preheated 350 degrees oven for 30 minutes or until brown and bubbling. Serve immediately, topping with sour cream, salsa, and more cilantro as desired.
Wednesday, August 14, 2013
Sabih
This is quick becoming one of our summer favorites (up there with Bun Chay, Taco Salad, and Sicilian Stir Fry). Despite doing this CSA thing for the past five plus years, our kids are still not fans of eggplant and zucchini. Curtis and I are still kinda iffy on both of those as well, especially zucchini.
Well, this recipe has no zucchini. It does use eggplant and cucumbers. We love this and have adapted it to the kids by also adding some grilled marinated chicken breasts. Everyone's happy. First bite and once again, I remember how wonderful summer can be.
This recipe calls for savory mango pickles. Some day, I hope to have the time to locate those (I know what store to look at, I just haven't braved it this summer with three kids in tow), so I am leaving them in the recipe.
Sabih
adapted from Jerusalem by Yotam Ottolenghi and Sami Tamimi
2 large eggplants (or 3 - 4 small or medium ones), peeled leaving a zebra like pattern (one strip peeled, one peel left on, etc)
1 1/4 c sunflower or canola oil
1/2 - 1 lb seasoned chicken breasts
sourdough bread, ciabatta bread, or fresh pita (I usually use bread)
4 hard boiled eggs, peeled and sliced
savory mango pickle (optional)
2 medium ripe tomatoes, diced
2 small cucumbers (1 med-lg), diced (if you use a large one, peel and seed cucumber as well)
1 1/2 T parsley
lemon slices
Tahini Sauce:
2/3 c tahini
1/2 c water
2 T lemon juice
salt
1 clove garlic, crushed (optional)
Zhoug:
1 1/4 oz cilantro (thin stems ok)
1/3 oz parsley (thin stems ok)
1 - 2 hot green chiles, coarsely chopped
1/2 t cumin
1/4 t cardamom
1/4 t cloves
pinch of sugar
1/4 t salt
1 clove garlic, crushed (optional)
2 T olive oil
2 T water
Cut eggplants widthwise into slices 1 inch thick. Sprinkle them on both sides with salt, spread on baking sheet or kitchen towel, and let stand for at least 30 minutes (this helps remove some of the water). Pat dry with paper towels or clean kitchen towels.
While the eggplants sweat, prepare the tahini sauce. In a small bowl, combine tahini, water, and lemon juice. The consistency should be of honey or a little runnier. Add a little extra water if needed. Taste and add salt as desired. Sauce can be store in the fridge for up to a week, just stir well before using (and add a little more water if needed).
Prepare the zhoug. Finely chop all the zhoug ingredients (not including olive oil or water). Add the water and olive oil and combine to make a coarse paste. If you have a small food processor, you could also pulse all the ingredients (including olive oil and water) until you have a coarse paste. Zhoug will keep in the fridge for up to three weeks (but ours never lasts that long!).
After the eggplant have sweated for 30 minutes or so, heat the sunflower or canola oil in a heavy frying pan. Make sure the oil is very hot (it almost looks like it starts swirling around in the pan by itself, it shouldn't smoke though, and you definitely don't want it catching on fire) and fry the eggplant slices in batches until nice and dark. Flip the eggplants once. Add oil if needed. When the eggplant is done, it should be nice and squishy in the center. Remove and drain on paper towels. While the eggplant fries, grill the chicken.
To serve: Slice the chicken into thin strips. Put the hardboiled eggs, diced tomatoes, diced cucumbers, and mango pickles on a platter. I don't mix things together because we all like different combinations. Put the parsley in a little bowl and serve the lemon slices as well.
Make the eggplant and chicken into open-faced sandwiches. Spoon tahini sauce over the bread. Follow with eggplant slices (or chicken), some more tahini sauce, eggs, tomato, cucumbers, and top with zhoug. If desired, you can squeeze a lemon over top or season with salt and pepper.
Well, this recipe has no zucchini. It does use eggplant and cucumbers. We love this and have adapted it to the kids by also adding some grilled marinated chicken breasts. Everyone's happy. First bite and once again, I remember how wonderful summer can be.
This recipe calls for savory mango pickles. Some day, I hope to have the time to locate those (I know what store to look at, I just haven't braved it this summer with three kids in tow), so I am leaving them in the recipe.
Sabih
adapted from Jerusalem by Yotam Ottolenghi and Sami Tamimi
2 large eggplants (or 3 - 4 small or medium ones), peeled leaving a zebra like pattern (one strip peeled, one peel left on, etc)
1 1/4 c sunflower or canola oil
1/2 - 1 lb seasoned chicken breasts
sourdough bread, ciabatta bread, or fresh pita (I usually use bread)
4 hard boiled eggs, peeled and sliced
savory mango pickle (optional)
2 medium ripe tomatoes, diced
2 small cucumbers (1 med-lg), diced (if you use a large one, peel and seed cucumber as well)
1 1/2 T parsley
lemon slices
Tahini Sauce:
2/3 c tahini
1/2 c water
2 T lemon juice
salt
1 clove garlic, crushed (optional)
Zhoug:
1 1/4 oz cilantro (thin stems ok)
1/3 oz parsley (thin stems ok)
1 - 2 hot green chiles, coarsely chopped
1/2 t cumin
1/4 t cardamom
1/4 t cloves
pinch of sugar
1/4 t salt
1 clove garlic, crushed (optional)
2 T olive oil
2 T water
Cut eggplants widthwise into slices 1 inch thick. Sprinkle them on both sides with salt, spread on baking sheet or kitchen towel, and let stand for at least 30 minutes (this helps remove some of the water). Pat dry with paper towels or clean kitchen towels.
While the eggplants sweat, prepare the tahini sauce. In a small bowl, combine tahini, water, and lemon juice. The consistency should be of honey or a little runnier. Add a little extra water if needed. Taste and add salt as desired. Sauce can be store in the fridge for up to a week, just stir well before using (and add a little more water if needed).
Prepare the zhoug. Finely chop all the zhoug ingredients (not including olive oil or water). Add the water and olive oil and combine to make a coarse paste. If you have a small food processor, you could also pulse all the ingredients (including olive oil and water) until you have a coarse paste. Zhoug will keep in the fridge for up to three weeks (but ours never lasts that long!).
After the eggplant have sweated for 30 minutes or so, heat the sunflower or canola oil in a heavy frying pan. Make sure the oil is very hot (it almost looks like it starts swirling around in the pan by itself, it shouldn't smoke though, and you definitely don't want it catching on fire) and fry the eggplant slices in batches until nice and dark. Flip the eggplants once. Add oil if needed. When the eggplant is done, it should be nice and squishy in the center. Remove and drain on paper towels. While the eggplant fries, grill the chicken.
To serve: Slice the chicken into thin strips. Put the hardboiled eggs, diced tomatoes, diced cucumbers, and mango pickles on a platter. I don't mix things together because we all like different combinations. Put the parsley in a little bowl and serve the lemon slices as well.
Make the eggplant and chicken into open-faced sandwiches. Spoon tahini sauce over the bread. Follow with eggplant slices (or chicken), some more tahini sauce, eggs, tomato, cucumbers, and top with zhoug. If desired, you can squeeze a lemon over top or season with salt and pepper.
Tuesday, August 6, 2013
Spiced Chickpeas and Summer Vegetable Salad
I know it's been a long time since I've added any recipes. A usual, its a new cookbook that causes me to start adding recipes. For Christmas this year, the dog gave me a cookbook again. Her choice was superb: Jerusalem by Yotam Ottolenghi and Sami Tamimi. I want to be sure next summer when I am scrambling to come up with recipes using eggplant, cucumbers, and the likes, I remember these recipes.
Normally I shy away from cookbooks by restaurant owners or Food Network personalities. They seem full of themselves and full of ingredients that are either terribly expensive or terribly hard to find. Not so for Jerusalem. Although Ottolenghi owns restaurants bearing his name in London, the recipes are easily accessible. The recipes are mostly kosher and heavy on vegetables. Many of the summer vegetables use limited stove/oven time as well, which is nice when it's over 100 degrees outside and I really don't want to heat up my oven any more.
This the first recipe to share. We love it, especially the spiced chickpeas. My margin note? "The spiced chickpeas are divine!" I made a few changes. The original recipe called for a dressing on top of the vegetables. I left that out. Additionally, because with five people we are bound to like different things, I did not mix the vegetables together, I left them in separate piles on the serving platter. I used the vegetables I had (two kinds of sweet peppers), I omitted those I didn't (radishes).
Remember to start the chickpeas the night before you want to eat this meal.
This serves 4.
Spiced Chickpeas and Summer Vegetable Salad
adapted from Jerusalem by Ottolenghi and Tamimi
1/2 c dried chickpeas
1 t baking soda
2 small cucumbers, cut into 2/3" dice (seed and peel if you prefer)
2 large tomatoes, cut into 2/3" dice
8.5 oz radishes, cut into 2/3" dice (optional)
1 -2 sweet peppers, seeded and ribs removed, cut into 2/3" dice
2/3 oz cilantro, coarsely chopped
1/2 oz parsley, coarsely chopped
1 t ground cardamom
1 1/2 t allspice
1 t cumin
1/4 t salt
Greek yogurt
pita
Soak the chickpeas overnight in a large bowl with plenty of cold water and baking soda. The next day, drain, place in a large saucepan and cover with water twice the volume of the chickpeas. Bring to a boil and simmer, skimming off any foam that may gather on top. Simmer for an hour or until the chickpeas are tender. Drain and set aside.
Mix the cardamom, allspice, cumin, and salt on a plate. Roll the cooked chickpeas gently through the spices. Heat 1 T olive oil in a frying pan over medium heat. Add the chickpeas and fry for 2 - 5 minutes. Gently shake the pan so they cook evenly and don't stick. Remove from heat and keep warm
To serve, put each vegetable on a serving platter. (Alternately, combine all the vegetables and herbs and place in a low bowl. Top with warm chickpeas.) Serve the chickpeas in a small bowl. Allow everyone to take the vegetables they want and top with chickpeas. Serve with pita and drizzle Greek yogurt over top if desired.
Normally I shy away from cookbooks by restaurant owners or Food Network personalities. They seem full of themselves and full of ingredients that are either terribly expensive or terribly hard to find. Not so for Jerusalem. Although Ottolenghi owns restaurants bearing his name in London, the recipes are easily accessible. The recipes are mostly kosher and heavy on vegetables. Many of the summer vegetables use limited stove/oven time as well, which is nice when it's over 100 degrees outside and I really don't want to heat up my oven any more.
This the first recipe to share. We love it, especially the spiced chickpeas. My margin note? "The spiced chickpeas are divine!" I made a few changes. The original recipe called for a dressing on top of the vegetables. I left that out. Additionally, because with five people we are bound to like different things, I did not mix the vegetables together, I left them in separate piles on the serving platter. I used the vegetables I had (two kinds of sweet peppers), I omitted those I didn't (radishes).
Remember to start the chickpeas the night before you want to eat this meal.
This serves 4.
Spiced Chickpeas and Summer Vegetable Salad
adapted from Jerusalem by Ottolenghi and Tamimi
1/2 c dried chickpeas
1 t baking soda
2 small cucumbers, cut into 2/3" dice (seed and peel if you prefer)
2 large tomatoes, cut into 2/3" dice
8.5 oz radishes, cut into 2/3" dice (optional)
1 -2 sweet peppers, seeded and ribs removed, cut into 2/3" dice
2/3 oz cilantro, coarsely chopped
1/2 oz parsley, coarsely chopped
1 t ground cardamom
1 1/2 t allspice
1 t cumin
1/4 t salt
Greek yogurt
pita
Soak the chickpeas overnight in a large bowl with plenty of cold water and baking soda. The next day, drain, place in a large saucepan and cover with water twice the volume of the chickpeas. Bring to a boil and simmer, skimming off any foam that may gather on top. Simmer for an hour or until the chickpeas are tender. Drain and set aside.
Mix the cardamom, allspice, cumin, and salt on a plate. Roll the cooked chickpeas gently through the spices. Heat 1 T olive oil in a frying pan over medium heat. Add the chickpeas and fry for 2 - 5 minutes. Gently shake the pan so they cook evenly and don't stick. Remove from heat and keep warm
To serve, put each vegetable on a serving platter. (Alternately, combine all the vegetables and herbs and place in a low bowl. Top with warm chickpeas.) Serve the chickpeas in a small bowl. Allow everyone to take the vegetables they want and top with chickpeas. Serve with pita and drizzle Greek yogurt over top if desired.
Tuesday, September 11, 2012
Thai Chicken with Dipping Sauce
Each summer seems to have a theme. There was the summer I made lots of Italian food, the summer I cooked a little from Julia Child's cookbook, the summer of Greek food. If there was a way to summarize this summer, it would have to be the summer of the fish sauce.
Our family loves fish sauce. All of us. We fell in love with it through Vietnamese food and have continued loving it all throughout Southern Asia.
This was the perfect grilling recipe for me, because there was no messing it up. The chicken gets charred on the grill and then cooked in the oven. I am comfortable with cooking chicken in an oven---the grill not so much.
We loved this recipe. I adapted the types of chicken parts used to fit our family---three leg quarters and half a split chicken breast made everyone happy.
Serves 4 -6
Thai Chicken with Dipping Sauce
adapted a bit from Food and Wine
1/4 c cilantro, finely chopped
2 T Asian fish sauce (I like 3 Crabs brand these days)
1 1/2 t black pepper
4 chicken leg quarters or any combination of leg quarters and breasts, skinned (but bone in)
1/2 t tamarind concentrate dissolved in 1 t water
1/4 c Asian fish sauce
2 T lime juice
2 t sugar
1 T water
1 small chile, seeded and minced (optional)
1/2 c cilantro, chopped
In a small bowl, combine 1/4 c cilantro, 2 T fish sauce and black pepper (if you have a mini-food processor, you can use this instead). Coat the chicken with the cilantro fish sauce marinade and let stand at room temperature for 20 minutes.
While the chicken marinates, light a grill and preheat the oven to 400 degrees. Grill the chicken over moderately high heat, turning, until charred, 12 minutes or so. Transfer the chicken to a baking sheet and roast for 30 minutes or until cooked.
While the chicken cooks, mix together the tamarind concentrated dissolved in water, 1/4 c fish sauce, lime juice, sugar, water and chile (if using). Just before serving, stir the cilantro into the dipping sauce. Serve with the chicken and brown rice.
Our family loves fish sauce. All of us. We fell in love with it through Vietnamese food and have continued loving it all throughout Southern Asia.
This was the perfect grilling recipe for me, because there was no messing it up. The chicken gets charred on the grill and then cooked in the oven. I am comfortable with cooking chicken in an oven---the grill not so much.
We loved this recipe. I adapted the types of chicken parts used to fit our family---three leg quarters and half a split chicken breast made everyone happy.
Serves 4 -6
Thai Chicken with Dipping Sauce
adapted a bit from Food and Wine
1/4 c cilantro, finely chopped
2 T Asian fish sauce (I like 3 Crabs brand these days)
1 1/2 t black pepper
4 chicken leg quarters or any combination of leg quarters and breasts, skinned (but bone in)
1/2 t tamarind concentrate dissolved in 1 t water
1/4 c Asian fish sauce
2 T lime juice
2 t sugar
1 T water
1 small chile, seeded and minced (optional)
1/2 c cilantro, chopped
In a small bowl, combine 1/4 c cilantro, 2 T fish sauce and black pepper (if you have a mini-food processor, you can use this instead). Coat the chicken with the cilantro fish sauce marinade and let stand at room temperature for 20 minutes.
While the chicken marinates, light a grill and preheat the oven to 400 degrees. Grill the chicken over moderately high heat, turning, until charred, 12 minutes or so. Transfer the chicken to a baking sheet and roast for 30 minutes or until cooked.
While the chicken cooks, mix together the tamarind concentrated dissolved in water, 1/4 c fish sauce, lime juice, sugar, water and chile (if using). Just before serving, stir the cilantro into the dipping sauce. Serve with the chicken and brown rice.
Monday, July 9, 2012
Red Cabbage Salad with Fennel and Orange
Yes, I have somewhat abandoned this blog. Sad I know. However, I've been pulled back, mostly by myself because I realized that I am not going to be able to remember where I've found some of these great recipes I've been making in the past 6 months and have loved. Thus, some pared down posts. I'll apologize now for the lack of pictures, however, there will be recipes again. Somehow, as my kids get older and more independent I am not being granted copious amounts of time to cook, take pictures, and blog. Or maybe I am granted that time, I am just spending it in other ways. :)
The pumpkin seeds are great to snack, consider making double and keeping some around just to eat. :)
Serves 4 - 6 as a side, easily
Red Cabbage Salad with Fennel, Orange, and Pepitas
adapted a bit from Food and Wine
1 c raw pumpkin seeds
1 T tamari or regular soy sauce
2 T olive oil
1/2 T lemon zest, grated
2 T lemon juice
2 nice, juicy oranges
3/4 lb red cabbage, halved, cored, and thinly sliced
1 fennel bulb, halved, cored, and thinly sliced (optional, however if you can find it, use it!!)
1/4 c cilantro, chopped
Spread the pumpkin seeds on a cookie sheets (half jelly roll pan--with sides) and bake in preheated 350 degrees oven for 7 minutes or until golden brown. Drizzle with tamari/soy sauce and bake for 3 more minutes, until the seeds area crisp. Set aside.
Working over a bowl, cut the peel off the orange, making sure to get all of the white pith. Gently slide the knife in between the sections of the orange to release the fruit (without the tough membranes). This gets messy so work over a bowl and save all that wonderful juice for the salad. Cut the released fruit into small, bite-sized pieces.
In a large bowl, toss together the orange pieces and juice, cabbage, fennel, if using, and the cilantro. In a small jar, vigorously shake together the olive oil, lemon zest, and lemon juice. Pour over the cabbage mixture and toss gently. Immediately before serving liberally sprinkle with the roasted pumpkin seeds. Season to taste with salt and pepper.
The pumpkin seeds are great to snack, consider making double and keeping some around just to eat. :)
Serves 4 - 6 as a side, easily
Red Cabbage Salad with Fennel, Orange, and Pepitas
adapted a bit from Food and Wine
1 c raw pumpkin seeds
1 T tamari or regular soy sauce
2 T olive oil
1/2 T lemon zest, grated
2 T lemon juice
2 nice, juicy oranges
3/4 lb red cabbage, halved, cored, and thinly sliced
1 fennel bulb, halved, cored, and thinly sliced (optional, however if you can find it, use it!!)
1/4 c cilantro, chopped
Spread the pumpkin seeds on a cookie sheets (half jelly roll pan--with sides) and bake in preheated 350 degrees oven for 7 minutes or until golden brown. Drizzle with tamari/soy sauce and bake for 3 more minutes, until the seeds area crisp. Set aside.
Working over a bowl, cut the peel off the orange, making sure to get all of the white pith. Gently slide the knife in between the sections of the orange to release the fruit (without the tough membranes). This gets messy so work over a bowl and save all that wonderful juice for the salad. Cut the released fruit into small, bite-sized pieces.
In a large bowl, toss together the orange pieces and juice, cabbage, fennel, if using, and the cilantro. In a small jar, vigorously shake together the olive oil, lemon zest, and lemon juice. Pour over the cabbage mixture and toss gently. Immediately before serving liberally sprinkle with the roasted pumpkin seeds. Season to taste with salt and pepper.
Saturday, January 21, 2012
So Much More than Beans and Rice
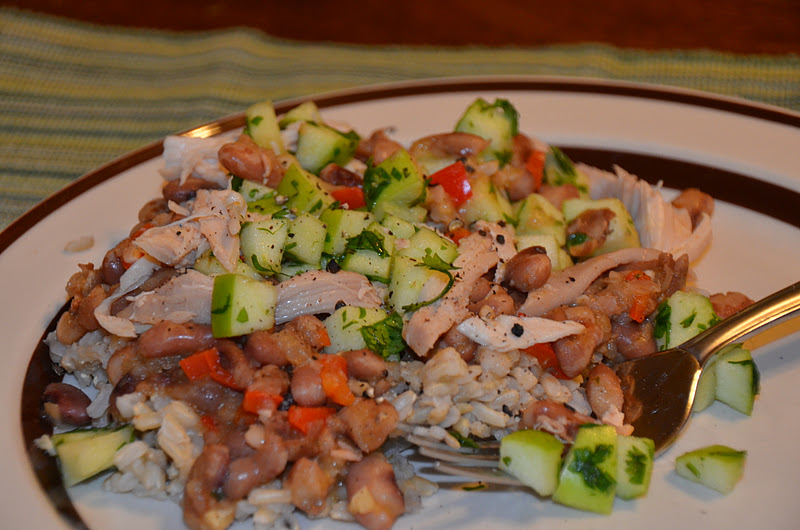
Those who have been reading this blog since is conception many moons ago, may remember, if you have a memory like an elephant, that M is not a bean fan. It often takes coercion, unless it is lentils which she loves.
Tonight, M ate only beans for supper.
Those who read my post two short posts ago may remember I said that my boys aren't eating my supper or liking my food. Today, J ate a serving of supper and asked for more. (Little I wouldn't touch, so at least someone is true to form).
I was less than excited about tonights' meal, part of our eat more healthy plan. Beans and Rice. Sigh.
This is so much more than beans and rice. It's what my family called Mexican haystacks (tacos on rice), but all together different. It's beans and rice go gourmet. It's absolutely yummy. I will make this again and next time, I'll be much more excited about making it. If you want to simplify this, use 1 - 2 cans of black beans in place of the dried beans. I prefer the dried beans because I better control the sodium content.
I changed up this recipe a bit. The original was in Bon Appetit's January 2012 issue.
This will serve 4 in these proportions.
So Much More than Beans and Rice
adapted from Bon Appetit
1 c dried anasazi or black beans
1 T bacon grease or olive oil (guess which I used)
1/2 onion, diced
1 lg clove garlic, minced
1 c Granny Smith apple, cored and chopped
1/4 c chopped cilantro
1/2 lime juiced
2 T olive oil
1/3 c (about 1/2 of...) red bell pepper
3 garlic cloves, minced
1 t chili powder
1 t ground coriander
1/2 - 1 t ground cumin
1 1/2 c chicken broth
3 c cooked brown rice
1 c cooked, shredded chicken (using a rotisserie chicken is easiest. Don't use frozen cooked chicken)
Cook anasazi or black beans. Quick soak method (because I always forget to soak them overnight): put the beans in a pot and cover with 3 inches of water. Bring to a boil, cover, and remove from heat. Let stand for an hour. Drain. In same pot, heat bacon grease or olive oil. Saute the onion until it is soft and slightly browned. Add the garlic and cook until fragrant. Return the beans to the pan. Cover with water (1 - 2 inches above the top of the beans/onions). Cook for 40 minutes for adzuki beans, or until tender. (Black beans will take a bit longer).
In a small bowl, combine the apple, cilantro, and lime juice. Set aside.
Heat 2 T olive oil in a saute pan or skillet. Add the bell pepper and cook until tender, about 5 - 6 minutes. Add the garlic, chili powder, coriander, and cumin and saute 1 - 2 minutes, stirring constantly. Add beans and broth. Bring to a boil. Reduce heat just until the beans are simmering briskly (not past medium in my case). Stir occasionally, smashing some beans with the back of a wooden spoon to help thicken the sauce. Cook for 8 - 10 minutes.
To serve: put a pile of rice on a plate. Top with beans followed by chicken and then apple/cilantro salsa. Season as desired with salt and pepper.
Friday, January 13, 2012
Thai Curry Chicken Soup
In my search for "healthier" recipes, I looked for ones that are full of flavor, loaded with veggies, and are unique. As much as I love lentils and beans, I reach a saturation point after a while---two different lentil dishes plus their leftovers are about all I can handle. While this didn't have as much veggies as some, it still fit my healthier label.
We loved this soup. I greatly reduced the amount of spice in it so my kids would eat it and eat it M did! (I've pretty much given up with the boys eating much for supper....I think they eat enough during the day that by supper they're not super hungry...I remember M doing the same thing, then along came kinder and changed it. I've accepted the boys don't like anything I cook and M will eat almost anything because she is starving after school).
As is quickly becoming a trend, I want Asian flavored foods in the winter--something about fish sauce (of the Vietnamese nature), ginger, or star anise is comforting when it is cold. This soup didn't have any of these, but I did get to use a little more of my Thai red curry paste. The optional ingredients I didn't use, for obvious reasons if you know me (kids don't do spicy and I don't do corn). There is no set time for this to simmer. Like many soups, the leftovers are even better because the flavors had time to marry.
This should serve about 4 - 6.
Thai Curry Chicken Soup
adapted a bit from apartmentcooker on Food52.com
2 T olive oil
1/2 c onion, minced
1/2 c cilantro, roughly chopped
2 cloves garlic, minced
1 (14-oz) can coconut milk
6 c chicken stock (or a combo of chicken stock and water)
2 t (you can use up to 2 T) red curry paste
zest and juice of 1 lime
1 jalapeno, seeded and minced (optional)
1 T ginger, minced
2 scallions, thinly sliced
1-2 c mushrooms, thinly sliced
1/2 red bell pepper, thinly sliced
1 c corn kernels (optional)
1 1/2 c or so chicken, cooked and shredded
thinly sliced jalapenos
thinly sliced scallions
roughly chopped cilantro
lime wedges
avocado, thinly sliced (optional)
Heat 1 T olive oil in a dutch oven over medium heat. Add the onions and cook until softened. Add the garlic and cilantro and cook until fragrant, about a minute more. Add the coconut milk and chicken stock and bring to a simmer. Add the red curry paste and zest and juice of lime. Meanwhile, in a saute pan or skillet, heat the remaining T of olive oil over medium heat. Add the jalapeno, if using, ginger, scallions, mushrooms, red bell pepper, corn, and chicken and cook until heated, 4 - 5 minutes. Add to the broth. Simmer until the mixture has reached desired flavor. Season with salt.
To serve, ladle into bowls and garnish with jalapenos, scallions, cilantro, lime, and avocado as desired.
We loved this soup. I greatly reduced the amount of spice in it so my kids would eat it and eat it M did! (I've pretty much given up with the boys eating much for supper....I think they eat enough during the day that by supper they're not super hungry...I remember M doing the same thing, then along came kinder and changed it. I've accepted the boys don't like anything I cook and M will eat almost anything because she is starving after school).
As is quickly becoming a trend, I want Asian flavored foods in the winter--something about fish sauce (of the Vietnamese nature), ginger, or star anise is comforting when it is cold. This soup didn't have any of these, but I did get to use a little more of my Thai red curry paste. The optional ingredients I didn't use, for obvious reasons if you know me (kids don't do spicy and I don't do corn). There is no set time for this to simmer. Like many soups, the leftovers are even better because the flavors had time to marry.
This should serve about 4 - 6.
Thai Curry Chicken Soup
adapted a bit from apartmentcooker on Food52.com
2 T olive oil
1/2 c onion, minced
1/2 c cilantro, roughly chopped
2 cloves garlic, minced
1 (14-oz) can coconut milk
6 c chicken stock (or a combo of chicken stock and water)
2 t (you can use up to 2 T) red curry paste
zest and juice of 1 lime
1 jalapeno, seeded and minced (optional)
1 T ginger, minced
2 scallions, thinly sliced
1-2 c mushrooms, thinly sliced
1/2 red bell pepper, thinly sliced
1 c corn kernels (optional)
1 1/2 c or so chicken, cooked and shredded
thinly sliced jalapenos
thinly sliced scallions
roughly chopped cilantro
lime wedges
avocado, thinly sliced (optional)
Heat 1 T olive oil in a dutch oven over medium heat. Add the onions and cook until softened. Add the garlic and cilantro and cook until fragrant, about a minute more. Add the coconut milk and chicken stock and bring to a simmer. Add the red curry paste and zest and juice of lime. Meanwhile, in a saute pan or skillet, heat the remaining T of olive oil over medium heat. Add the jalapeno, if using, ginger, scallions, mushrooms, red bell pepper, corn, and chicken and cook until heated, 4 - 5 minutes. Add to the broth. Simmer until the mixture has reached desired flavor. Season with salt.
To serve, ladle into bowls and garnish with jalapenos, scallions, cilantro, lime, and avocado as desired.
Monday, September 26, 2011
Somewhat Thai Pork Pineapple Skewers
I am beginning to feel like a broken record. It goes like this: I found this great recipe in Melissa Clark's In the Kitchen with a Good Appetite. I am not sure exactly how many of her recipes I've posted, but I am starting to feel guilty. Just go buy the cookbook so I don't need to feel guilty. Ok? Ok. Let's say I am posting this recipe for myself, not you, so when I get my box of produce and plan my menu for the week, the recipes are here on the blog, the first place I check when menu planning.
Really, that dog of ours couldn't find a better cookbook for me for Christmas present last year (yep, the cookbook is from our dog). I hope she does as well this year.
It being summer and all, we've been getting our CSA box every other week. It just works out better for us to do it that way in July, August, and September. I can work through all the produce in a 2 week time easily, but in a week is a bit of a stretch. I need to supplement vegetable based meals with a little more meat. I found a pork loin in my freezer (I wonder how that got there.....), and then found the easiest, least apt to heat up the kitchen recipe I could find.

All but M loved this (but to be honest, she didn't like a single thing I cooked all week. Seriously). This was super easy and can be mostly made ahead of time and just cooked at the last minute. I served it with brown rice.
Somewhat Thai Pork Pineapple Skewers
adapted from Melissa Clark's In the Kitchen with a Good Appetite
1 c roasted, salted cashews
6 T cilantro
1/4 c olive oil
4 garlic cloves, chopped
2 T soy sauce
2 t brown sugar
juice of 1 lemon
1 1/2 lbs (approx) pork tenderloin, cut into 1" chunks (or you could use 1 1/2 lbs chicken)
2 c fresh pineapple, cut into 1" or so chunks
In a food processor, combine nuts, 2 T cilantro, oil, garlic, soy sauce, sugar, lemon juice and 2 T water. Blend until smooth. Season to taste with salt and pepper.
Season the pork chunks with salt and pepper. Smear half of the cashew sauce over the pork to coat thoroughly. Reserve remaining sauce as a serving/dipping sauce. Let the pork marinate at room temperature while heating the grill or broiler or you can let the pork marinate in the refrigerator for up to 12 hours. Alternately thread the pork and pineapple chunks onto metal skewers. Grill or broil (I grill to avoid heating up the house) the skewers until the pork is cooked through, about 12 minutes, turning the skewers once halfway through.
Serve with rice, sprinkling pork with remaining cilantro and serving the remaining cashew sauce on the side.
Really, that dog of ours couldn't find a better cookbook for me for Christmas present last year (yep, the cookbook is from our dog). I hope she does as well this year.
It being summer and all, we've been getting our CSA box every other week. It just works out better for us to do it that way in July, August, and September. I can work through all the produce in a 2 week time easily, but in a week is a bit of a stretch. I need to supplement vegetable based meals with a little more meat. I found a pork loin in my freezer (I wonder how that got there.....), and then found the easiest, least apt to heat up the kitchen recipe I could find.

All but M loved this (but to be honest, she didn't like a single thing I cooked all week. Seriously). This was super easy and can be mostly made ahead of time and just cooked at the last minute. I served it with brown rice.
Somewhat Thai Pork Pineapple Skewers
adapted from Melissa Clark's In the Kitchen with a Good Appetite
1 c roasted, salted cashews
6 T cilantro
1/4 c olive oil
4 garlic cloves, chopped
2 T soy sauce
2 t brown sugar
juice of 1 lemon
1 1/2 lbs (approx) pork tenderloin, cut into 1" chunks (or you could use 1 1/2 lbs chicken)
2 c fresh pineapple, cut into 1" or so chunks
In a food processor, combine nuts, 2 T cilantro, oil, garlic, soy sauce, sugar, lemon juice and 2 T water. Blend until smooth. Season to taste with salt and pepper.
Season the pork chunks with salt and pepper. Smear half of the cashew sauce over the pork to coat thoroughly. Reserve remaining sauce as a serving/dipping sauce. Let the pork marinate at room temperature while heating the grill or broiler or you can let the pork marinate in the refrigerator for up to 12 hours. Alternately thread the pork and pineapple chunks onto metal skewers. Grill or broil (I grill to avoid heating up the house) the skewers until the pork is cooked through, about 12 minutes, turning the skewers once halfway through.
Serve with rice, sprinkling pork with remaining cilantro and serving the remaining cashew sauce on the side.
Friday, April 8, 2011
Red Lentil Soup aka Curtis's Favorite Dal
It's just within the past year that I've really, really fallen in love with lentils. I try to rotate them into our menu once every two weeks or so--just like tofu stir fry. It's a nice meat alternative, very inexpensive, and very easy to make. Unlike most dried beans, lentils cook very quickly.
In my foray into lentils, I'm discovered the different kinds. French green lentils hold their shape better. Brown lentils are the traditional looking ones that turn kinda to mush when cooked to tenderness. Red lentils looks orange and also turn to mush. For this recipe you want the lentils that turn to mush, not the French lentils that hold their shape.
We loved this recipe (well, not the kids, but I'm don't always worry about them when it comes to lentils. It takes a couple of tries with a lentil recipe before they love one). I trimmed some cilantro from my herb garden to sprinkle on top.
This recipe serves 6.
Red Lentil Soup
from In the Kitchen with A Good Appetite by Melissa Clark
4 T olive oil
1 very large onion or 2 medium onions, chopped
4 garlic cloves, minced
2 T tomato paste
2 t cumin
1/2 t salt, plus more to taste
1/2 t pepper
pinch of chili powder or cayenne
2 qts chicken or vegetable broth
2 c water
2 c red lentils
2 large carrots or 4 small carrots, diced
juice of 1 lemon
1/3 c fresh cilantro, mint, or parsley, chopped
Heat the oil over high heat until hot in large soup pot. Add the onions and garlic. Saute until golden. Stir in the tomato paste, cumin, salt, pepper, and chili powder. Saute an additional 2 minutes. Add the broth, water, lentils, and carrots. Bring to a simmer, partially cover the pot, and cook for 30 minutes, or until lentils are soft. Taste and add more salt, if necessary (if you are using homemade chicken stock, you will need more salt). Puree half of the soup in a food processor or blender (be sure to leave the center of the lid off to allow the steam to escape). Reheat the soup if necessary, then stir in lemon and desired fresh herb. Serve the soup lightly drizzled with your best olive oil, if desired.
Thursday, March 3, 2011
Slow Cooker Ropa Vieja

As my children get older, our schedule gets fuller. We are still trying to keep the extras minimal--soccer in the fall, swimming in the spring/early summer. With spring here (yep, we live in Texas, spring comes early!), swim lessons have started in preparation for swim team in May. We generally get home from swim lessons around 5:20 and we eat at 6:00--no small task for me. Even if I had a 30 minute meal to make, having 30 minutes in that time frame which didn't involve care for the boys (they're the younger two), is a stretch.
Thus, I am becoming re-acquainted with my slow cooker again. We also have taken a CSA break this month to get the cabbage and turnips that have multiplied in my fridge cleaned out.
I am also in the process of cleaning last years quarter cow out of the freezer--mostly stew meat and round cutlets left. I am dreaming of a new quarter in April/May, so I need to get rid of the old one first. Stew meat lends itself perfectly to slow-cooker. Round cutlets lends itself perfectly to absolutely nothing, I've found. That doesn't prevent me from trying to use my cutlets.
The goal: To consume round cutlets in the most pleasing, make ahead way possible.
The plan: Slow Cooker Ropa Vieja
Analysis: Awesome slow cooker meal which doesn't taste like a bland slow-cooker meal. Round cutlets don't lend themselves well to ropa vieja either, but with the overall taste of the dish, the round cutlets can be ignored, if not entirely forgiven.
Slow Cooker Ropa Vieja
adapted slightly from Food and Wine
1 2-lb flank steak, halved lengthwise and cut crosswise into 4 pieces
28 oz diced tomatoes, with juice
2 medium (1 large) bell pepper, thinly sliced--a variety of colors is nice if possible
1 medium onion, diced
2 garlic cloves, thinly sliced
1/2 t oregano
1/2 t cumin
1 bay leaf
1/2 c green olives
2 T capers, drained
3 T cilantro, coarsely chopped
Season the flank steak with salt and pepper. Set aside. In the slow cooker, combine tomatoes and juice, pepper, onion, garlic, oregano, cumin, and bay leaf. Add the steak and cover. Cook on high for 5 hours or until the meat is very tender.
Transfer meat to a cutting board and let rest for 10 minutes (to seal the juices). While the meat rests, stir in the olives, capers, and cilantro. Use shred meat, using 2 forks is the easiest way. Return the meat to the sauce. Season as needed with salt and pepper. Serve over rice and sprinkle with additional cilantro, if desired.
Friday, December 10, 2010
Char Siu Pulled Pork Bahn Mi

As you know by now (if you've been reading for a couple months), I am fascinated by Asian food this winter. Bahn Mi is my new favorite sandwich (so inexpensive at one of our favorite Vietnamese restaurant---seriously, McDonald's priced but so much tastier!!). I stumbled across this recipe on the blogosphere and decided it would make the perfect for serving my family the evening they got to Texas for Thanksgiving (which is my excuse for no pictures--being busy with my family and the craziness of having to feed and house 11 people for 3 days).
This wasn't quite the bahn mi (which is just a Vietnamese sandwich---meat with a cabbage slaw served on french bread/baguette) I had in mind, but it was pretty good. The original recipe had links to make your own char siu sauce (Chinese BBQ sauce) and nuoc mam cham (fish sauce), but I opted to buy both of those ingredients. Char siu sauce can be found at Asian markets. The nuoc mam, I picked up at a Vietnamese restaurant a couple of hours before super. Nuoc Mam is perishable, the char siu sauce, not so much if it isn't opened. The owners of the Vietnamese restaurant looked at me as if I were crazy, but obliged me anyway.
The hardest part about the recipe is procuring the ingredients. Once that is done, the slow cooker does most of the work for you.
This recipe will serve 4 - 6 people.
Char Siu Pulled Pork Bahn Mi
from the Ravenous Couple
Pulled Pork
3 lb pork shoulder (bone in)
kosher salt
black pepper
1 lg yellow onion, peeled and cut into 1/4" rings
1 (8.5-oz) jar char siu sauce
Slaw
1/2 head green cabbage, thinly shredded
1/2 c red cabbage, thinly shredded
1/2 c cilantro, coarsely chopped
1/2 c mint, coarsely chopped
1/2 c fresh basil (thai basil is preferable), coarsely chopped
1/4 c nuoc mam cham
For the sandwiches:
baguettes
cilantro
additional nuoc mam cham
For the pulled pork: Put the sliced onions in slow cooler. Lightly rub pork with small amount of salt and pepper and put in slow cooker on top of onion bed. Brush on a generous layer of char siu sauce, turning pork to coat all sides evenly. Turn the slow cooker on low and leave on overnight (8 - 12 hours) or on high for 4 - 5 hours.
For the slaw: An hour before serving, combine cabbages, cilantro, mint, and basil and toss well. Season with nuoc mam cham to taste (we love nuoc mam cham so we used 1/4 cup). Stir and allow slow to marinate at least 30 minutes before serving (and up to a day before serving).
To assemble the sandwiches: Remove cooked pork from the crockpot. The pork should easily fall apart with gentle pressure. Put pork in a large bowl and pull apart with fork or tongs, discarding fat and bones. Add additional char siu sauce--1 T at a time until pulled pork is well coated (don't overdo it, you can always add more char siu sauce to the sandwiches).
Place pork in a baguette and top with slaw. Garnish with cilantro and drizzle extra nuoc mam cham over top if desired.
Monday, December 6, 2010
Pollo Enchiladas Rojos
For some reason, I think the name of this recipe sounds better in Spanish, so I've renamed it. :) Over the years, I've done lots of experimenting with chicken enchiladas. I started out with my mom's rich, wonderful enchiladas which were drenched in a sour cream sauce. I've tried plain chicken enchiladas, chicken enchiladas with green sauce, and chicken enchiladas with some chard mixed in. My experimenting with new recipes for chicken enchiladas is officially over. I love this recipe. It's not terribly difficult to make and it tastes fabulous!
I needed to make some significant modifications to this recipe, because according to M, this recipe would be TOO SPICY. (You would not believe what foods she complains about being too spicy--things that have no spice at all!) Thankfully, even with most of the spice taken out, it didn't taste bland and was full of flavor. Everyone really enjoyed this, even M. Curtis, bless his heart, told me this was his favorite chicken enchilada recipe I've made.
This recipe makes a lot of enchiladas--two shallow baking dishes worth. I split the chicken mixture and the sauce mixture in half. Half I used to I make one pan of enchiladas. The other half went in the freezer and made for a fabulously easy new baby meal for a friend.
Pollo Enchiladas Rojos
adapted from Food and Wine
Optional spicy addition to sauce
3 each of guajillo chiles and ancho chiles, stemmed and seeded
3 c hot water
Sauce
1 medium onion, quartered
3 lg garlic cloves
1 T ground cumin
1 1/2 t ground coriander
1/2 t ground oregano
2 T extra virgin olive oil
2 1/2 c tomato sauce (20 oz)
1 c water
Enchiladas
2 T extra virgin olive oil
1 lg onion, thinly sliced (3 c)
1/2 c chicken broth or water
4 c shredded cooked chicken (or turkey if you are looking to get rid of T'giving leftovers)
1 t cumin
1/4 c cilantro
3 c Monterey Jack cheese
salt and pepper, to taste
16 flour, whole wheat, or corn tortillas (not burrito-sized)
For the chiles: Cover the chiles in hot water in a microwave safe bowl. Microwave on high for 2 minutes, until softened. Transfer chiles to a food processor or blender. Add 1 c of soaking liquid. Proceed with rest of recipe.
For the sauce: Place onion, garlic, cumin, coriander, and oregano in a food processor. Add 1 c of water (if you didn't use the chiles above). Puree until smooth. Heat olive oil over medium-low heat in a large saucepan. Add the tomato sauce and water. Add the pureed onion mixture (if using the chiles as well, press the onion mixture through a sieve before adding to the tomato sauce to remove any stray chile seeds and skins). Cook the sauce, stirring occasionally until the sauce is slightly reduced, about 15 minutes. Set aside.
Meanwhile, heat 2 T olive oil in a large skillet. Add the onion and cook over medium heat, stirring occasionally, until lightly browned, about 10 minutes. Add the broth and cook, until the onions are very soft and the broth has evaporated, about 10 more minutes. Transfer to a bowl and let cool. Stir in cumin, cilantro, and 1 1/2 c of the cheese. Season with salt and pepper to taste.
To assemble the tortillas, Spoon 3/4 c of sauce into the bottom of two shallow baking dishes (I used 2 9x13" pans. Neither pan was full, but held 8 tortillas comfortably). Soften the tortillas (I heat 4 flour tortillas at a time in the microwave for 15 seconds). Spoon 1/4 c filling into each tortilla, roll up, and place in pan. Repeat. Spoon remaining sauce over top (dividing between 2 pans) and sprinkle with remaining cheese. Cover pan with foil (or oven safe lid).
Bake in a preheated 350 degrees oven for 25 minutes. Remove foil/lid and bake an additional 20 minutes. Serve hot, topped with sour cream or salsa, if desired.
I needed to make some significant modifications to this recipe, because according to M, this recipe would be TOO SPICY. (You would not believe what foods she complains about being too spicy--things that have no spice at all!) Thankfully, even with most of the spice taken out, it didn't taste bland and was full of flavor. Everyone really enjoyed this, even M. Curtis, bless his heart, told me this was his favorite chicken enchilada recipe I've made.
This recipe makes a lot of enchiladas--two shallow baking dishes worth. I split the chicken mixture and the sauce mixture in half. Half I used to I make one pan of enchiladas. The other half went in the freezer and made for a fabulously easy new baby meal for a friend.
Pollo Enchiladas Rojos
adapted from Food and Wine
Optional spicy addition to sauce
3 each of guajillo chiles and ancho chiles, stemmed and seeded
3 c hot water
Sauce
1 medium onion, quartered
3 lg garlic cloves
1 T ground cumin
1 1/2 t ground coriander
1/2 t ground oregano
2 T extra virgin olive oil
2 1/2 c tomato sauce (20 oz)
1 c water
Enchiladas
2 T extra virgin olive oil
1 lg onion, thinly sliced (3 c)
1/2 c chicken broth or water
4 c shredded cooked chicken (or turkey if you are looking to get rid of T'giving leftovers)
1 t cumin
1/4 c cilantro
3 c Monterey Jack cheese
salt and pepper, to taste
16 flour, whole wheat, or corn tortillas (not burrito-sized)
For the chiles: Cover the chiles in hot water in a microwave safe bowl. Microwave on high for 2 minutes, until softened. Transfer chiles to a food processor or blender. Add 1 c of soaking liquid. Proceed with rest of recipe.
For the sauce: Place onion, garlic, cumin, coriander, and oregano in a food processor. Add 1 c of water (if you didn't use the chiles above). Puree until smooth. Heat olive oil over medium-low heat in a large saucepan. Add the tomato sauce and water. Add the pureed onion mixture (if using the chiles as well, press the onion mixture through a sieve before adding to the tomato sauce to remove any stray chile seeds and skins). Cook the sauce, stirring occasionally until the sauce is slightly reduced, about 15 minutes. Set aside.
Meanwhile, heat 2 T olive oil in a large skillet. Add the onion and cook over medium heat, stirring occasionally, until lightly browned, about 10 minutes. Add the broth and cook, until the onions are very soft and the broth has evaporated, about 10 more minutes. Transfer to a bowl and let cool. Stir in cumin, cilantro, and 1 1/2 c of the cheese. Season with salt and pepper to taste.
To assemble the tortillas, Spoon 3/4 c of sauce into the bottom of two shallow baking dishes (I used 2 9x13" pans. Neither pan was full, but held 8 tortillas comfortably). Soften the tortillas (I heat 4 flour tortillas at a time in the microwave for 15 seconds). Spoon 1/4 c filling into each tortilla, roll up, and place in pan. Repeat. Spoon remaining sauce over top (dividing between 2 pans) and sprinkle with remaining cheese. Cover pan with foil (or oven safe lid).
Bake in a preheated 350 degrees oven for 25 minutes. Remove foil/lid and bake an additional 20 minutes. Serve hot, topped with sour cream or salsa, if desired.
Monday, August 2, 2010
Chicken with Salsa Verde
We are currently in pepper overload, as I suspect many who subscribe to our CSA are. I am working on staying on top of the peppers, but find myself falling behind on the red anaheim peppers. The larger, milder yellow/green peppers aren't a problem, nor are the hot, hot small red/green peppers (they usually don't even darken my doorstep, instead heading straight for the trade box at our pick up spot). I was excited to find this Rick Bayless recipe which was easy to adapt to be spiceless for the kids to spicy for the grown ups.
As good as this was the first day, I discovered the best way to eat these as leftovers. I shredded the leftover chicken and put a small amount inside a hot tortilla. I poured some of the salsa verde over top and then microwaved briefly. Instant green chicken enchiladas! The leftovers were as fabulous as the first meal.
To make this spiceless, just omit the 2 fresh chiles and proceed with the recipe at browning the chicken breasts.
This serves 4.
Chicken with Salsa Verde
from Everyday Mexican by Rick Bayless via Serious Eats.
2 fresh poblano or anaheim chiles
2 T vegetable oil
4 boneless, skinless chicken breasts (1 1/2 lbs total)
salt
1 lg white onion, sliced 1/4" thick
1 1/2 lbs tomatillos, husked and rinsed
1 c cilantro, roughly chopped
1 c chicken broth
2 - 3 T Mexican crema, heavy cream, or creme fraiche
Roast the chiles (click here for a link to chile roasting if you need some advice). Remove blackened skin from chiles, discard seeds and membranes, and cut into 1/4" strips. Set aside. Pour the oil into a large skillet over medium high heat. Season chicken with salt and place in skillet. Cook until well browned on both sides, about 2 minutes per side. Set aside. Cook the onions until just beginning to soften, about 4 minutes, adding more oil to the skillet if necessary. Meanwhile, blend the tomatillos and cilantro in a food processor or blender (it may take a couple of batches). Pour tomatillo/cilantro mixture into skillet with not yet tender onions. Cook until sauce is very thick, about 8 minutes. Add the broth, chile strips, and crema. Stir well and season with 1 t salt. Return chicken breasts and any accumulated juices to skillet. Reduce the heat and simmer until the chicken is completely cooked, about 8 - 10 minutes. Serve.
As good as this was the first day, I discovered the best way to eat these as leftovers. I shredded the leftover chicken and put a small amount inside a hot tortilla. I poured some of the salsa verde over top and then microwaved briefly. Instant green chicken enchiladas! The leftovers were as fabulous as the first meal.
To make this spiceless, just omit the 2 fresh chiles and proceed with the recipe at browning the chicken breasts.
This serves 4.
Chicken with Salsa Verde
from Everyday Mexican by Rick Bayless via Serious Eats.
2 fresh poblano or anaheim chiles
2 T vegetable oil
4 boneless, skinless chicken breasts (1 1/2 lbs total)
salt
1 lg white onion, sliced 1/4" thick
1 1/2 lbs tomatillos, husked and rinsed
1 c cilantro, roughly chopped
1 c chicken broth
2 - 3 T Mexican crema, heavy cream, or creme fraiche
Roast the chiles (click here for a link to chile roasting if you need some advice). Remove blackened skin from chiles, discard seeds and membranes, and cut into 1/4" strips. Set aside. Pour the oil into a large skillet over medium high heat. Season chicken with salt and place in skillet. Cook until well browned on both sides, about 2 minutes per side. Set aside. Cook the onions until just beginning to soften, about 4 minutes, adding more oil to the skillet if necessary. Meanwhile, blend the tomatillos and cilantro in a food processor or blender (it may take a couple of batches). Pour tomatillo/cilantro mixture into skillet with not yet tender onions. Cook until sauce is very thick, about 8 minutes. Add the broth, chile strips, and crema. Stir well and season with 1 t salt. Return chicken breasts and any accumulated juices to skillet. Reduce the heat and simmer until the chicken is completely cooked, about 8 - 10 minutes. Serve.
Wednesday, May 5, 2010
Thai-style Stir Fry
This is another recipe from the Mayo Clinic Williams-Sonoma Cookbook. I adapted this one slightly to include some of the carrots accumulating in my refrigerator. The carrots added a nice color and flavor.
M and J weren't too fond of this, I am not quite sure why because it had two of M's favorite things in it; snow peas and tofu. Little I, Curtis, and myself rather enjoyed it though. Despite the big 2 not liking this, I think I will make it again--this seems to be recipe they should like, so maybe next time, they will.
This serves 4 - 6 people. I made some udon noodles to serve this with and it was wonderful!
Thai-style Stir Fry
from The Mayo Clinic Williams-Sonoma Cookbook
1/4 c peanut butter
2 T soy sauce
2 T lime juice
1/3 c water
2 t sesame oil
2 T cornstarch
1/2 t red pepper flakes (optional)
12 oz mushrooms, sliced
2 -4 carrots (depending on size of carrot), sliced
1/2 lb snow peas, ends trimmed and strings pulled
8 oz can sliced water chestnuts, rinsed and drained
1 lb firm tofu, pressed and cut into 1/2" cubes
1/2 c cilantro, chopped
In a small bowl, whisk together peanut butter, soy sauce and lime juice until smooth. Add water, sesame oil, cornstarch and red pepper flakes, if using, and whisk until blended. Set aside.
Heat a couple of T of olive oil in a large frying pan over medium-high heat. Add the mushrooms and carrots and stir-fry until mushrooms are lightly browned, about 4 minutes. Add the snow peas and continue to stir-fry until peas are crisp-tender, about 2 - 3 more minutes. Add the peanut butter sauce, water chestnuts and tofu and stir-fry until sauce thickens slightly and tofu is heated through.
Serve on top of rice or noodles. Sprinkle with cilantro.
M and J weren't too fond of this, I am not quite sure why because it had two of M's favorite things in it; snow peas and tofu. Little I, Curtis, and myself rather enjoyed it though. Despite the big 2 not liking this, I think I will make it again--this seems to be recipe they should like, so maybe next time, they will.
This serves 4 - 6 people. I made some udon noodles to serve this with and it was wonderful!
Thai-style Stir Fry
from The Mayo Clinic Williams-Sonoma Cookbook
1/4 c peanut butter
2 T soy sauce
2 T lime juice
1/3 c water
2 t sesame oil
2 T cornstarch
1/2 t red pepper flakes (optional)
12 oz mushrooms, sliced
2 -4 carrots (depending on size of carrot), sliced
1/2 lb snow peas, ends trimmed and strings pulled
8 oz can sliced water chestnuts, rinsed and drained
1 lb firm tofu, pressed and cut into 1/2" cubes
1/2 c cilantro, chopped
In a small bowl, whisk together peanut butter, soy sauce and lime juice until smooth. Add water, sesame oil, cornstarch and red pepper flakes, if using, and whisk until blended. Set aside.
Heat a couple of T of olive oil in a large frying pan over medium-high heat. Add the mushrooms and carrots and stir-fry until mushrooms are lightly browned, about 4 minutes. Add the snow peas and continue to stir-fry until peas are crisp-tender, about 2 - 3 more minutes. Add the peanut butter sauce, water chestnuts and tofu and stir-fry until sauce thickens slightly and tofu is heated through.
Serve on top of rice or noodles. Sprinkle with cilantro.
Monday, April 19, 2010
Cilantro Carrot Salad

After 3 (or is it now 4?) months of carrots, M and Curtis are finally tiring of them. It is a sad day, mostly because we are still getting large bunches of small-medium sized carrots. What to do with them? It's been too warm to think much about roasts (beef or a roasted chicken) lately. I haven't been feeling the motivation to make a carrot cake or carrot muffins. I needed a carrot outlet--one that would use two weeks worth of carrots without flinching.
Which once again took me to my trusty Moosewood---the best cookbook of all things vegetarian and vegetables. Moosewood didn't let me down. I found not one, but two carrot salads, neither of which used orange jello. I attempted the Cilantro Carrot Salad.
Curtis and I loved it. I really didn't expect the kids to eat it--it will need to show up at the table about 50 more times or so before M will try it. That's ok. I am fine with not sharing. I didn't peel the carrots for this salad--in fact, I don't think I've peeled any carrots this winter---their outer flesh isn't hard, but nice and tender. Why waste perfectly good carrot? This version is a 1/2 recipe--it will serve 2 - 3 adults as a side salad.
Cilantro Carrot Salad
adapted slightly from Moosewood Restaurant New Classics
1 1/4 c peeled (optional) and grated carrots
1 1/2 T extra virgin olive oil
1 small garlic clove, minced
1 t fresh cilantro, minced
1 t fresh parsley, minced
1/2 t salt
1 T fresh lemon juice
a small pinch of cayenne
Place carrots in a small serving bowl and set aside. With a whisk or in a small glass jar, combine the remaining ingredients. Pour the dressing over the carrots and toss well. Serve at room temperature or lightly chilled.
Wednesday, March 10, 2010
Meatball Banh Mi

(Sorry, another dark picture....)
I've read about banh mi sandwiches for quite some time. Then a couple of months ago, I saw a recipe for them in Bon Appetit that looked like something I could possibly handle. I've yet to have an authentic banh mi, so I don't know how well this recipe rates. We loved it though. Curtis and I had sandwiches as pictured above. The kids just had meatball sandwiches (alas, without the veggies).
Cooking teaches me things about culture and geography. For example, it's only been since really getting interested in food that I've learned that there are French and Vietnamese connections. If I am remembering correctly, the French occupied ("colonized") Vietnam for about 50 years. Thus, in Vietnamese cooking, there are some French influences, for example, meatball and carrot/daikon vinegar sandwiches on baguettes.
These were tasty sandwiches. The original recipe says it will serve 4, but that is if each person eats a 10" long sandwich. I don't eat 10" long sandwiches (nor does anyone in my family). I think this will serve more like 6, possible 8 if the the sandwiches are made very small. I will definitely make these again!
Meatball Banh Mi
adapted from Bon Appetit
Pickled Vegetables
2 c carrots, coarsely grated
2 c peeled daikon, coursely grated
1/4 c rice vinegar
1/4 c sugar
1 t coarse kosher salt
Hot Chili Mayo
2/3 c mayo
2 green onions, finely chopped
1 T hot chili sauce (like sriracha)
Meatballs
1 lb ground beef or pork
1/4 c finely chopped fresh basil (I omitted this because I didn't have)
4 garlic cloves, minced
3 green onions, finely chopped
1 T fish sauce (such as nam pla or nuoc nam)
1 T hot chili sauce (optional)
1 T sugar
2 t cornstarch
1 t black pepper
1 t coarse kosher salt
Sandwiches
1 T sesame oil
2 long baguettes, cut into sandwiches of desired size
thinly sliced jalapeno chiles (optional)
16 fresh cilantro sprigs
Pickled Vegetables: Toss all ingredients together in a medium bowl. Let stand at room temperature for 1 hour, tossing occasionally.
Hot Chili Mayo: Stir all ingredients in a small bowl. Season with salt. Cover and chill until you are ready to use.
Meatballs: Gently mix all ingredients in a large bowl. Roll meat mixture in to 1" meatballs (about a scant tablespoon per meatball). Place on baking sheet, plate or desired surface until ready to cook. Heat 1 T sesame oil in large skillet over medium-high heat. Add half of the meatballs (or however many will fit without crowding). Saute meatballs until brown and cooked through, turning meatballs often and lowering heat if browning too quickly, about 15 minutes. Transfer to cooling rack lined with paper towels to drain, then put on baking sheet and place in preheated 300 degrees oven to keep warm. Repeat with remaining meatballs.
To assemble sandwiches: Cut each baguette piece in half horizontally. Pull out enough bread half to leave 1/2" thick shell. Spread hot mayo over each shell. Arrange jalapenos and then cilantro in bottom halves. Fill each with enough meatballs to fill. Drain pickled vegetables and place a generous spoonful or two on top of meatballs. Press on baguette tops and serve.
Subscribe to:
Posts (Atom)