Many months seem to have desserts that belong to them. June, July, and August are for ice cream, popsicles, and cold desserts. September is for apple desserts. October is for all things pumpkin and cupcaky. December is for cookies. January is for sneaking in bread pudding once I'm done trying to eat healthy. February is for cherry and strawberry desserts. Spring and summer months (depending on where you live) also get berry crisps, strawberry tarts, and other light, not so filling desserts.
November gets pies. Every imaginable kind of pie. Some pumpkin desserts make the cut, but mostly, it's pies. November is not for cupcakes. Sorry, November.
Yet, here it is, November 10 and I am posting a cupcake recipe. I still have pureed butternut squash in my fridge and there was that school fall festival yesterday, complete with a cake walk. I made cupcakes. They were fabulous. So November, you can have these cupcakes too, especially if they sneak in at the beginning of the month, before the pies take over.
We were thankful these were mostly donated to the school cake walk. Otherwise, Curtis and I would have eaten way.too.many. The icing was incredible--salted caramel. One cupcake was all we each got and it was just enough to leave me thinking about exactly how good those cupcakes were and how lucky two cake walk winners were.
If you want, you can make the salted caramel sauce days in advance. Just refrigerate and then reheat before to room temperature (so it's pourable) before using. If you don't feel like messing with making caramel, you can also use store bought salted caramel sauce. Just be sure to buy the good stuff (with real ingredients, not the cheapest on the shelf).
A single recipe makes 15 cupcakes. Go ahead and just double the recipe. Share the love.
Pumpkin Cupcakes with Salted Caramel Icing
adapted from twopeasandtheirpod.com
Cupcakes:
3/4 c (12 T) unsalted butter, at room temperature
1 2/3 c flour
2 t baking powder
1 t salt
1/2 t cinnamon
1/4 t freshly grated nutmeg
1 c cooked pumpkin (butternut squash) puree or canned pumpkin
1 c brown sugar
1/2 c sugar
1 t vanilla
2 large eggs
Salted Caramel Sauce:
1 c sugar
6 T butter, at room temperature, cut into pieces
1/2 c heavy cream
1/2 T fleur de sel or other fancy, coarse sea salt (it's worth it to buy this in bulk folks. Totally worth it)
Frosting:
3/4 c (12 T) butter at room temperature
2 c powdered sugar
1/2 c salted caramel sauce (from above)
For the cupcakes: In a saucepan, melt the butter over medium (or medium-low, up to you, I like medium) and cook, swirling occasionally, until the butter turns golden brown. Watch carefully to prevent from burning. The butter should smell nice and nutty. Remove from heat and allow to cool. Meanwhile, in a small to medium bowl, whisk together the flour, baking powder, salt, cinnamon, and nutmeg. In a larger bowl, stir together the pumpkin, sugar, eggs, vanilla extract, and browned butter. Add the flour mixture and whisk until just combined. Line muffin cups with paper liners. Fill each cup 3/4 full. Bake in a preheated 325 degrees oven 20 -25 minutes. Transfer to a wire rack after they have cooled a bit and allow to cool completely before icing.
For the salted caramel sauce: While the cupcakes bake, make the caramel sauce. Heat the sugar in a small saucepan over medium to medium-high heat. Stir in the sugar as it begins to melt and stir frequently until the sugar is melted. Once the sugar has melted, no longer stir. Swirl the pan if you need to stir the sugar. Continue cooking the sugar until it reaches a deep amber color (a lighter amber color will give you a milder flavor), being careful not to scorch it. If you are unsure, use a candy/fry thermometer and cook until the sugar reaches 350 degrees. Carefully add the butter and stir (caramel will bubble up vigorously when things like butter or cream are added). Stir until the butter is melted. Remove from heat and stir in the cream. Sir in the fleur de sel. Melted sugar is extremely hot. Let it cool in the pan for 10 minutes and then you can pour into a jar or other storage container.
For the frosting: Beat the butter until light in color and fluffy. Add the powdered sugar and continue to beat until the sugar is incorporated. Add 1/2 c of the salted caramel sauce and beat to combine. Increase the mixer speed to medium-high (depending on your mixture) and beat until airy and fluffy.
Frost the cooled cupcakes. For embellishment you can drizzle extra caramel sauce on top or top with a square pretzel (my favorite!).
Showing posts with label Winter Squash. Show all posts
Showing posts with label Winter Squash. Show all posts
Sunday, November 10, 2013

Monday, October 1, 2012
Favorite Pumpkin Whoopie Pies
By the time this posts, it will be October. October is fall at it's fullest, I think. It's the month of Halloween, the first frosts in Northern vicinities, anticipating cool fronts in all vicinities and winter squash. The name of this recipe is a bit inaccurate--in fact, there is no pumpkin in these whoopie pies. How exciting does butternut squash or kabocha squash whoopie pies sound though? There is no warm, cozy feeling emitted with either of those titles. So although, no pumpkins were harmed in the cooking of this recipe, I am leaving the title as is.
Last year when I made my old pumpkin whoopie pie recipe, I was a bit disappointed. It could be better, I felt, much better. This year, after I had cooked down four smallish butternut squash I searched for a new recipe.
I love this recipe. It has twice as much squash as my old recipe and fewer spices. That's a good thing. The flavor is better because of it.
This will make 2 dozen or so appropriately sized whoopie pies. I know, that's not enough. Just go ahead and double this recipe when you make it. They freeze fabulously--just thaw a bit before eating.
Favorite Pumpkin Whoopie Pies
adapted from browneyedbaker.com and Martha Stewart (maybe)
Cakes
3 c flour
2 T cinnamon
1 t baking powder
1 t baking soda
1 t salt
1 t ground ginger
a dash of freshly grated nutmeg (or 1/2 t ground nutmeg)
1 c sugar
1 c dark brown sugar
1 c canola oil
3 c chilled butternut squash, kabocha squash, or pumpkin puree (canned pumpkin)
2 eggs
1 t vanilla
Icing
8 oz cream cheese, at room temperature
1/2 c butter, at room temperature
3 c powdered sugar
dash of freshly grated nutmeg
1 t vanilla
In a medium bowl, whisk together flour, cinnamon, baking powder, baking soda, salt, ginger, and nutmeg. In a separate large bowl, beat with an electric mixer the sugars and the oil, until well combined. Add the pumpkin and continue to beat until to combine thoroughly. Add the eggs and vanilla and beat some more. Gradually add the flour mixture and beat gently until combined. Using a small ice cream scoop, drop rounded heaping tablespoons of dough onto baking sheets. Bake in a preheated 350 degrees oven for 12 or so minutes until a toothpick inserted in the centers come out clean. Remove from oven and let cool completely on the racks.
Meanwhile, make the icing. Beat together the cream cheese and butter until smooth. Add the powdered sugar and continue to beat until the icing is lump free. Stir in the nutmeg and vanilla to combine.
To assemble the whoopie pies, pair the cooled cakes together, looking for cakes that are similar in size. Top on flat side of the cake with icing. Top with the other cookie, flat side down against the icing.
Last year when I made my old pumpkin whoopie pie recipe, I was a bit disappointed. It could be better, I felt, much better. This year, after I had cooked down four smallish butternut squash I searched for a new recipe.
I love this recipe. It has twice as much squash as my old recipe and fewer spices. That's a good thing. The flavor is better because of it.
This will make 2 dozen or so appropriately sized whoopie pies. I know, that's not enough. Just go ahead and double this recipe when you make it. They freeze fabulously--just thaw a bit before eating.
Favorite Pumpkin Whoopie Pies
adapted from browneyedbaker.com and Martha Stewart (maybe)
Cakes
3 c flour
2 T cinnamon
1 t baking powder
1 t baking soda
1 t salt
1 t ground ginger
a dash of freshly grated nutmeg (or 1/2 t ground nutmeg)
1 c sugar
1 c dark brown sugar
1 c canola oil
3 c chilled butternut squash, kabocha squash, or pumpkin puree (canned pumpkin)
2 eggs
1 t vanilla
Icing
8 oz cream cheese, at room temperature
1/2 c butter, at room temperature
3 c powdered sugar
dash of freshly grated nutmeg
1 t vanilla
In a medium bowl, whisk together flour, cinnamon, baking powder, baking soda, salt, ginger, and nutmeg. In a separate large bowl, beat with an electric mixer the sugars and the oil, until well combined. Add the pumpkin and continue to beat until to combine thoroughly. Add the eggs and vanilla and beat some more. Gradually add the flour mixture and beat gently until combined. Using a small ice cream scoop, drop rounded heaping tablespoons of dough onto baking sheets. Bake in a preheated 350 degrees oven for 12 or so minutes until a toothpick inserted in the centers come out clean. Remove from oven and let cool completely on the racks.
Meanwhile, make the icing. Beat together the cream cheese and butter until smooth. Add the powdered sugar and continue to beat until the icing is lump free. Stir in the nutmeg and vanilla to combine.
To assemble the whoopie pies, pair the cooled cakes together, looking for cakes that are similar in size. Top on flat side of the cake with icing. Top with the other cookie, flat side down against the icing.
Tuesday, April 19, 2011
Bagna Cauda Salad

Raw beets? Raw turnips? Raw radishes? In a salad with anchovies? I wasn't sold but the picture looked so pretty I decided to try it anyway, mostly because I had so many turnips in my fridge.
Turns out, Curtis and I both love it. I've made this twice now. I've rotated some different winter veggies in to the dish as they show up in my CSA box (and then crisper). If you have it on hand, you can also use 1/4 small butternut squash (seed and peel it--the send end is preferable) and 8 trimmed brussels sprouts. Thinly slice the squash and pull all the leaves off the brussels sprouts.
This recipe calls for a lot of thin slicing. If you are not adept with a knife to cut the vegetables paper thin, use a mandoline. Just watch your knuckles---slicing your thumb knuckle on a mandoline because your kids have lost the protective guide. I'm not talking from experience or anything. :) Almost all your prep time is spent cutting and slicing the vegetables. The rest goes quite quickly.
Just a note on the beets. If you don't care if your turnips and cabbage turn pinkish, you can stir in the beets as enthusiastically as you desire. However, if you want your whites white, stir a little dressing into the beets before you add them to the salad. Toss the salad very gently just to incorporate the beets.
Bagna Cauda Salad
adapted from Amanda Hesser's recipe on Food52.com
2 small carrots, trimmed (peeled if store bought, not necessary if just picked)
2 radishes, trimmed
2 small turnips (or 4 very small turnips), trimmed and peeled
2 small beets (or 4 very small beets), trimmed and peeled
2 - 3 leaves of cabbage, sliced thinly
1/4 c parsley, chopped
4 anchovy fillets
2 small (1 medium) garlic clove
salt
2 T lemon juice
5 T good extra virgin olive oil
Prep the veggies: The radishes, turnips, and beets should be sliced as thinly as possible using a mandoline or your wicked knife skills. These veggies should be translucent. Put the radishes and turnips in a small to medium sized serving bowl. Set the beets aside in a small mixing bowl. Cut the carrots into 3" long matchsticks (each matchstick about 1/8" thick or so). Add the carrots, cabbage and parsley to the radishes and turnips in the serving bowl. Mix with your hands to combine vegetables.
The dressing: You have several options. If you have a good mortar and pestle, that is sufficient. I don't. You could also use a mini food processor or blender. I don't have those either. Using a knife (or one of the other methods which involves the equipment I don't have), finely mince the anchovies and garlic. Combine to make with the salt to make a paste. Place in a small glass jar, add the lemon juice and olive oil, and shake vigorously. Season with salt and adjust the amount of lemon juice and oil as needed.
To create salad: Pour half of the dressing over the vegetables (not the beets yet) and blend with your hands, separating the vegetables as necessary. Mix very well. Taste and add more dressing if you would like. Once seasonings are how you like, very, very gently mix in the beets. Let rest for 15 minutes or so before serving.
Friday, November 5, 2010
Thai Red Curry Squash Soup
I love pureed soups. They are one of my favorite things about cold weather. I make a batch of a pureed soup, have it for supper and then enjoy it for lunches for several days afterwards. My husband, unfortunately, doesn't see it that way. Pureed soups are appetizers for him.
We don't do appetizers in our house. If I make something, it's supper, not an appetizer. However, with this soup, Curtis got lucky. I knew this soup would be spicy, so I knew I couldn't give it to the kids for supper. Sigh. So, I made this and I made a main dish as well. All were happy. I enjoyed my pureed soup, Curtis enjoyed his appetizer and main course, and the kids enjoyed the main course.
An ingredient note: Red curry paste comes in a large quantity. I have a container of it stashed in the back of my fridge. The stuff is SPICY!! Most recipes call for 1 T of it at a time. If you buy it, find a container that you can reseal and store in the back of your fridge until you make this or another red curry recipe again.
This serves 6 people easily.
Thai Red Curry Squash Soup
adapted slightly from Food and Wine
2 T butter
1/2 lg onion, thinly sliced
2 T thinly sliced fresh ginger (or 2 t ginger spice)
1 T Thai red curry paste (see ingredient note above)
1 1/2 lbs orange winter squash, kabocha, kuri or buttercup is preferred, but butternut will do, peeled, seeded, and cut into 2" chunks
2 1/2 c water
1 (13.5-oz) can unsweetened coconut milk
1/2 t lime zest (or 1 keifer lime leaf)
1/2 stalk of lemongrass (to get half, cut in half vertically), smashed and cut into 2" lengths (don't use long green ends, use the lighter colored bottom 1/4 - 1/3")
1 T sugar
1 T fresh lime juice
salt, to taste
In a large, heavy pot, melt the butter. Add the onion and sliced ginger, if using, and cook over moderate heat, stirring occasionally, until the onion is softened, about 7 minutes. Add the curry paste and ginger powder (if using) and cook, stirring constantly, until fragrant, about 2 minutes. Add the squash and water and bring to a boil. Cover partially and simmer until squash is soft, about 25 minutes. Add the coconut milk, lime zest, and lemongrass, cover partially, and simmer an additional 30 minutes. Discard the lemongrass (and lime leaf, if using). Working in batches, puree the soup in a food processor or blender (or just use an immersion blender in the pot). Return to the pot and stir in the lime juice and sugar. Season as desired with salt.
Serve hot.
We don't do appetizers in our house. If I make something, it's supper, not an appetizer. However, with this soup, Curtis got lucky. I knew this soup would be spicy, so I knew I couldn't give it to the kids for supper. Sigh. So, I made this and I made a main dish as well. All were happy. I enjoyed my pureed soup, Curtis enjoyed his appetizer and main course, and the kids enjoyed the main course.
An ingredient note: Red curry paste comes in a large quantity. I have a container of it stashed in the back of my fridge. The stuff is SPICY!! Most recipes call for 1 T of it at a time. If you buy it, find a container that you can reseal and store in the back of your fridge until you make this or another red curry recipe again.
This serves 6 people easily.
Thai Red Curry Squash Soup
adapted slightly from Food and Wine
2 T butter
1/2 lg onion, thinly sliced
2 T thinly sliced fresh ginger (or 2 t ginger spice)
1 T Thai red curry paste (see ingredient note above)
1 1/2 lbs orange winter squash, kabocha, kuri or buttercup is preferred, but butternut will do, peeled, seeded, and cut into 2" chunks
2 1/2 c water
1 (13.5-oz) can unsweetened coconut milk
1/2 t lime zest (or 1 keifer lime leaf)
1/2 stalk of lemongrass (to get half, cut in half vertically), smashed and cut into 2" lengths (don't use long green ends, use the lighter colored bottom 1/4 - 1/3")
1 T sugar
1 T fresh lime juice
salt, to taste
In a large, heavy pot, melt the butter. Add the onion and sliced ginger, if using, and cook over moderate heat, stirring occasionally, until the onion is softened, about 7 minutes. Add the curry paste and ginger powder (if using) and cook, stirring constantly, until fragrant, about 2 minutes. Add the squash and water and bring to a boil. Cover partially and simmer until squash is soft, about 25 minutes. Add the coconut milk, lime zest, and lemongrass, cover partially, and simmer an additional 30 minutes. Discard the lemongrass (and lime leaf, if using). Working in batches, puree the soup in a food processor or blender (or just use an immersion blender in the pot). Return to the pot and stir in the lime juice and sugar. Season as desired with salt.
Serve hot.
Saturday, November 21, 2009
Thanksgiving Bundt Cake

Here is another option if you are not a pie fan (I am not a huge pie fan, so I know there must be more like me out there) but still want a Thanksgiving type dessert. This baby is loaded--pumpkin, apples, cranberries, pecans, ginger, cinnamon, and nutmeg--everything that tastes like Thanksgiving but the turkey. Needless to say, this cake didn't last long at our house, between sharing it with preschool teachers, extended family, and eating it for breakfasts and snacks. It maybe made it twenty-four hours. I will make this again, and maybe even at a time other Thanksgiving.
I used frozen winter squash (either kabocha or butternut, not sure which) for this. Because the
liquid in the squash increases with thawing, I ran the squash through a fine sieve to get the excess liquid out. I was expecting to need to increase the cooking time as well, but didn't need to. I've renamed the cake from it's original name (All-in-One Holiday Bundt Cake) because Thanksgiving Cake just seems to sum it up better to me and is less words.
Thanksgiving Cake
from Baking: From My Home to Yours by Dorie Greenspan
2 c flour
2 t baking powder
1/2 t baking soda
2 t ground cinnamon
1/4 t freshly grated nutmeg
pinch of salt
1 1/2 t grated fresh ginger (1 t ground ginger)
10 T butter, at room temperature
1 c sugar
1/2 c packed brown sugar
2 large eggs, at room temperature
1 t vanilla
1 1/4 c pumpkin puree
1 lg apple, peeled, cored and finely diced
1 c cranberries, coarsely chopped
1 c pecans, coarsely chopped
Icing
6 T confectioners' sugar
2 T maple syrup
Stir together flour, baking powder, baking soda, cinnamon, nutmeg, salt, and ground (if you are using--not the grated ginger). Set aside. In a separate bowl, beat the butter and sugars together on medium speed (using an electric mixer) until they are light and fluffy. Add the eggs one at a time, and beat for 1 minute after each addition. Beat in the vanilla. Reduce the mixer speed to low and add the pumpkin, apple, and grated ginger (if you are using). The mixture will look curdled. With the mixer still on low speed, add the dry ingredients, mixing only until they are incorporated. Stir in the cranberries and pecans with a rubber spatula. Scrape the batter into a buttered and floured 9 - 10" Bundt pan. Smooth the top with a rubber scraper. Bake in a preheated 350 degrees oven on the center rack for 60 - 70 minutes (mine only took 60 minutes) or until a tester inserted into the center of the cake comes out clean. Cool in pan for 10 minutes, then unmold and cool on rack.
To make icing, sift 6 T of confectioner's sugar into a small bowl. Stir in maple syrup. Drizzle icing over cooled cake with a spoon. Allow icing to set a few minutes before serving.

Friday, November 20, 2009
Another reason to make your own "pumpkin" for pies
I saw this article on NPR's website. I am betting canned pumpkin prices are going to spike. This is just another good reason to make your own "pumpkin" (any orange winter squash like kabocha, butternut, etc) for pies and desserts.
Tuesday, November 17, 2009
Butternut Squash Bisque Reprise
Last year, I thought I had perfected my butternut squash bisque. Upon making that recipe this year, I was slightly disappointed and I think I may have spoken too soon. There are a few changes I would make to my bisque recipe so I am republishing it--with my suggested changes and in recipe (instead of narrative) format. My changes, use between 1 - 1 1/2 t minced fresh ginger, reduce the cream to 1/2 c (as a starting point, add more if you want a creamier, richer soup, or stop there if you think it's creamy enough).
Curtis and I both enjoyed this. M ate it after I told her it Tyranasaurus Rex soup (because it was the color of T-Rex's on M's new favorite PBS show, Dinosaur Train). I'll need to remember that trick for future meals. Maybe she'll eat the food if I don't tell her what's in it. :) This well make 4 moderately sized servings.
Butternut Squash Bisque (Take 2)
1/2 large onion, chopped
1 - 1 1/2 t fresh ginger, minced
1 1/2 lbs butternut squash (or other orange winter squash), peeled and chopped
2 carrots, chopped
2 1/4 c chicken stock
1 t orange zest (optional)
1/4 c chopped parsley
dash of nutmeg
1/2 t salt
freshly ground black pepper
1/2 - 1 c heavy cream
Saute onion and garlic in a soup pot for 5 minutes in a little olive oil. Add squash and carrots and saute for 3 more minutes. Ad the chicken stock and orange zest and bring to a boil. Lower heat, cover, and simmer vegetables for 30 minutes, or until squash and carrots are tender. Add parsley, nutmeg, salt, and pepper. (You can do through this point ahead of time). Puree the soup in batches in a food processor or blender until mixture is smooth and creamy. Be sure to take the cap in the center of the lid off to allow the heat to escape without spewing soup everywhere. Return bisque to soup pot and add 1/2 c heavy cream. Stir in cream and taste. If you desire a richer, creamier soup, add remaining heavy cream. Heat until the bisque is hot. Garnish with croutons if you wish.
Curtis and I both enjoyed this. M ate it after I told her it Tyranasaurus Rex soup (because it was the color of T-Rex's on M's new favorite PBS show, Dinosaur Train). I'll need to remember that trick for future meals. Maybe she'll eat the food if I don't tell her what's in it. :) This well make 4 moderately sized servings.
Butternut Squash Bisque (Take 2)
1/2 large onion, chopped
1 - 1 1/2 t fresh ginger, minced
1 1/2 lbs butternut squash (or other orange winter squash), peeled and chopped
2 carrots, chopped
2 1/4 c chicken stock
1 t orange zest (optional)
1/4 c chopped parsley
dash of nutmeg
1/2 t salt
freshly ground black pepper
1/2 - 1 c heavy cream
Saute onion and garlic in a soup pot for 5 minutes in a little olive oil. Add squash and carrots and saute for 3 more minutes. Ad the chicken stock and orange zest and bring to a boil. Lower heat, cover, and simmer vegetables for 30 minutes, or until squash and carrots are tender. Add parsley, nutmeg, salt, and pepper. (You can do through this point ahead of time). Puree the soup in batches in a food processor or blender until mixture is smooth and creamy. Be sure to take the cap in the center of the lid off to allow the heat to escape without spewing soup everywhere. Return bisque to soup pot and add 1/2 c heavy cream. Stir in cream and taste. If you desire a richer, creamier soup, add remaining heavy cream. Heat until the bisque is hot. Garnish with croutons if you wish.
Monday, November 16, 2009
Risotta with Winter Squash and Collards
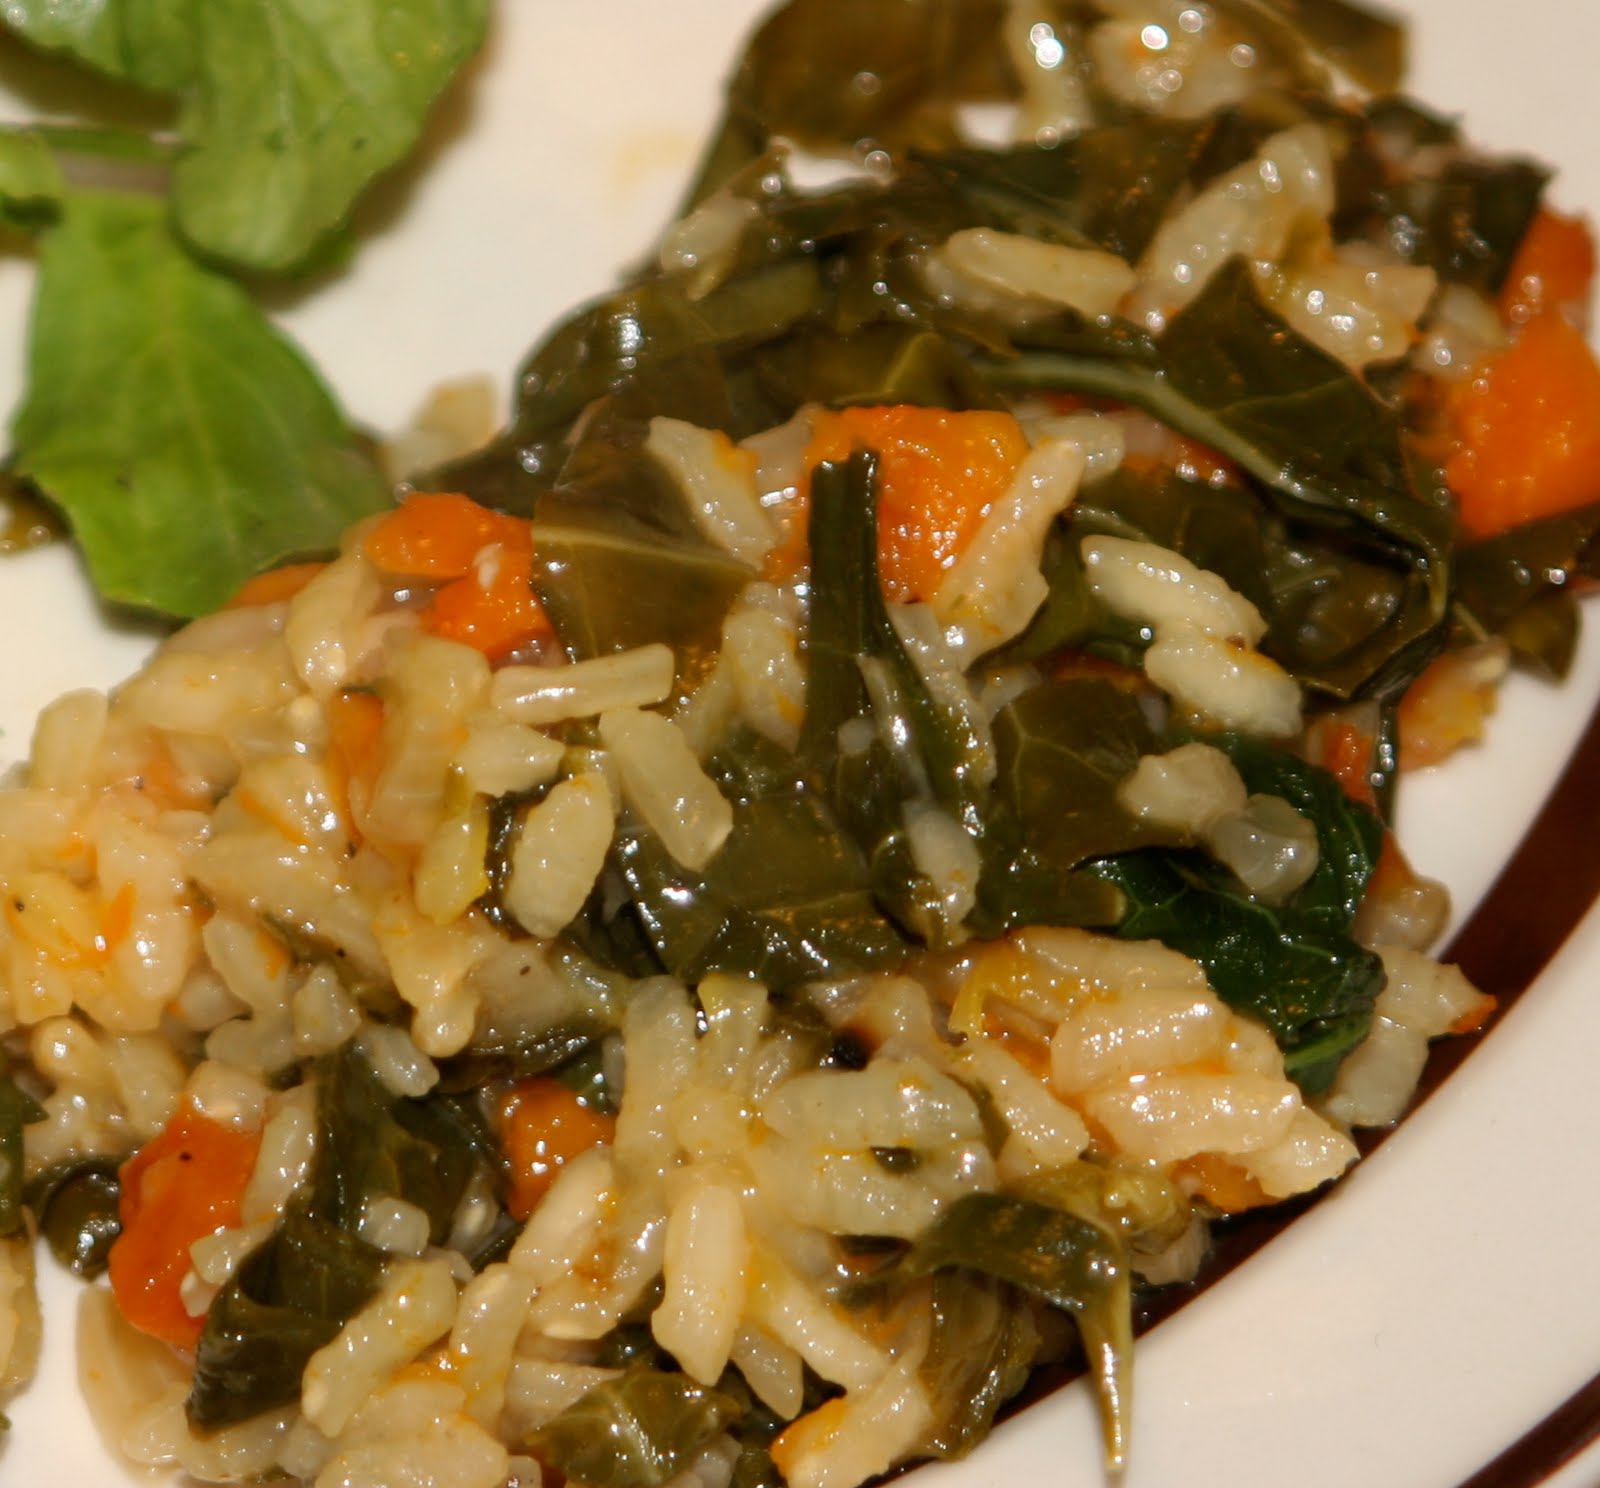
I made risotto for the first time last fall and discovered how much I loved it. Curtis and I really liked the dish--it was quite tasty and rather healthy too between the orange winter squash and the sturdy leafy greens. I will definitely make it again, even though the kids didn't eat it. These proportions make enough to serve 3 - 4 adults as a side dish. I roasted the squash and blanched the collards in the afternoon and then just assembled it at dinner time.
Risotto with Winter Squash and Greens
adapted from the New York Times
3/4 lb winter squash (of the orange variety--kabocha, butternut, etc), peeled, seeded and cut into 1/2" dice
1 T extra virgin olive oil
salt and freshly ground pepper, to taste
1/2 lb collard greens or kale, stemmed and washed
1 qt chicken stock
1 small onion, chopped
2 large garlic cloves, minced
3/4 c arborio rice
1/4 c dry white wine
pinch of saffron
1/4 c freshly grated Parmesan cheese
1 - 2 T flat leaf parsley, chopped (optional)
Toss the squash with 1/2 T olive oil, season with salt and pepper, and spread on a well oiled baking sheet. Roast in a preheated 425 degrees oven for 30 minutes, stirring every 10 minutes , or until the squash is tender and caramelized. Set aside. Meanwhile, blanch the collard greens in a large pot of boiling, salted water. Blanch for 4 minutes and then cool immediately by plunging into ice water and rinsing it with cold water. Drain and squeeze out any extra water. Chop coarsely. (You can do to this point ahead of time).
Bring the stock to a simmer in a saucepan. Heat the remaining oil in a medium saucepan and add the onion. Saute for three minutes or until the onion begins to soften. Add the garlic and a dash of salt. Cook for another minute and add the rice. Cook, stirring, until the grains of rice are separate. Stir in the wine and cook over medium heat, stirring constantly. When the wine has almost evaporated, add the collard greens, a third of the squash and the saffron. Stir in a ladleful or two of the simmering stock, enough to just cover the rice. Bring to a slow boil. Cook, stirring frequently until stock is just about absorbed, then add another ladleful of stock. Continue in this way, adding more stock when the rice is almost dry, until the rice is tender all the way through, about 20 - 25 minutes. Taste and adjust seasonings. Add the remaining roasted squash and another 1/2 c stock to the rice. Stir in Parmesan and parsley and remove from heat. Serve immediately.
Sunday, October 25, 2009
Pumpkin Torte
I have no idea why this is called a torte. It is not a torte, which is a type of cake that has lots of eggs and nuts, like almonds. While this contains some eggs, it has no nuts and is more like messy bar cookies than a cake. Possibly a better name may be Pumpkin Cheesecake Bars or Layered Pumpkin Bars or Goodness. Or the best name may be the Dessert that Won the Pumpkin Dessert Contest at our church's fall festival.
 These are wonderful. They are full of all sorts of goodness and eating just one is close to impossible. The texture is dreamy and it is even a great Thanksgiving dessert (or before meal snack). Eating these are a bit of risk though: it contains raw egg whites (sorry to all those people I've served this to and have never disclosed this information before). You also get to use gelatin in this. Look for plain gelatin (under the brand of Knox) in the baking aisle next to the flavored Jello type gelatin. (Pictured is the graham cracker and cream cheese layer of the dessert).
This recipe is from my maternal Grandmother who claims she never made these. I know she did because she gave me this recipe after she made these for us one Thanksgiving. Make sure you move quickly when you get to the gelatin step--mix it quickly into the cold water and then quickly stir it into the hot pumpkin. If you take too long, it will congeal and get rather funky and inedible.
Best Pumpkin Dessert Bars
Crust
2 c graham cracker crumbs
1/3 c sugar
1/2 c butter
2 eggs, beaten
3/4 c sugar
8 oz cream cheese, at room temperature
Filling
2 c pumpkin
1/2 c milk
3 egg yolks
1/4 t salt
1/2 c sugar
1 T cinnamon
1 T plain gelatin (Knox brand is what I've found)
1/4 c cold water
3 egg whites, beaten
1/4 c sugar
whipped topping
In a food processor (or by hand), mix together the graham cracker crumbs, 1/3 c sugar, and butter. Press into a greased 9 x 13" pan (I've found lining the bottom with tin foil makes it easier to dish--you can't lift it out of the pan, but it isn't as apt to stick to the bottom). Mix the eggs, sugar, and cream cheese in a blender until smooth and pour over the graham cracker crust mixture. Bake in a preheated 350 degrees oven for 20 minutes. Remove from oven and set aside.
Cook the pumpkin, milk, egg yolks, salt, 1/2 c sugar, and cinnamon in a medium saucepan until thickened. Remove from heat. Meanwhile, dissolve gelatin in cold water in a small bowl. Stir into hot pumpkin mixture. Set aside and let pumpkin cool to room temperature (if you continue before it is cool enough, the heat will deflate the egg whites).
Beat the egg whites and 1/4 c sugar until stiff peaks form. Fold into cooled pumpkin mixture. Pour pumpkin onto cream cheese/graham cracker crust. Allow to chill in refrigerator for several hours. Just before serving, top with whipped topping. Cut into bars and serve. Refrigerate any leftovers (but there probably won't be many).
 These are wonderful. They are full of all sorts of goodness and eating just one is close to impossible. The texture is dreamy and it is even a great Thanksgiving dessert (or before meal snack). Eating these are a bit of risk though: it contains raw egg whites (sorry to all those people I've served this to and have never disclosed this information before). You also get to use gelatin in this. Look for plain gelatin (under the brand of Knox) in the baking aisle next to the flavored Jello type gelatin. (Pictured is the graham cracker and cream cheese layer of the dessert).
This recipe is from my maternal Grandmother who claims she never made these. I know she did because she gave me this recipe after she made these for us one Thanksgiving. Make sure you move quickly when you get to the gelatin step--mix it quickly into the cold water and then quickly stir it into the hot pumpkin. If you take too long, it will congeal and get rather funky and inedible.
Best Pumpkin Dessert Bars
Crust
2 c graham cracker crumbs
1/3 c sugar
1/2 c butter
2 eggs, beaten
3/4 c sugar
8 oz cream cheese, at room temperature
Filling
2 c pumpkin
1/2 c milk
3 egg yolks
1/4 t salt
1/2 c sugar
1 T cinnamon
1 T plain gelatin (Knox brand is what I've found)
1/4 c cold water
3 egg whites, beaten
1/4 c sugar
whipped topping
In a food processor (or by hand), mix together the graham cracker crumbs, 1/3 c sugar, and butter. Press into a greased 9 x 13" pan (I've found lining the bottom with tin foil makes it easier to dish--you can't lift it out of the pan, but it isn't as apt to stick to the bottom). Mix the eggs, sugar, and cream cheese in a blender until smooth and pour over the graham cracker crust mixture. Bake in a preheated 350 degrees oven for 20 minutes. Remove from oven and set aside.
Cook the pumpkin, milk, egg yolks, salt, 1/2 c sugar, and cinnamon in a medium saucepan until thickened. Remove from heat. Meanwhile, dissolve gelatin in cold water in a small bowl. Stir into hot pumpkin mixture. Set aside and let pumpkin cool to room temperature (if you continue before it is cool enough, the heat will deflate the egg whites).
Beat the egg whites and 1/4 c sugar until stiff peaks form. Fold into cooled pumpkin mixture. Pour pumpkin onto cream cheese/graham cracker crust. Allow to chill in refrigerator for several hours. Just before serving, top with whipped topping. Cut into bars and serve. Refrigerate any leftovers (but there probably won't be many).
Tuesday, October 13, 2009
Pumpkin Whoopie Pies-Not My Favorite-Keep Scrolling
I finally got around to making the whoopie pies I've been talking about for a while. I decided on pumpkin instead of zucchini because is October and we were in a midst of a nice rainy day. I was also trying to decide on the appropriate recipe for our church's pumpkin dessert competition in a couple of Sundays and wanted to test this one out.
Whoopie Pies, for those of you not from Amish country or the Northeast, are basically two little cakes held together by icing in the middle. Typically, these are no larger in diameter than a baseball. I grew up eating chocolate whoopie pies, with uncooked egg white icing in the middle. I didn't like the feel of the egg white frosting in my mouth, so I switched to boiled white icing for my chocolate whoopie pies. However, for the pumpkin whoopie pies, I thought cream cheese frosting (with a hint of nutmeg) would work best.
Making these are a little time consuming because of multiple steps. They are totally worth it though. These tend to be wrapped individually in Saran Wrap. I generally freeze my chocolate whoopie pies and pull them out of the freezer to eat when I want some. They last a little longer this way and I don't need to worry about the moist cake spoiling quickly. I used some of my frozen winter squash for these. If you opt for canned pumpkin instead of frozen winter squash, you will need to shorten the baking time considerably. I baked mine for 20 minutes a pan. The original recipe (using canned pumpkin) thought you would only need to bake them for 10 minutes.

Do I need to tell you that everyone in my family loves these? J isn't sure whether to call them a cookie or a cupcake. Technically, they are considered a cookie. They didn't last long and I think I may need to make another batch before too long. I think this recipe makes between 2 and 3 dozen (we ate them too fast to be able to count them) finished whoopie pies.
Pumpkin Whoopies with Cream Cheese Icing
adapted from Mennonite Country-Style Recipes and Martha Stewart
Cakes
1/2 c vegetable oil
1 c sugar
2 c brown sugar
2 egg yolks
1 t vanilla
4 1/2 c flour
1 t baking powder
1 t baking soda
1 t salt
1 t ground cinnamon
1/2 t ground cloves
a dash of freshly grated nutmeg
1 1/2 c pureed pumpkin
Icing
8 oz cream cheese, at room temperature
1/2 c butter, at room temperature
3 c powdered sugar
a dash of freshly grated nutmeg
1 t vanilla
For the cakes: Beat together the well the oil and sugars. Add egg yolks and vanilla, beating until fluffy. In a separate bowl, mix together remaining ingredients, except pumpkin. Add dry ingredients alternately with the pumpkin to the egg mixture, ending with the dry. Drop by teaspoonfuls (to tablespoonfuls---from the cutlery drawer, not measuring spoons) onto greased baking sheets. Bake in preheated 350 degrees oven for 10 - 20 minutes (or until cakes are baked through--test with a toothpick or by eating). Remove from pan to rack. Let cool.
Meanwhile, make the icing. Beat together cream cheese and butter. Add the powdered sugar and beat until smooth. Add the nutmeg and vanilla and stir to combine.
To Assemble the Whoopie Pies: Once the cakes are cooled, pair them together, looking for two cakes that are similar in size. Top one flat side of the cake with icing. Top with other cookie, flat side down, against the icing.
Whoopie Pies, for those of you not from Amish country or the Northeast, are basically two little cakes held together by icing in the middle. Typically, these are no larger in diameter than a baseball. I grew up eating chocolate whoopie pies, with uncooked egg white icing in the middle. I didn't like the feel of the egg white frosting in my mouth, so I switched to boiled white icing for my chocolate whoopie pies. However, for the pumpkin whoopie pies, I thought cream cheese frosting (with a hint of nutmeg) would work best.
Making these are a little time consuming because of multiple steps. They are totally worth it though. These tend to be wrapped individually in Saran Wrap. I generally freeze my chocolate whoopie pies and pull them out of the freezer to eat when I want some. They last a little longer this way and I don't need to worry about the moist cake spoiling quickly. I used some of my frozen winter squash for these. If you opt for canned pumpkin instead of frozen winter squash, you will need to shorten the baking time considerably. I baked mine for 20 minutes a pan. The original recipe (using canned pumpkin) thought you would only need to bake them for 10 minutes.

Do I need to tell you that everyone in my family loves these? J isn't sure whether to call them a cookie or a cupcake. Technically, they are considered a cookie. They didn't last long and I think I may need to make another batch before too long. I think this recipe makes between 2 and 3 dozen (we ate them too fast to be able to count them) finished whoopie pies.
Pumpkin Whoopies with Cream Cheese Icing
adapted from Mennonite Country-Style Recipes and Martha Stewart
Cakes
1/2 c vegetable oil
1 c sugar
2 c brown sugar
2 egg yolks
1 t vanilla
4 1/2 c flour
1 t baking powder
1 t baking soda
1 t salt
1 t ground cinnamon
1/2 t ground cloves
a dash of freshly grated nutmeg
1 1/2 c pureed pumpkin
Icing
8 oz cream cheese, at room temperature
1/2 c butter, at room temperature
3 c powdered sugar
a dash of freshly grated nutmeg
1 t vanilla
For the cakes: Beat together the well the oil and sugars. Add egg yolks and vanilla, beating until fluffy. In a separate bowl, mix together remaining ingredients, except pumpkin. Add dry ingredients alternately with the pumpkin to the egg mixture, ending with the dry. Drop by teaspoonfuls (to tablespoonfuls---from the cutlery drawer, not measuring spoons) onto greased baking sheets. Bake in preheated 350 degrees oven for 10 - 20 minutes (or until cakes are baked through--test with a toothpick or by eating). Remove from pan to rack. Let cool.
Meanwhile, make the icing. Beat together cream cheese and butter. Add the powdered sugar and beat until smooth. Add the nutmeg and vanilla and stir to combine.
To Assemble the Whoopie Pies: Once the cakes are cooled, pair them together, looking for two cakes that are similar in size. Top one flat side of the cake with icing. Top with other cookie, flat side down, against the icing.
Saturday, September 26, 2009
Pumpkin Muffins
 Cookbooks are my weakness. I love them. I can devour them like a wonderful meal or a good book. I love the pictures. I love the descriptions of the recipes. I love reading ingredients lists and descriptions on how to create something wonderful to eat. Can you tell I've gotten a new cookbook?
After my brioche, I looked up this Dorie Greenspan person who provided me with the wonderful recipe for happiness. Turns out, she is rather accomplished--she wrote the Baking with Julia cookbook (from the PBS TV series with Julia Child). I also discovered this entire online cooking club that is cooking a different recipe from her baking cookbook, Baking: From My Home to Yours, every week. I was intrigued and decided that the rest of birthday money would be well spent on THAT cookbook.
I was excited to find this pumpkin muffin recipe in there. I used my kabocha squash I cooked down on Wednesday (I steamed instead of boiled it so it would be thick enough). We loved these muffins, I didn't even follow the recipe very well because my spice cabinet needs to be restocked with fall spices (allspice, whole nutmeg, ginger...) Curtis summed it up perfectly, "These taste like fall."
Pumpkin Muffins
from Baking: From my Home to Yours by Dorie Greenspan
2 c flour
2 t baking powder
1/4 t baking soda
1/4 t salt
3/4 t cinnamon
1/2 t ground ginger
1/8 t fresh grated nutmeg (I used a pinch of store bought ground nutmeg)
pinch of allspice
1/2 c unsalted butter, at room temperature
1/2 c sugar
1/4 c packed brown sugar
2 large eggs
1/2 t vanilla
3/4 c pumpkin (or other orange winter squash, pureed and unsweetened)
1/4 c buttermilk
1/2 c raisins
1/2 c pecans, chopped
a few unsalted, unroasted sunflower seeds
Stir together the flour, baking powder, baking soda, salt, and spices. Set aside. Using a mixer, beat the butter at medium speed until soft. Add the sugars and continue to beat until light and smooth. Add the eggs, one at a time, and beat for a minute after the eggs are incorporated. Beat in the vanilla. Lower the mixer speed and mix in the pumpkin and buttermilk. Slowly add the dry ingredients and beat only until they are just combined. With a spatula or wooden spoon, stir in the raisins and pecans. Divide the batter evenly between 12 greased muffin cups and sprinkle a few sunflower seeds over top each one.
Bake in a preheated 400 degrees oven for about 25 minutes or until a knife inserted in the center comes out clean. Cool for minutes in the pan and then remove from pan and cool on rack.
Thursday, September 24, 2009
Spaghetti Squash and Meatballs
 Spaghetti Squash still remains a slight mystery to me. I am intrigued by it. I love the idea of it....using a fork and scraping it into spaghetti like strands. It's just fun to do. However, I have yet to do it so that it is tender and not somewhat crunchy. Thankfully (or maybe not, maybe if I got more I'd have figured it out) I only get about one spaghetti squash a year. This year, I thought I would bury it under a large mound of sauce and meatballs.
I tried a different recipe this year for cooking the squash from about.com. It was cool, it had a step by step slide show and everything. However, I ended up with crunchy spaghetti squash again--despite baking it at 375 for an hour and then, in desperation, microwaving it for 12 minutes (covered with a bit of water in hopes of steaming it). The meatballs and sauce were absolutely awesome. M only ate the squash when we told her it was the only way she would get more meatballs. I think Curtis and I tolerated the squash and J loved the meatballs.

That said, I am not giving directions on how to prepare spaghetti squash because I consider it a failure. Maybe I am under the wrong impression and it never actually gets soft.
For yet another year, spaghetti squash remains a mystery.
Sauce with Meatballs
from Better Homes and Gardens New Cookbook
1 c onion, chopped
1/2 c green bell pepper, chopped
1/4 c celery, chopped
2 cloves garlic, minced
1 T olive oil
4 c tomatoes, chopped (or 1-28 oz canned diced tomatoes)
1 (6-oz) can tomato paste
1/3 c water
1 t salt
1/2 t black pepper
2 T fresh parsley, chopped
1 t dried oregano
1 t sugar
1 T fresh basil, chopped
Meatballs
1 egg
3/4 c bread crumbs
1/4 c onions, finely chopped
2 T green bell pepper, finely chopped
1/4 t dried oregano
1/4 t salt
1 lb ground beef
For the sauce: In a Dutch oven, saute the onion, bell pepper, celery and garlic in hot oil over medium heat until vegetables are tender. Stir in tomatoes, tomato paste, parsley, oregano, sugar, salt, and black pepper. Bring to a boil, reduce heat, and simmer, covered, for 30 minutes. Uncover and simmer for 10 - 15 minutes or to desired consistency.
Meanwhile, in a large bowl combine egg, bread crumbs, onions, green bell pepper, oregano, and salt. Add the ground beef and mix well. Shape into 16 - 24 meatballs (depending on desired size). Arrange meatballs on a cookie sheet. Bake in a preheated 350 degrees oven for 15 - 20 minutes or until done. Stir meatballs into sauce. Add fresh basil. Serve hot on top of pasta.
Friday, September 11, 2009
Kabocha Squash
 I am assuming these are Kabocha squash---it seems to be the closest thing I could find to it. I am using them accordingly.
Kabocha squash are often called a Japanese Pumpkin. They're smaller than pumpkins (at least the ones we're used to carving) and have a lot of green on them. However, they can be used in any recipe that calls for pumpkin or butternut squash (I love the interchangeability of vegetables!).
I went ahead and processed mine yesterday. I didn't have a good storage place for them and was worried about them going bad. Kabocha squash likes to be at a warm temperature (like the temperature of my house in the summer) for the first couple of weeks and then at a cooler temperature (between refrigerator temp and "room"--68 degrees--temperature). I don't have that in my house, so I couldn't completely ripen the Kabocha. One of my kabochas did
 go bad--rotted and grew mold around the stem, so I wanted to process them before I lost any of my others. I thought about cooking with them now, but the thought of lots of "winter" (called winter squash because hypothetically they'll keep part of the winter) squash in 90 degrees weather wasn't appetizing to me. Curtis and I are having fun dreaming up our root cellar we want to dig in our backyard to help the summer/fall vegetables like potatoes and squash last longer. Won't happen, but one can dream.
The easiest way to process (or preserve) any pumpkin-like squash, which includes pumpkins, butternut squash, and kabocha, is to cook, puree, and then freeze them. They are difficult to remove the shell/skin from. Here's what I did. I cut the squash and half and removed the seeds. (middle picture) The seeds can be difficult to scoop out with a spoon so I use a grapefruit knife (or spoon) or any utensil with a serrated edge, even the utensil I use to spread frosting on cakes. Then, I cut the halves in very large chunks. I steamed them for 30 minutes to an hour. Once the flesh was easily pierced with a fork, I removed them from the steamer (steamed squash--bottom picture) and cut the shell off of them. I put the c
 hunks in freezer containers and mashed them with my pastry blender (I use my utensils for many purposes, it prevents me from buying too many individualized tools!).
In the past, I also boiled the squash down in a little bit of water. That works too. However, frozen squash tends to get a little liquidy when thawed so I wanted to avoid putting any extra water in. Thus, I steamed them. We'll see how it works when I pull it out of the freezer to make butternut (kabocha) squash bisque or pumpkin (kabocha) chocolate cheesecake.
Saturday, November 1, 2008
Pumpkin Chocolate Cheesecake
 ..because Butternut Squash Chocolate Cheesecake doesn't sound as good! That's right, butternut squash made another appearance in a dessert.
Cheesecakes still remain a bit of a mystery to me, but I am getting it a little more figured out....reading up on them helps a lot. To make this cheesecake (which was supposed to be lighter than some...), I started by crushing 1 1/2 c of chocolate wafers (a little more than half of a 9 oz package) in my food processor. I transfered the crushed wafers to a bowl and combined 2 T brown sugar and 2 T melted butter and mixed well. I pressed the wafers into the bottom of a greased 9-inch springform pan and up the sides about an inch or so. I set this aside until later.
For the cheesecake, I pureed 3 c low-fat (not non-fat) cottage cheese in the food processor until it was smooth. I then added 12 oz cream cheese at room temperature, 1 1/4 c sugar and 1/4 c cornstarch and pureed until smooth. I poured this into a mixing bowl and added 2 beaten eggs, 2 t vanilla, and 1/4 t salt and then beat (with an electric mixer). I removed 1 1/2 c of the cream cheese batter and put it in a separate bowl for later. To what remained in the mixing bowl, I added 1 1/2 c of cooked, pureed butternut squash (or pumpkin), 1/4 c brown sugar, 3/4 t cinnamon, and 1/8 t ground nutmeg and mixed well.
In the bowl I had set aside, I stirred in 1 c melted chocolate chips and 1/3 c cocoa powder and mixed until it was thoroughly blended.
I poured the pumpkin mixture into the crust-lined pan and then spooned in the chocolate mixture on top (I tried to spread it out, but it ended up really close together). I swirled everything together gently with a knife, being sure not to mix the two together but to just leave streaks of chocolate through the pumpkin. I baked in a preheated 325 degrees oven for 60 - 65 minutes or until just the edge of the filling was set. I turned off the oven and left the cheesecake in the oven for 30 minutes with the oven door closed. Then I removed it from the oven and let it cool on rack at room temperature for 3 hours. Then, I finally covered and refrigerated over night before serving. All of this gentle cooling is supposed to prevent cracks on the top. I have yet to achieve a cheesecake without cracks, but maybe this helps.
Thursday, October 23, 2008
Butternut Squash Bisque with Bok Choy Salad and fresh whole wheat Bread

As I've mentioned earlier, I've been searching for the perfect butternut squash bisque for a couple of years now. I think with a few adjustments I may have finally found my soup.
I combined two recipes--one from Whole Foods and one from About.com: French Food. I sauted 1/2 a chopped large onion and 1/2 T minced fresh ginger (I will decrease that amount next time---use only 1/2 - 1 t instead) in a soup pot for 5 minutes. I added 1 1/2 lbs peeled and chopped butternut squash and 2 large chopped carrots and sauted the veggies for another 3 minutes. Then I added 2 1/4 c chicken stock and 1 T orange zest (again, I will decrease that amount next time to probably 1 t) and brought everything to boil. I lowered the heat, covered the pot, and simmered for about 30 minutes (or until all carrots and squash are tender). Then I added 1/4 c chopped fresh parsley, a dash of nutmeg and about 1/2 t sea salt. I transfered the soup to my food processor and pureed the mixture until it is smooth and creamy (a hint about pureeing hot ingredients in a blender or food processor---take the the cap in the center of the lid out---that will allow the heat to escape without the spewing soup everywhere. I am speaking from experience!). Put it back in the soup pot and add 1 c of heavy cream (Whole Foods recipe stops before adding the cream, but the cream makes the soup thicker). Heat until the bisque is hot. Garnish with croutons (we used Central Market croutons because I was too lazy tonight to make those too).
I also made a bok choy salad to go with it and a loaf of rustic whole wheat bread. I found the bread recipe online and as I made it, I realized it didn't make a lot of sense---the process was much different than typical bread recipes and the ingredients contained no oil or no sugar, which was also very unusual. I won't repeat the recipe so I am not going to post it.
The kids didn't like the bisque. They ate bread with homemade jelly on top. Curtis and I loved the bisque and we enjoyed a nice complete meal.
Tuesday, October 21, 2008
Sausage Stuffed Acorn Squash
 The title of the recipe is a little deceptive. I didn't use any acorn squash in this recipe. From my best guess I used a sweet dumpling squash and possibly a carnival or kobucha (or maybe a turban squash---but I don't think the turban part of it was pronounced enough for that) squash. The larger one was the one I pegged as the carnival squash. I am glad I stuck to two different squashes instead of using two little orange ones like my first inclination was. The larger squash had much more "meat" in it, the orange didn't really have any squash insides to eat. It was very stringy and didn't appear to be very edible. (or maybe I did something wrong...no...couldn't be that!)
How I got from the top picture to the bottom picture. First time I tried to cut the squash in half I could barely get my knife in. So I pierced the skin of the squash with the knife and microwaved it for 1 minute. After that it was easier to cut in half. I scooped the seeds and strings out of both halves and placed them cut side down on a cookie sheet. I baked them in a preheated 350 degree oven for 40 minutes until they were soft inside but not mushy.
While the squash baked, I made the filling. I sauted 1 lb of bulk (also called breakfast sausage---not links or patties but it cooks more like ground beef) in a skillet. I added one chopped onion and one chopped green apple (I actually added two because they weresmall) and sauted until they were just tender (again, not mushy). While those cooked, in a separate bowl I combined 2 c toasted bread cubes (I toasted 3 slices of the whole wheat bread I had on hand and then cut it into cubes), as many pecans as I had (the recipe calls for 3/4 c---I didn't have that much so I used the little bit I had), 3/4 c raisins, 1 - 2 T sour cream or plain yogurt, 1 t fresh chopped thyme (1/4 t dried), 1 t fresh chopped oregano (1/4 t dried), and 1/4 t dried basil.
At this point, I had to leave to go to soccer. The squash was done in the over so I left it to cool on the counter, I put the sausage/onions/apples in the refrigerator, and left the bread cube mixture (minus the sour cream) on the counter as well. When I got home, I preheated the oven to 375 and combined the bread cube mixture (plus the sour cream) and sausage mixture and then stuffed each squash half. I baked them for 20 minutes.
On the side we had kale gratin with our leftover kale and tomato slices. I was disappointed the small orange squash didn't taste better (or we were able to eat it at all), but the larger squash was incredible---tender and flavorful (it absorbed some of the stuffing's flavors). Everyone ate and enjoyed it. J didn't like the sausage or squash much (he picked out the bread, apples, and raisins), M didn't care for the squash but ate everything else. Curtis and I had no problem finishing our plates.

Monday, September 15, 2008
Butternut Squash Risotta
It was our first cool fall day today. I decided that there was nothing like butternut squash to celebrate fall. I needed to look for a recipe though that didn't have too many other "fall" type vegetables, since I didn't have any of those. I found a risotto recipe that looked good.
I had never made risotto before, so I was a little nervous. One of my friends told me last week she had tried a similar recipe which was really good, so I decided to go for it. The recipe was from the October issue of Bon Appetit (I can't find the recipe online...). A brief description...I peeled and removed the seeds from 1 lb of butternut squash. I sauteed that in some butter and sprinkled it with a little brown sugar, salt and pepper. I made the risotto using beef and chicken broth, fresh thyme, onions and bacon, gradually adding the broth and stirring a lot. The recipe called for shallots, which I substituted with a less amount of regular onions. It also called for sage, but again, I had none and I didn't really miss it. The risotto was not lacking in flavor. That's the really short version. If you want the whole recipe let me know...it's pretty long.
Overall the dish turned out great! Curtis, J, and I loved. M wouldn't touch it. However she did eat the butter beans that I seasoned with a chicken bouillon cube, as did Curtis and J. The risotto wasn't as much work as I was worried about. I stirred for a little, then went to check on the kids playing in the backyard. I did that repeatedly.
I had never made risotto before, so I was a little nervous. One of my friends told me last week she had tried a similar recipe which was really good, so I decided to go for it. The recipe was from the October issue of Bon Appetit (I can't find the recipe online...). A brief description...I peeled and removed the seeds from 1 lb of butternut squash. I sauteed that in some butter and sprinkled it with a little brown sugar, salt and pepper. I made the risotto using beef and chicken broth, fresh thyme, onions and bacon, gradually adding the broth and stirring a lot. The recipe called for shallots, which I substituted with a less amount of regular onions. It also called for sage, but again, I had none and I didn't really miss it. The risotto was not lacking in flavor. That's the really short version. If you want the whole recipe let me know...it's pretty long.
Overall the dish turned out great! Curtis, J, and I loved. M wouldn't touch it. However she did eat the butter beans that I seasoned with a chicken bouillon cube, as did Curtis and J. The risotto wasn't as much work as I was worried about. I stirred for a little, then went to check on the kids playing in the backyard. I did that repeatedly.
Subscribe to:
Posts (Atom)