I feel like this soup doesn't need much of a preface. It's a wonderful soup. Everyone in my family loved it. It's happiness in a bowl and not nearly as complicated as I remembered french onion soup years ago when I made it. This was simple to make, most of the prep time was slicing onions. Other than that, it was just a couple of hours of happiness as our house was permeated with the aroma of onions and beef. What a wonderful winter Sunday afternoon.
Love. this. soup. Need to make it again soon. Thanks Deb! (of Smitten Kitchen)
Serves 4 - 6. Maybe.
French Onion Soup
from Smitten Kitchen.com
1 1/2 lbs thinly sliced yellow onions
3 T unsalted butter
1 T olive oil
1 t salt
1/4 t sugar
3 T flour
1/2 c dry white wine (optional)
2 qts beef stock
Optional for serving:
crusty bread, toasted
Gruyere or swiss cheese, grated
Melt the butter and olive oil together in a Dutch oven over med-low heat (4 or 5 on my stove). Add the onions, toss them to coat them in butter/oil and cover the pot. Reduce the heat to low (2 on my stove) and let them slowly steep for 15 minutes. Ignore them. Don't peek. After 15 minutes, uncover the pot, raise the heat (to a 4 or so), and stir in the salt and sugar. Cook the onions, stirring frequently for 30 - 40 minutes, until the have turned a nice brown. This is the caramelization. Don't rush this step (don't rush any of these steps in fact). The slowness of the process is what gives the soup its wonderful flavor.
Once the onions are caramelized, stir in the flour and cook briefly. Stir in the wine if using. Add the stock, a little at a time, stirring between additions. Season to taste with salt and pepper. Bring to a simmer, partially cover, and simmer for 30 - 40 minutes. If you are using homemade beef stock, you may have foam float to the top. You can skim that off for a clearer broth.
Enjoy. For a fancy meal, put a piece of crusty toasted bread in the bottom of a bowl, sprinkle with gruyere and place under the broiler for a few minutes. I'm scared of my broiler, so I simply cut my crusty bread into croutons and sprinkle grated Gruyere over top and enjoy.
Showing posts with label Onions. Show all posts
Showing posts with label Onions. Show all posts
Tuesday, January 21, 2014

Monday, February 20, 2012
Caramelized Onion Spinach Salad

My first dish I am going to share from our weekend of blissful eating was the last one I made. It is also one that fits perfectly with the produce to be found in Central Texas this time of year---spinach. We didn't offer this dish to the kids, Curtis and I were content to eat it all by ourselves. It was a side salad for our pizza, but we both agreed it could easily be the main course. It was also one of Curtis's favorite Spinach salads. Ever. That says a lot because that man loves salads.
A few notes on the recipe: When you caramelize the onions, if possible, don't use a cast iron pan. I tried out my new stainless saute pan I got for Christmas from my parents (By the way, I love it, Mom and Dad!). It's easier to caramelize them and a bit faster. The poached egg is optional. I am still working on mastering the poached eggs, I overcooked mine for my tastes (but Curtis thought his was perfect). I also had to throw one out in the process too because the yolk. Here's a hint: You can't poach an egg if you accidentally break the yolk trying to get a small piece of shell out of the whites.
Enough said. My notes are going to be way longer than the recipe itself!
Caramelized Onion Spinach Salad
adapted from coffeefoodwritergirl on food52.com
4 - 8 oz spinach, torn into manageable sized salad pieces
1 large yellow, thinly sliced
2 T extra virgin olive oil
2 T balsamic vinegar
1/2 t sea salt
1/2 t ground pepper
one egg per person eating
Wash and dry spinach. Place in a salad bowl. Over medium heat in a stainless pan (not nonstick, not cast iron if possible), heat the olive oil. Add the onions and a 1/4 t salt and saute until they are beginning to caramelize (some will be light brown in color. They will be very soft and pliable). Add the balsamic vinegar and continue until caramelized completely. At this point the onions will be very dark brown, rather shrunken, and very soft.
While the onions are caramelizing, poach your eggs. I could give you a long detailed explanation on my attempts. Since I still have varying degrees of success, I thought instead I would provide you to a link with step by step instructions and beautiful pictures. Here's how to poach eggs, thanks to Deb of Smitten Kitchen. To serve your salad. Pour the hot onions and olive oil that remains in the pan over the spinach. Season with the remaining 1/4 t salt and 1/4 pepper. Toss completely. When the salad is tossed, gently lay the poached eggs over the salad. Eat immediately.
Tuesday, August 9, 2011
Slow Cooker Pork Tacos
Every time I make this, I scour this blog looking for where I posted this recipe. I never find it. I guess I've never posted this before.
This is quickly becoming my go to slow cooker recipe. I make it when I have a late afternoon airport run and am not at home to make supper. I make it when we have a play date/supper date and I don't want to spend time making supper. I make it when I need an after swim practice meal. Yep. It's one of those go to meals.
A 4lb bone-in, boston butt will serve 6 - 8. If possible, make the onions, the day before you want to eat.
Slow Cooker Pork Tacos
adapted from Merrill at Food52
3 - 4 t cumin seeds (2 t ground)
1 - 2 t coriander seeds (1 t ground)
3 - 6 t chili powder (I like New Mexican because it has good flavor but isn't spicy)
1 t dried oregano
4 lbs bone-in, bost butt, very large pieces of fat trimmed
salt
olive oil
1 medium onion chopped
1 poblano pepper, chopped (optional)
1 serrano or jalapeno, seeded and finely chopped (optional)
2 garlic cloves, minced
1 (15-oz) can diced tomatoes, with their juices
1 c water or chicken stock (fill the tomato can half up with water and use that)
2 large limes
corn tortillas
2 - 4 avocados, peeled and cut into thin slices
cilantro
sour cream
salsa
Pickled Onions
1 medium red onion, sliced thinly
1 T kosher salt
2 T sugar
1/4 medium beet, peeled
handful cilantro
a lot of cider vinegar
water
For the onions: Put the onion in a microwaveable container. Add the salt, sugar, beet, and cilantro. Cover everything with 1 part water to 2 parts vinegar (in other words, 1 c water to 2 c vinegar). Microwave 1 minute, stir, and microwave another minute. Cool, cover, and refrigerate overnight (or until serving).
For the pork: Put the cumin and coriander in a small pan and set over medium heat. Toast the spices a minute or two, shaking the pan occasionally, until they're fragrant. Grind the spices using a spice grinder and set aside. Meanwhile, heat 1 T oil in a skillet over medium-high heat. Season all sides of the pork with salt. Put in skillet and brown on all sides. Transfer to slow cooker. Drain a little of the fat off and saute the onions and peppers, if using, until soft. Add the garlic and saute another minute. Stir in the spice mixture and cook another minute. Transfer the onion and spices to the slow cooker. With the skillet still over the heat, pour the water into the skillet, stirring to loosen all the browned bits and spices on the bottom of the pan. Pour into the slow cooker along with the diced tomatoes and the juice of the a lime.
Cook in a slow cooker over low heat for 6 - 8 hours. Before serving, remove meat from pot. Discard bone and large chunks of fat. Shred the pork using two forks and adjust seasonings (salt and chili powder) as needed. Serve on top of a tortilla with an avocado slice, some pickled onions, a sprig of cilantro, and a dollop of sour cream or salsa if desired. Squeeze a lime wedge over top.
Tuesday, February 22, 2011
Moroccan Pickled Vegetables
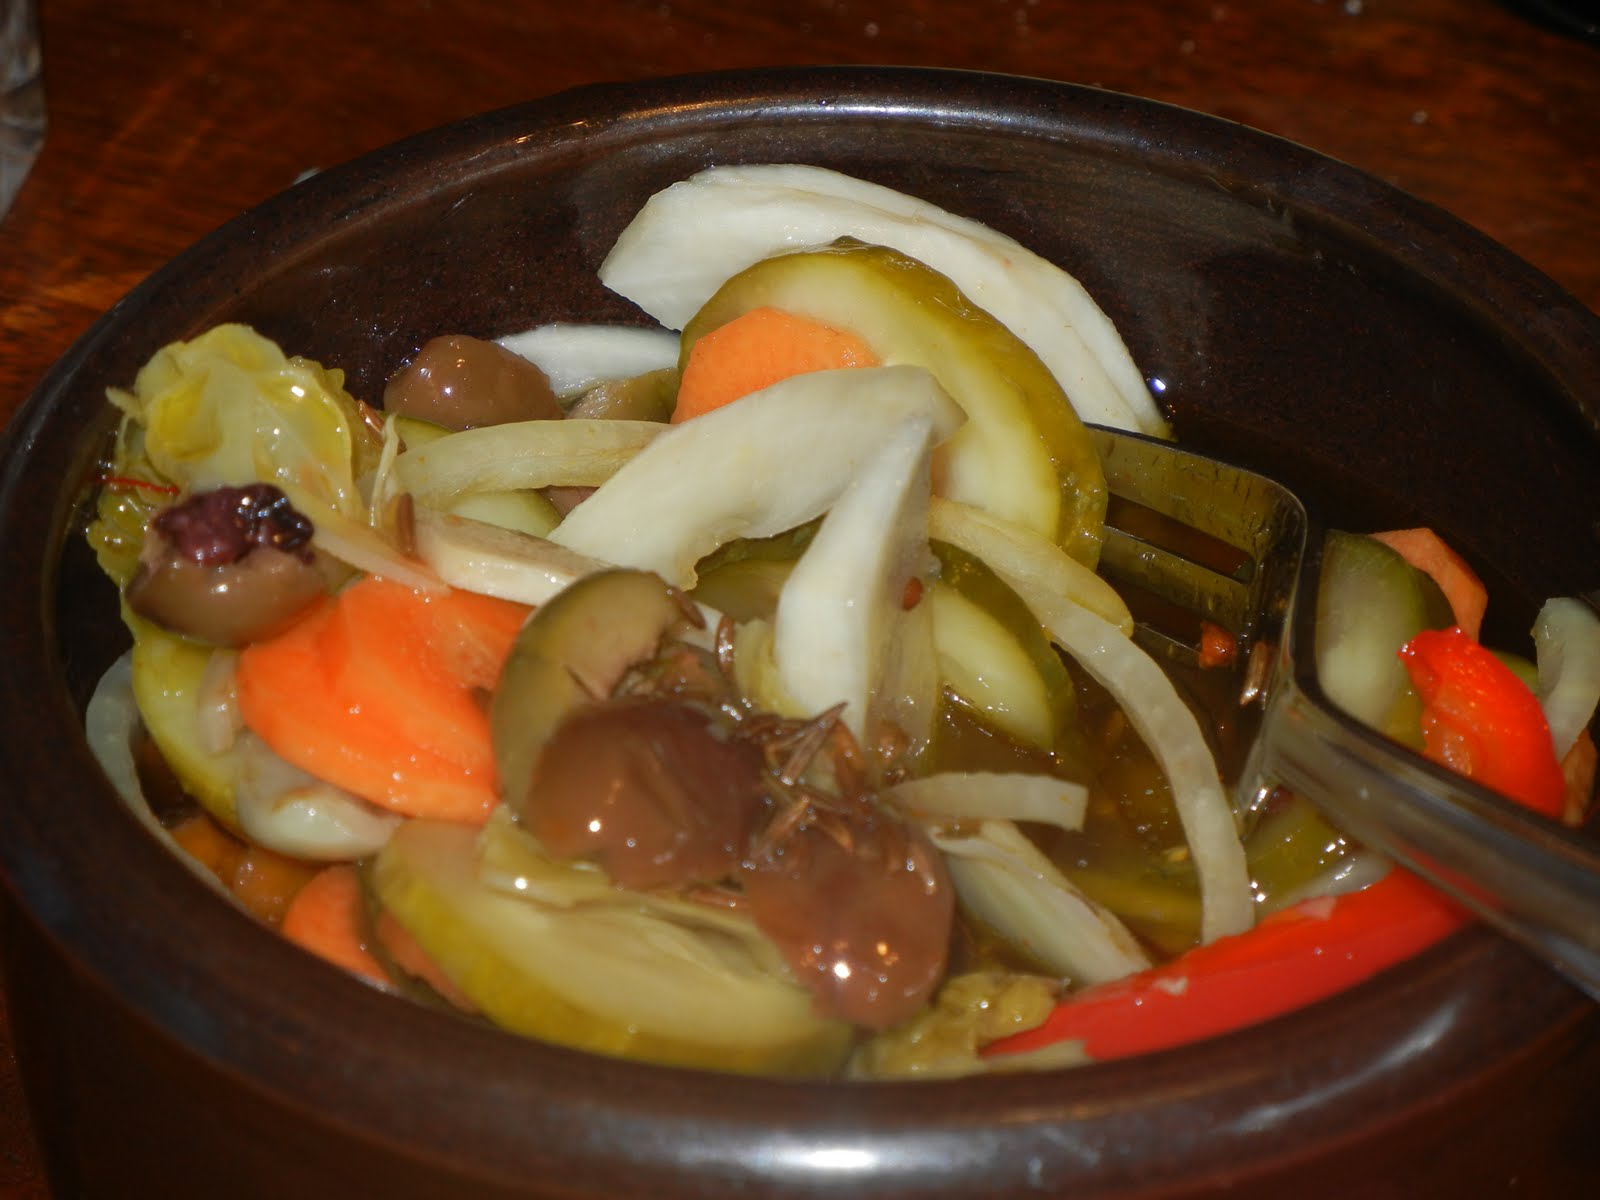
As I said in the last post, I've been on a hunt for turnip recipes. I loved food52 a little more when I found many turnip recipes on there. One of those recipes was for pickled mixed vegetables. I made them, with many reservations. Two cups of olive oil? Only two pints of vegetables? Would we like them? Was my chili garlic sauce the right kind? Would it be too spicy with the chili garlic sauce?
Wouldn't you know it, it turned out ok! I was pleasantly surprised! I ended up using only 1 1/2 cups of olive oil and I still think it is a little too oily. The recipe made two quarts easily, and I even cut down on the amount of veggies I used. We've been eating with meals and have enjoyed it. In fact, I think I will probably even make it again.
A few additional notes on the recipe. If you use the amounts called for, which I am including, it will make probably four quarts. Just divide each layer on vegetables between four jars. This recipe also needs to sit for three days before serving. This sitting should take place at room temperature. After the initial three days, keep in the refrigerator for up to a month. The harissa also makes way more than you need. Refrigerate the extra for up to 3 months and use as you make new batches of pickled vegetables (or search for harissa recipes). Just keep it covered with a light film of olive oil.
Moroccan Pickled Vegetables
adapted from epicureanodyssey on food52.com
For the Harissa:
1 1/2 c Asian chile-garlic sauce
1 lg garlic clove, roughly chopped
1 T coriander
1 T caraway seeds
1 T dried mint (optional)
1 t kosher salt
1 T extra virgin olive oil
For the vegetables:
2 small cucumbers, unpeeled, sliced 1/4" thick
3 medium carrots, peeled, sliced 1/4" thick
2 medium turnips, peeled, halved, and cut into thin wedges
6 medium garlic cloves, peeled and lightly crushed
1 medium sweet onion, peeled, halved lengthwise and cut into thin strips
1/2 large red or yellow pepper, seeded and sliced
1/2 head green cabbage, cut in half, cored, and cut into 1/2" slices
6 oz mixed olives
2 lemons, halved, seeded and thinly sliced
4 thyme sprigs
1 t dried oregano
2 - 4 bay leaves
1 T caraway seeds, lightly crushed
1 T coriander seeds, lightly crushed
small pinch of saffron
2 T harissa
For the pickles:
1 1/4 c white vinegar
1 1/4 c apple cider vinegar
1 1/2 c extra virgin olive oil
2 T sugar
1 T kosher salt
For the harissa: Put all ingredients in a food processor and process to a paste. Set aside until you assemble the jars.
Divide the vegetables and herbs evenly between 4, 1-quart jars. Layer in the order listed in each jar. Top each with a little harissa. Meanwhile, in a medium saucepan, gently heat the olive oil, vinegars, sugar, and salt over medium-low heat until the sugar dissolves. Pour over the vegetable mixture. (Don't make it too hot or it will break the glass jars. If you think it is too hot or are worried about it, just let it cool a little before adding it). Cover and shake the jars to distribute the spices evenly.
Let set at room temperature for 3 days. Store in the refrigerator after that.
To serve, empty jar into a bowl. Top with some fresh feta if desired. (You can return uneaten portion to jar and eat another time).
Wednesday, January 12, 2011
Maple Glazed Root Vegetables
I like cold-weather produce. Most of it stores well and is packed with a whopper of a nutritional punch. I don't stress about how many weeks my root vegetables have languished in my fridge---carrots, turnips, beets, rutubagas, radishes, kohlrabi will hang out for quite a while before they go bad. That's a good thing.
Occasionally, I come across a recipe like this which lets me use a bunch of root veggies at once. I raid the root vegetable drawer and drastically increase the amount of real estate in the crisper drawers. The amounts of vegetables in this recipe is kinda loosey-goosey. You don't have to use all these vegetables. Say if you have lots of turnips and sweet potatoes, don't go and buy a rutubaga for this (I wonder why anyone would ever pay for a rutubaga. It's definitely not one of my favorite roots). I know my vegetables weren't the size they were imagining--I had baby farm carrots, not big grocery store ones and small Hakerui Salad Turnips. I guessed amounts. You could also throw a parsnip in there if you had one. I didn't so I left it out. Just cut it into 2" pieces (about 1 c worth).
This recipe works perfectly on a rack in the oven sitting beneath a roasting chicken. Mmmm...I didn't actually eat these with supper, at which point I was a little unhappy because I doubted the restaurant I was going to could beat these (they couldn't). The tastes I had were great though and I can't wait to eat the leftovers.
This serves 4 - 6 as a side dish.
Maple-Glazed Roasted Root Vegetables
adapted Williams-Sonoma Cooking from the Farmers' Market
2 carrots, cut into 2" pieces (if using smaller carrots use 3 or 4)
5 - 6 small Hakerui Salad Turnips, cut into halves and quarters or 1 larger traditional turnip, cut into 2" pieces (I'd say about 2 c worth)
1/2 rutubaga, peeled and cut into 2" pieces (about 2 c worth)
1 sweet potato, peeled and cut into 2" pieces (about 2 c worth)
1 red onion, cut into wedges (about 1 1/2 c worth)
2 - 3 T olive oil
salt
1/4 c maple syrup (not Aunt Jemima type pancake syrup folks. Use the real thing!)
2 T butter, melted
In a large bowl, toss together all the vegetables with olive oil to coat. Season with 2 t salt and toss again. Spread the vegetables on a single layer on cookie sheet (with a silcone mat makes for much easier clean up). If they won't all fit on one, use two sheets (I had no problem with them all comfortably fitting on one without crowding). Roast vegetables in a preheated 400 degrees oven for 40 - 50 minutes until they develop a light crust and are tender. If you are using the oven for say a roasted chicken as well and the roast chicken is in a 425 degrees oven, just leave the oven set at 425 and start checking your vegetables earlier for tenderness. Occasionally stir and shake the pans to crisp sides of vegetables and prevent sticking.
While the vegetables roast, stir together maple syrup and butter in a small bowl. Brush over tender vegetables, return vegetables to oven and roast another 5 minutes, or until vegetables look glazed. Serve immediately.
Occasionally, I come across a recipe like this which lets me use a bunch of root veggies at once. I raid the root vegetable drawer and drastically increase the amount of real estate in the crisper drawers. The amounts of vegetables in this recipe is kinda loosey-goosey. You don't have to use all these vegetables. Say if you have lots of turnips and sweet potatoes, don't go and buy a rutubaga for this (I wonder why anyone would ever pay for a rutubaga. It's definitely not one of my favorite roots). I know my vegetables weren't the size they were imagining--I had baby farm carrots, not big grocery store ones and small Hakerui Salad Turnips. I guessed amounts. You could also throw a parsnip in there if you had one. I didn't so I left it out. Just cut it into 2" pieces (about 1 c worth).
This recipe works perfectly on a rack in the oven sitting beneath a roasting chicken. Mmmm...I didn't actually eat these with supper, at which point I was a little unhappy because I doubted the restaurant I was going to could beat these (they couldn't). The tastes I had were great though and I can't wait to eat the leftovers.
This serves 4 - 6 as a side dish.
Maple-Glazed Roasted Root Vegetables
adapted Williams-Sonoma Cooking from the Farmers' Market
2 carrots, cut into 2" pieces (if using smaller carrots use 3 or 4)
5 - 6 small Hakerui Salad Turnips, cut into halves and quarters or 1 larger traditional turnip, cut into 2" pieces (I'd say about 2 c worth)
1/2 rutubaga, peeled and cut into 2" pieces (about 2 c worth)
1 sweet potato, peeled and cut into 2" pieces (about 2 c worth)
1 red onion, cut into wedges (about 1 1/2 c worth)
2 - 3 T olive oil
salt
1/4 c maple syrup (not Aunt Jemima type pancake syrup folks. Use the real thing!)
2 T butter, melted
In a large bowl, toss together all the vegetables with olive oil to coat. Season with 2 t salt and toss again. Spread the vegetables on a single layer on cookie sheet (with a silcone mat makes for much easier clean up). If they won't all fit on one, use two sheets (I had no problem with them all comfortably fitting on one without crowding). Roast vegetables in a preheated 400 degrees oven for 40 - 50 minutes until they develop a light crust and are tender. If you are using the oven for say a roasted chicken as well and the roast chicken is in a 425 degrees oven, just leave the oven set at 425 and start checking your vegetables earlier for tenderness. Occasionally stir and shake the pans to crisp sides of vegetables and prevent sticking.
While the vegetables roast, stir together maple syrup and butter in a small bowl. Brush over tender vegetables, return vegetables to oven and roast another 5 minutes, or until vegetables look glazed. Serve immediately.
Tuesday, August 17, 2010
Purslane and Peach Salad

If you've been following this blog for awhile, you know my parents' had what I considered a massive garden when I was growing up (and they still do---just with some flowers and raspberry bushes thrown in now). One summer, I remember that we were required to work in the garden an hour every day. Most of this was spent picking off potato beetles to later drown in motor oil or pulling weeds. I spent a lot of time pulling this weed. Little did I know that some 20 years later I would be paying money to buy purslane, the weed I spent hours trying to rid my parents' garden of.
Purslane is really healthy for you from what I understand--healthier than spinach, in fact. It's high in Omega-3's. Plus, it's completely free if you have a garden to weed (just goggle it first to make sure you are in fact planning on eating purslane and not something else). I made a simple salad of ours. I saw lots of more elaborate recipes--eating purslane is more common in other cultures. I didn't feel like elaborate though and made the simplest recipe I could find that looked good: Purslane and Peach Salad.
Curtis loved it. J ate some of it (he is actually eating salads now, glory be!!). M and little I didn't, but they aren't salad eaters yet (I still have hope). Curtis loved the texture of the leaves and it wasn't too bitter (like summer arugula often is).
I found this recipe off of seriouseats.com. It's not so much of a recipe as just a few things thrown together. Perfect for a side salad that presents wonderfully and requires minimal work.
Purslane and Peach Salad
from seriouseats.com
purslane
a peach (or two, depending on how much purslane you have), sliced or cut into chunks
one small red onion, thinly sliced.
Combine all ingredients. If you are using a particularly juicy peach, you won't need any dressing. Otherwise toss very lightly with good extra virgin olive oil or grapefruit balsamic vinegar (if you can find it).
Monday, January 11, 2010
Pickled Onions
I made these pickled onions as a side for the black bean/cochinita pibil meal. I remembered the cochinita pibil tacos/burritos at El Chilito and new that part of what made those divine were the purplish onions on top that weren't strong at all.
Make these a day ahead of when you want to serve them to let the flavors soak into the onions and deepen. These are great on pulled pork, and black beans and rice. I am also thinking about using these to make leftover fish tacos with the leftover fish I made from the other night.
Yucatan Pickled Onions
from Bon Appetit
6 c of water
1 large red onion, cut crosswise into 1/8" thick slices, rings serparated
2 garlic cloves, quartered
1 T coarse kosher or sea salt
1/2 c white vinegar
3 whole allspice
1 bay leaf
1/2 t ground black pepper
1/2 t dried oregano (preferably Mexican)
1/4 t ground cumin
Combine 6 c of water, onion, garlic, and 1 T coarse salt in heavy medium saucepan. Bring to a boil, then boil 1 minute. Drain. Return onions and garlic to same saucepan. Add vinegar and remaining ingredients. Add enough water to saucepan to just cover onions. Bring to a boil over medium heat. Remove from heat, cover and cool. Transfer onion mixture to a bowl, cover and chill overnight. Will keep for one week in the refrigerator.
Make these a day ahead of when you want to serve them to let the flavors soak into the onions and deepen. These are great on pulled pork, and black beans and rice. I am also thinking about using these to make leftover fish tacos with the leftover fish I made from the other night.
Yucatan Pickled Onions
from Bon Appetit
6 c of water
1 large red onion, cut crosswise into 1/8" thick slices, rings serparated
2 garlic cloves, quartered
1 T coarse kosher or sea salt
1/2 c white vinegar
3 whole allspice
1 bay leaf
1/2 t ground black pepper
1/2 t dried oregano (preferably Mexican)
1/4 t ground cumin
Combine 6 c of water, onion, garlic, and 1 T coarse salt in heavy medium saucepan. Bring to a boil, then boil 1 minute. Drain. Return onions and garlic to same saucepan. Add vinegar and remaining ingredients. Add enough water to saucepan to just cover onions. Bring to a boil over medium heat. Remove from heat, cover and cool. Transfer onion mixture to a bowl, cover and chill overnight. Will keep for one week in the refrigerator.
Wednesday, September 30, 2009
Pulled Chicken Sandwiches
Over the weekend Curtis smoked 2 chickens--Rockingham County, VA style (which would be a vinegar baste and cooked low and slow....my favorite chicken in the whole world). Now what my family needs with 2 chickens for one meal, I am not quite sure. Needless to say, I have leftover chicken I need to figure out how to use. We also went every other week with our CSA box in September, so I've needed to use a little more thought to plan meals (because I don't have a fridge full of vegetables I don't want to go bad).
The result--Pulled Chicken Sandwiches. I used some of my remaining onions (the onions are dwindling--so sad. I may need to buy onions at the store before too long again) and the challah I made in the afternoon. Mmm...a great way to use leftover cooked chicken (and I'd imagine turkey around Thanksgiving time). Everyone liked it. M even ate the onions without mentioning them, which was an accomplishment. I used two chicken quarters (dark meat sections) for this. I think it was around 2 c of chicken. Instead of the tomato paste and water, you could also use 1/2 c tomato sauce and 2 T water. With 2 c chicken, it barely made 4 sandwiches.
Pulled Chicken Sandwiches
adapted from Better Homes and Gardens New Cookbook
1 1 3/4 - 2 lb purchased rotisserie chicken (or leftover, cooked chicken from another meal)
1 med onion, sliced 1/4" thick
1/3 c cider vinegar
2 T concentrated tomato paste
1/2 c water
1 T molasses
1/2 t salt
3 - 4 T serrano or jalapeno peppers, seeded and finely chopped (optional--I omitted)
Remove the chicken from the bones, discarding skin, fat, and bones (and other misc parts you don't want). Pull meat into shreds. In a large skillet cook onion in hot oil over medium heat about 5 minutes or until tender, stirring occasionally to separate slices into rings. Add vinegar and cook another minute. Add tomato paste, water, molasses, salt, and pepper. Bring to a boil. Add the chicken and stir to coat. Heat through. You can keep warm on the stove until you are ready to serve it.
The result--Pulled Chicken Sandwiches. I used some of my remaining onions (the onions are dwindling--so sad. I may need to buy onions at the store before too long again) and the challah I made in the afternoon. Mmm...a great way to use leftover cooked chicken (and I'd imagine turkey around Thanksgiving time). Everyone liked it. M even ate the onions without mentioning them, which was an accomplishment. I used two chicken quarters (dark meat sections) for this. I think it was around 2 c of chicken. Instead of the tomato paste and water, you could also use 1/2 c tomato sauce and 2 T water. With 2 c chicken, it barely made 4 sandwiches.
Pulled Chicken Sandwiches
adapted from Better Homes and Gardens New Cookbook
1 1 3/4 - 2 lb purchased rotisserie chicken (or leftover, cooked chicken from another meal)
1 med onion, sliced 1/4" thick
1/3 c cider vinegar
2 T concentrated tomato paste
1/2 c water
1 T molasses
1/2 t salt
3 - 4 T serrano or jalapeno peppers, seeded and finely chopped (optional--I omitted)
Remove the chicken from the bones, discarding skin, fat, and bones (and other misc parts you don't want). Pull meat into shreds. In a large skillet cook onion in hot oil over medium heat about 5 minutes or until tender, stirring occasionally to separate slices into rings. Add vinegar and cook another minute. Add tomato paste, water, molasses, salt, and pepper. Bring to a boil. Add the chicken and stir to coat. Heat through. You can keep warm on the stove until you are ready to serve it.
Monday, August 17, 2009
Pissaladiere Nicoise
On Saturday, I did something I would recommend strongly for others to avoid doing. I made four dishes for the very first time. To top it off, they were all out of Mastering the Art of French Cooking. I decided to attempt to make an entirely Julia Child meal to celebrate her birthday. We had tried to invite friends over, but they weren't available and for that I was thankful. By the time I was done cooking, I was exhausted. I never finished making the chicken (the hollandaise type sauce never got made).
Everything was fabulous though and I learned a lot (like only attempt one new dish for a meal), found a killer pie crust recipe, made a cake that is divine, and discovered that a tart made out of onions, anchovies, and black olives is actually really good. (I can imagine my redheaded cousin cringing as he reads that last sentence because I am sure that breaks so many of his food rules!).
The tart isn't a main course, but more like an appetizer or a side. Because the onions are slowly cooked for an hour, they are very tender, mild, and slightly sweet. The anchovies and olives provide nice flavor to an otherwise uniform tasting tart. I will definitely make this again, especially when my onion basket is overflowing like it currently is (one medium sized bag of onions is way more than I can use in a week). The most time consuming, hands on part of this is chopping the onions. However, if you want practice chopping onions, this recipe is the perfect recipe to attempt it. I feel like I am much quicker at it now than I was three days ago!
Pissaladiere Nicoise
from Mastering the Art of French Cooking
one 9" pie crust, put inside a tart pan**
2 lbs onions, chopped
4 T olive oil
1 medium herb bouquet: 4 parsley springs, 1/4 t fresh thyme, 11/2 bay leaf tied in a washed cheesecloth
2 cloves unpeeled garlic
1/2 t salt
1 pinch of cloves
1/8 t pepper
8 - 12 canned anchovy fillets
16 pitted black (Nicoise is preferable) olives
1 T olive oil
Cook the onions very slowly in the olive oil with the herb bouquet, unpeeled garlic, and salt for about an hour, or until very tender. Discard herb bouquet and garlic. Stir in cloves and pepper, and taste carefully for seasoning. Meanwhile, in a 400 degrees preheated oven, partially bake pie crust for 8 minutes. Be sure to line the pie crust with foil and weight down with pie weights, dried rice, or dried beans to let pie crust hold it's shape and not puff. Remove crust from oven, remove foil and discard, and prick pie crust with fork. Spread the onions in the pastry shell. Arrange anchovy fillets over it in a fan-shaped design. Place the olives at decorative intervals. Drizzle on the oil. Bake in the upper third of a preheated 400 degrees oven for 10 - 15 minutes or until bubbling hot. Remove tart from pan and serve.
**For what I think is the perfect pie crust, check out Julia Child's pastry shell recipe in Mastering the Art of French Cooking. I am not going to attempt to put it here, because it is very detailed and has some awesome illustrations. Go ahead, reserve and check out the cookbook at the Public Library, don't be scared of Julia any longer!
Everything was fabulous though and I learned a lot (like only attempt one new dish for a meal), found a killer pie crust recipe, made a cake that is divine, and discovered that a tart made out of onions, anchovies, and black olives is actually really good. (I can imagine my redheaded cousin cringing as he reads that last sentence because I am sure that breaks so many of his food rules!).
The tart isn't a main course, but more like an
 appetizer or a side. Because the onions are slowly cooked for an hour, they are very tender, mild, and slightly sweet. The anchovies and olives provide nice flavor to an otherwise uniform tasting tart. I will definitely make this again, especially when my onion basket is overflowing like it currently is (one medium sized bag of onions is way more than I can use in a week). The most time consuming, hands on part of this is chopping the onions. However, if you want practice chopping onions, this recipe is the perfect recipe to attempt it. I feel like I am much quicker at it now than I was three days ago!
Pissaladiere Nicoise
from Mastering the Art of French Cooking
one 9" pie crust, put inside a tart pan**
2 lbs onions, chopped
4 T olive oil
1 medium herb bouquet: 4 parsley springs, 1/4 t fresh thyme, 11/2 bay leaf tied in a washed cheesecloth
2 cloves unpeeled garlic
1/2 t salt
1 pinch of cloves
1/8 t pepper
8 - 12 canned anchovy fillets
16 pitted black (Nicoise is preferable) olives
1 T olive oil
Cook the onions very slowly in the olive oil with the herb bouquet, unpeeled garlic, and salt for about an hour, or until very tender. Discard herb bouquet and garlic. Stir in cloves and pepper, and taste carefully for seasoning. Meanwhile, in a 400 degrees preheated oven, partially bake pie crust for 8 minutes. Be sure to line the pie crust with foil and weight down with pie weights, dried rice, or dried beans to let pie crust hold it's shape and not puff. Remove crust from oven, remove foil and discard, and prick pie crust with fork. Spread the onions in the pastry shell. Arrange anchovy fillets over it in a fan-shaped design. Place the olives at decorative intervals. Drizzle on the oil. Bake in the upper third of a preheated 400 degrees oven for 10 - 15 minutes or until bubbling hot. Remove tart from pan and serve.
**For what I think is the perfect pie crust, check out Julia Child's pastry shell recipe in Mastering the Art of French Cooking. I am not going to attempt to put it here, because it is very detailed and has some awesome illustrations. Go ahead, reserve and check out the cookbook at the Public Library, don't be scared of Julia any longer!
Subscribe to:
Posts (Atom)