Need I say more? These are incredible and what I will do whenever I happen to have rice krispies sitting around my house. I love them.
Salted Brown Butter Crispy Treats
from SmittenKitchn
1/2 c unsalted butter
10 oz of marshmallows
heaping 1/4 t coarse sea salt
6 c Rice Krispies cereal
Butter a 9" square pan. In a large pot, melt butter over medium-low heat. Cook slowly, stirring frequently until butter has browned (it will foam, turn clear golden, and then start to brown---it will look like little pieces of brown things are floating in it). As soon as butter has browned and has taken on a nutty color and smell, turn off the heat and stir in the marshmallows. You shouldn't need to turn the heat back on, the pot and heat from the butter should melt the marshmallows. Stir vigorously until it is smooth. (if needed, turn the heat on low to help melt the marshmallows). Remove from the stove and stir in the salt and cereal. Spread into buttered pan. Press firmly into pan and evenly into the edges and corners with a silicon spatula. Let cool and cut into squares.
Tuesday, December 29, 2009
Monday, December 28, 2009
Chicken in Dill Mustard Sauce
Mmm...fresh dill. Problem is, I think of dill with summer dishes like cucumbers. No cucumbers here in December. I was excited to find this recipe--it was easy and adaptable for kids (I just left off the dill sauce). I used 1 lb of chicken breasts instead of the chicken legs and kept the rest of the proportions the same.
Curtis and I thought it was really good. I'll make this again next time I have dill in December. I served it over rice and with a side salad.
Chicken in Dill Mustard Sauce
adapted from Gourmet
1/4 c flour
1/2 t salt
1/2 t black pepper
4 whole chicken legs (2 lbs) or 1 lb chicken breasts
3 T oil
3/4 c onions, chopped
1/2 c white wine
1 c chicken broth or water
2 t dijon mustard
1/4 c fresh dill, chopped
Stir together flour, salt, and pepper in a shallow bowl. Pat chicken dry, then dredge, 1 at a time in flour, shaking off excess. Heat oil in 12" heavy skillet over moderate high heat until hot. Brown chicken, skin sides down first, turning over once, 6 - 8 minutes total. Transfer chicken to a plate, then pour off all but 1 T fat from skillet. Add onions to skillet and saute, stirring occasionally, until golden brown, 2 - 3 minutes. Add wine and deglaze skillet by boiling, stirring, and scraping up brown bits. Add broth, mustard, and remaining salt and pepper. Bring to a simmer, then return chicken to skillet, skin sides up, along with any juices from the plate, and cook over moderate heat, covered, until chicken is cooked through, about 25 minutes (10 - 15 minutes for chicken breasts). Transfer chicken to a platter and boil sauce until reduced to about 1 c and slightly thickened, about 3 - 5 minutes. Remove from heat and stir in dill, then pour sauce over chicken (or serve beside chicken if it is questionable if everyone will like the sauce).
Wednesday, December 23, 2009
Pizza Roll-ups

You would think just two days before Christmas, one day before we fly out of town I would have better things to do besides post. I do. I could make a list: laundry, pack, organize, clean. I don't really want to do any of those things though, so I am posting instead.
Our neighborhood had a Christmas party last Sunday night. It was wonderful, complete with a hay ride through the neighborhood to look at Christmas lights and caroling as we rode. It was a potluck and I wanted to bring a main course, because I suspected (and was right) there would be lots and lots of desserts. I also had arugula I needed to use.
I decided to try pizza roll-ups. I saw a recipe for mushroom pizza roll-ups on Bitten and thought I'd attempt those. While I was at it, I thought I'd make the traditional, more kid friendly sausage and cheese pizza rolls, which recipe found elsewhere on the internet. Plus, there was that arugula so I decided to make my own variation to use the arugula as well.
I had varied degrees of success. The sausage and cheese roll-ups looked the nicest. The arugula tasted the best (I thought). The mushroom was a bit of a flop--I think too much moisture for the dough to rise in the oven and too rich with all the mushrooms. Regardless, all three were gone pretty quickly at the potluck. A double batch of dough will make two-three pizza rolls. I am not including the recipe for the mushrooms because I don't think it I will make it again. You can include the pizza sauce on the arugula one if you want--I did this time, but don't think I will next time so the dough rises more in the oven (at least that's my hypothesis). Serve on the side if you don't use it inside the roll-up.
Pizza Roll-Ups
Adapted from Taste of Home plus my inventions
A batch of your favorite pizza dough (click here for my favorite)
For sausage and cheese filling for one pizza roll-up
1 lb bulk Italian sausage
7 oz roasted red peppers, drained and chopped
1 c mozzarella cheese, grated (or other Italian cheese)
For arugula filling for one pizza roll-up
one small bunch of arugula, coarsely torn
thinly sliced Italian deli salami
1 c mozzarella cheese (or other Italian cheese), grated
1 c pizza sauce (optional)
For the sausage and cheese filling: Cook sausage over medium heat until no longer pink. Stir in red peppers and mozzarella cheese. Roll dough into a long rectangle. Top with sausage topping. Roll up jelly roll style, starting with a short side. Tuck ends under and pinch seam to seal. Mix an egg with a little water and brush over top of roll, sprinkle with some parmesan cheese (optional). Bake in preheated 375 degrees oven for 25 -30 minutes or until golden brown. Let stand 5 minutes before cutting into 1/2 - 1" slices. (A variation: use 1/2 lb sausage and 10 oz of chopped spinach).
For the arugula filling: Roll out pizza dough into a long rectangle. Spread salami across the top of the dough. Top with arugula and then cheese. Mix an egg with a little water and brush over top of roll, sprinkle with some parmesan cheese (optional). Bake in preheated 375 degrees oven for 25 - 30 minutes or until golden brown.
Tuesday, December 22, 2009
Cherry Brownie Torte
Lest you think I've only been baking cookies lately, I'll share my current favorite winter dessert to share. I tend to only make this when I know I'll have other people to share this with. It is so rich and it looks too pretty just to keep to myself. This is the cake that can get me through long evenings of taking care of kids and cleaning up all by myself. In fact, I think I will need to take a brief blogging break to have a piece. It is too good not to sit and appreciate it---to just eat it while doing something distracts me.
 This is somewhat time consuming to make. It has two separate cooling/chilling periods. I make the brownie one day and the topping the next, being sure to give it at least 4 hours to chill before serving.
Cherry Brownie Torte
slightly adapted from Baking: From My Home to Yours by Dorie Greenspan
3/4 c all-purpose flour
1/4 c cocoa powder
1 t coarsely ground black pepper
1/4 t salt
1 c dried tart cherries
1/4 c water
3 T cherry preserves
12 T butter, cut into chunks
11 oz bittersweet or semisweet chocolate, coarsely chopped
1 1/2 c sugar
4 eggs, at room temperature
1/4 t vanilla
3 oz cream cheese, at room temperature
1/3 c sugar
1 t vanilla
1 1/2 c (12 oz) mascarpone cheese
3/4 c heavy cream
Whisk together the flour, cocoa, pepper, and salt. Bring the cherries and water to a boil in a small saucepan over medium heat. Stir in the preserves and boil until the mixture thickens, about 3 minutes. Set aside to cool. Put butter and 7 oz of chocolate into a small metal bowl. Put over a pot of boiling water. Cover and turn off heat. Stir occasionally, until chocolate and butter are melted (turn heat on slightly if chocolate isn't melting). Stir in 1/2 c sugar and remove from heat. Meanwhile, with a mixer, beat the eggs, 1 c sugar, and vanilla until pale and thick, about 4 minutes. Using a spatula or wooden spoon, gently mix in the melted chocolate. Fold in dry ingredients, followed by cherries and remaining 4 oz of chopped chocolate. Pour batter into a 9" springform pan, whose bottom has been butter and lined with parchment paper. Smooth the top with a rubber spatula.
Put springform pan on a baking sheet and bake in a preheated 350 degrees oven for 55 minutes or until the top is dry and the cake is starting to pull away from the sides of the pan. (Don't expect the middle to be dry--if poked with a tester, moist batter should be attached). Transfer the pan to a cooling rack and cool for 15 minutes. Loosen the cake from the pan by running a blunt knife between cake and pan. Remove sides of the pan. Cool completely on base. When completely cool, invert remove base of pan and parchment paper. Wash and dry the pan and return the cake to it. Refasten the sides.
At this point, I cover the pan with foil and refrigerate for a day until I am ready to do the icing. You can do this all in one day, I just can't ever quite time it right to achieve that. It may be because I bake during nap times in the afternoons.
To make the mouse icing, beat the cream cheese, 1/3 c sugar, vanilla and a pinch of salt on medium-high speed until it is very smooth. Reduce the mixer speed to low and add the mascarpone cheese and mix until it is smooth. Add the cream and beat only until the mousse is smooth and blended. Spoon the mousse over the cake and smooth out with a rubber spatula or a wooden spoon. Refrigerate cake at least 4 hours to set the mousse.
To serve, remove sides of springform pan. Dust with some extra cocoa if you would like just before serving. It is best if it sits at room temperature for 20 minutes before serving.
Monday, December 21, 2009
Sand Tarts

Like I said on Friday, my first true sand tart success was this past week. I had almost decided it was time to ditch the sand tart recipe and just stick to my sugar cookie recipe. This batch of cookies saved sand tarts for me.
In case you aren't familiar with sand tarts, or at least my definition of sand tarts, let me fill you in. Sand tarts are very thin sugar cookies. A little sandy, crispy, they are thinly rolled and baked only long enough to crisp, but not brown. When I was looking for other sand tart recipes online, I discovered there are other versions of sand tarts--many have walnuts or pecans or almonds on them. Some are circular and decorated with almonds to look like sand dollars. The sand tarts I am familiar with though tend to have no nuts---just cut out with cookie cutters and topped with a little colored sugar.
A good baking pan is very helpful for this. Just a plain, heavy duty baking sheet is all you need---nothing fancy. If you don't have good baking sheets, I would recommend going to a restaurant supply store. I found them there for $7.50 a piece and I am in love with mine---the best baking sheets I've found. Other than that, try to get the cookies all the same thickness or at least group cookies of similar thickness on one pan. That will allow the cookies to get crispy without browning. The cookies need to refrigerate over night or freeze for an hour before baking.
Sand Tarts
from Good Housekeeping's Cookies!
1 c butter, at room temperature
1 1/2 c sugar
2 large eggs
1 t vanilla
3 c flour
1/2 t baking powder
1/2 t salt
Beat butter and sugar in a mixer until light and creamy. Reduce speed to low and beat in eggs and vanilla until mixed. Beat in the flour, baking powder, and salt until well combined, occasionally scraping bowl with a rubber scraper. Shape dough into 4 balls and flatten into disks. Wrap in plastic wrap and freeze 1 hour or refrigerate overnight.
On a lightly floured surface, roll out one piece of dough until 1/8" thick. To prevent dough from sticking, pick up and rotate/flip dough frequently, reflouring as necessary. Cut dough into as many cookies as possible with cookie cutters, reserving trimmings. Place cookies on large ungreased baking sheet. Sprinkle with colored sugar or sprinkles if desired. Bake in preheated 350 degrees oven for 8 - 12 minutes (depending on thickness), until cookies are crispy, but not browned. Repeat with remaining dough and trimmings until all the dough is used. If desired, frost with icing when finished (if you didn't top with sprinkles, etc).
Saturday, December 19, 2009
What We've Been Eating Lately
I must say, my family has been no fun to cook for lately. Curtis still has no appetite and is not eating much in the evening due to his nausea---hence nothing tastes great. M is getting pickier and J has been snacking too much. Thus the past few days menus have looked like this:
Spaghetti and meatballs made with store bought sauce and meatballs from Costco
Leftovers and freshly made big salad.
Take out (and the kids didn't even like that).
Ok. It hasn't all been that bad. :) Also on the menu:
Potato Soup with Kale
Butternut Squash and Kale Risotto
Salmon with Bok Choy
Baked Ziti (frozen this summer and pulled out for an easy meal)
Homespun pot pie (which had perfect biscuits on top--light and flaky. I used chicken, kohlrabi, turnips, and sweet potatoes as the vegetables)
plus the above mentioned meals.
We've also had several big salads (a big salad is one that has more than just lettuce on it---the latest had a sliced bell pepper, boiled eggs, and sliced carrots). Now that Curtis is through with radiation, hopefully he'll start eating better again. I miss having a good audience to cook for.
Friday, December 18, 2009
How I Spent My Friday Afternoon

It was a truly wonderful afternoon. The only thing it needed was the foot of snow that my Virginia family is forecast to get tonight/tomorrow. All of the cookies I had stashed in the refrigerator and freezer I brought out to bake. What I ended up with (from front to back):
Molasses Cookies
Pinwheel Cookies (I especially like the pinwheel cookie wreck in the middle of the picture)
Sand Tarts
World Peace Cookies
Linzer Cookies
and already made, not pictured Buckeyes.
I like this method of baking. I will definitely need to remember it for next year. I used Stonewall Kitchen's Raspberry Jam for the filling of the Linzer cookies. It wasn't what I used last year, but it was thick enough to do.
This was the first year I was happy with my sand tarts. The secret? Two things. 1) No one helped me. 2) New baking pans from a restaurant supply store. Heavy duty, half sheet pans. They were awesome and the cookies cooked until they were crispy without browning. It was easier to roll them out evenly since no one was helping me (as in, no children assisting). Cookie making with kids is fun, but cookie making by myself is fun too.
Tuesday, December 15, 2009
Potato Soup with Kale
I really like kale in soup, but was ready for a change from my normal minestrone/Italian soup version. I was delighted to stumble upon this version for which I had all the ingredients and was not very time consuming to prep (it does simmer for an hour, but you can basically ignore it during that hour.
The family enjoyed it--especially the croutons for the top (the cubed bread sauted in olive oil). I'll be making this one again. This serves 6 adults.
Potato Soup with Kale
from Bon Appetit
5 T olive oil
1 large onion, chopped
5 - 8 oz fully cooked Spanish chorizo, casings removed if necessary, chopped
1 - 2 t smoked paprika
1 1 /2 lbs potatoes, cut into 1/4" slices
8 c chicken broth (or a broth/water combination)
1 bunch kale (1 - 1 1/2 lbs), stemmed and torn into small pieces
3 c 1/2"-cubed rustic bread
Heat 3 T olive oil in a large pot over medium heat. Add onion, cook until translucent, about 8 minutes. Add chorizo and paprika and cook, stirring constantly, for 1 minute. Add potatoes and broth and bring to a boil. Add kale; stir until wilted and soup returns to a boil. Reduce heat to low, cover, and simmer for one hour, stirring occasionally. (Can make this ahead, just rewarm before serving).
Meanwhile, heat 2 T oil in large skillet over medium heat. Add bread cubes and saute until golden and crispy, about 10 minutes, stirring occasionally. Sprinkle with salt and pepper.
To serve, place soup in bowls and top with croutons.
Monday, December 14, 2009
Salmon with Bok Choy
 the before picture
Love she did. I can't go wrong with fish and that girl, even if the fish rests on a nice bed of bok choy. She didn't eat the bok choy, but she sure enjoyed the salmon! Everyone else enjoyed this meal too, Curtis and I liked having the bok choy all to ourselves.
This is an easy weeknight meal, but presents fancy since it is fish sitting on a bed of something. I didn't have hoisin sauce, so I substituted soy sauce. This proportions will serve 4.
Salmon with Bok Choy
adapted from Bon Appetit
2 heads bok choy (or however much you have), well rinsed and separated
1 lb of salmon, cut into 4 pieces
2 T fresh orange juice
1 green onion, thinly sliced (optional)
1 T hoisin sauce (or 2 t soy sauce)
1 t fresh ginger, peeled and minced
1/2 t finely grated orange peel
1/4 c fresh cilantro leaves
Form a bed of bok choy in the center of 4 12-inch pieces of foil. Top bok choy with fish. Mix orange juice, green onion, hoisin, ginger, and orange peel in a small bowl. Spoon mixture over fish, dividing equally. Sprinkle with salt. Top with cilantro. Fold up foil sides and pinch tightly to seal above fish and at both ends of the packets, enclosing contents completely. Place packets on baking sheet and bake in a preheated 425 oven for 12 - 14 minutes, or until fish is just opaque in the center. Serve with rice.
 the not as great, after picture
Friday, December 11, 2009
Buckeyes
 This is another one of my Grandma's recipes. Buckeyes, I've learned recently, aren't just a Lancaster County, PA Christmas speciality. In my not very extensive research, I've learned that buckeyes are commonly eaten at Ohio State "Buckeyes" football games. Those buckeyes, are slightly different than mine. The football buckeye candy is not completely coated with chocolate, but instead made to look like eyes. That approach looks really cool, but I'll take total chocolate coating any day over appearances.
My Grandma and her two sisters would make candy every year for many, many years. Buckeyes were the simplest candy they made and also my favorite. I was relieved to learn exactly how easy they are to make when I tried to make them. To make buckeyes the easiest, they will need to chill twice before being coated with chocolate. When coating them with chocolate, be careful not to let them sit in the chocolate. The chocolate will melt. I use an electric skillet, set to between 200 - 250 degrees. If you are fortunate enough to have a double boiler, use that. (I am not one of the fortunate ones...) If the finished buckeyes don't look perfect, don't fret. Everyone will ignore that once they eat one (and then another and another).
Do I need to say my kids love these?
Buckeyes
1/2 c butter, at room temperature
2 c crunchy peanut butter (not the organic/natural type--stick to Jiff or Peter Pan or the like)
1 3/4 c confectioners' sugar
3 c Rice Krispies
approximately 8 oz of chocolate chips or chocolate pieces
approximately 2 - 4 oz of a Hershey Bar (or similar chocolate bar)
approximately 1/4 slab of paraffin (Gulf Wax is a very common brand--pictured below)
Mix together butter, peanut butter, confectioners' sugar, and Rice Krispies well, using your hands if necessary. Form into small balls and chill.

Melt chocolate slowly in a double boiler or in an electric skillet (set between 200 - 250 degrees). If the chocolate is too hot, it will get crumbly. It will not recover from this (the heat being an "irreversible change," as M likes to remind me). Water and moisture will cause the chocolate to harden, so don't cover the pan while melting. Stir frequently. Stir in a little melted paraffin to thin chocolate. If chocolate is thin enough to coat, you won't need the paraffin. (Play around with this---taste or cut buckeyes in half to see if the thickness is right. It took me a several attempts before I figured out how thin it needs to be.)


Dip balls into chocolate. The easiest way I found to do this was dropping the buckeye in the chocolate, rolling it around, lifing it out with a fork, and scraping the bottom of the fork clean with a thin knife. Drop coated buckeye onto parchment paper to cool. Chill to harden and store in the refrigerator or freezer.

Thursday, December 10, 2009
Mac and Cheese with Chard
I needed new ways of using chard and few this recipe. I think it passes as a recipe that can stand up to the rigors of chard. It's nice for the kids (who won't eat the chard, because it is green and leafy), because the chard is in a layer in the middle, making it easy to eat around it.
Mac and Cheese with Chard
adapted from Bon Appetit
3 T butter
2 garlic cloves, minced
1/4 c flour
3 c milk
2 c Gouda cheese, coarsely grated
2 c Edam cheese, coarsely grated (or you can use 4 c total of whatever cheeses you want)
a pinch of chili powder
a pinch of freshly ground nutmeg
1 1/2 lb chard, stems and center ribs removed
12 oz macaroni
Melt 3 T butter in a large pot over medium heat. Stir in garlic, then flour, stirring constantly for 1 minute. Gradually whisk in milk. Cook, whisking occasionally, until mixture begins to boil, about 5 minutes (longer if you use skim milk). Add 1 1/2 c grated Gouda and 1 c grated Edam. Stir until cheeses melt. Stir in chili powder and nutmeg. Season with salt and pepper.
Meanwhile, cook chard in a large pot of boiling salted water until tender, about 1 minute. Transfer the chard to a plate with a slotted spoon to cool. Reserve water in the pot. Squeeze water from the chard and coarsely chop. Return the water in the pot to a boil. Add the macaroni and cook until al dente. Stir drained macaroni into warm cheese sauce. Place half of macaroni in a 9 x 13" baking dish, smooth top. Top with 1 c Edam cheese and then chard. Top with remaining macaroni mixture, spread evenly. Sprinkle remaining 1/2 c Gouda over top.
Bake in a preheated 350 degrees oven and bake for 40 minutes, until macaroni is golden and edges are bubbling. Let stand 10 minutes before serving.
Wednesday, December 9, 2009
Rigatoni with Fennel and Sausage
My kids don't dig fennel. That's unfortunate because fennel is one of my favorite things. I am excited that we've gotten fennel two weeks in row in our CSA box and I hope the streak continues.
That said, neither M or J ate the fennel in the pasta. They ate the pasta and sausage quickly, they just avoided the fennel, leaving it to their parents to eat off their plates (mostly me).
Curtis and I enjoyed this recipe. It wasn't as rich as I was worried it would be based on the cream sauce. I made some serious adjustments to the original recipe, but I think it turned out just right.
Rigatoni with Fennel and Sausage
adapted from Gourmet
1 lb mild Italian sausage (either bulk or links with the casings removed and discarded)
2 T olive oil
1 c onion, finely chopped
2 large garlic cloves, minced
1 large bell pepper (red is preferable but green is fine), chopped
1 fennel bulb, sliced thin (about 2 c)
2/3 c dry white wine
1 c chicken broth
1/2 c heavy cream
1/2 lb rigatoni or other tubular pasta
1/4 c minced fresh parsley leaves
grated fresh parmesan cheese
Cook the sausage over moderate heat in a heavy skillet, stirring and breaking up any lumps, until it is cooked through and transfer it with a slotted spoon to paper towels to drain. Add the onion and garlic to the skillet, reduce heat to medium low, and cook until the onion is softened, stirring occasionally. Add the bell pepper and fennel and cook the mixture over medium heat for 5 minutes, or until the bell pepper and fennel are softened. Add the wine and broth, bring to boil and simmer, covered, for 5 minutes. Add the cream and boil until it is thickened slightly and reduced by about a 1/3. Meanwhile, cook the pasta until al dente in a pot of boiling water. Place pasta in a bowl, toss with the fennel mixture, sausage, parsley, and Parmesan. Serve
Tuesday, December 8, 2009
Cookies Galore!
It's Christmastime and for those who know me, you know that I love to make cookies around Christmas. I give plates of cookies as gifts of thanks to teachers, neighbors, friends, pretty much anyone I can for as long as the cookies last. I enjoy coming up with a cookie menu with something for everyone--peanut butter, chocolate, sugar and butter, nuts, and spicy.
This year, that has gotten more challenging. The addition of another child and continued health issues for Curtis has made finding the time required a little more difficult. I have found the answers though. 1) Don't make as many kinds of cookies (the list of this years cookies to follow) and 2) Break cookie making into parts and divide over days.
We are fortunate to live in modern times of good freezers. This makes my problem so much less of a problem. Currently in my freezer, I have two different kinds of cookies, waiting until the week I want to give them to be baked. Most cookies freeze easily before baking or at least will last in the refrigerator a week or so. Rolled cookies and ice box cookies actually require refrigeration (or freezing) before baking. Thus, I have started making my cookies 3 weeks before I intend on giving them.
My cookie list for this Christmas:
Buckeyes
Linzer Cookies
Molasses Sugar Cookies
World Peace Cookies
Sugar cookies or sand tarts
Pecan Sandies
The buckeyes are waiting to be coated with chocolate in my refrigerator and the Linzer Cookies and World Peace Cookies are chilling in the freezer. I plan on having the molasses sugar cookies join them there tomorrow and making sand tarts with the kids next week. Pecan sandies will be made only right before I bake them. The plan is to post recipes for the buckeyes and sand tarts this year. The World Peace Cookies can be found here, at smitten kitchn.
Monday, December 7, 2009
What We've Been Eating Lately

Fennel in Roasted Chicken with Fennel (pictured)
Poblanos and Tomatoes in Pork and Tomatillo Stew
Chard in Lasagna-Style Baked Ziti
Mustard Greens in Greens and Smoked Gouda Sandwiches
Bell Pepper, Lettuce, and Salad Turnips in salads
Kohlrabi in Boiled Pot Pie
Poblanos in Cranberry Salsa
Plus, new recipes coming this week and Christmas Cookies!
Wednesday, December 2, 2009
Grandma's Boiled Pot Pie
 I have no less than three pot pie recipes in my collection. Two are very similar---baked in the oven with a dough topping or crust. This one is different.
This is what I grew up thinking pot pie was like. My Grandma would make it and it was my absolute favorite thing she made. Rolling out the noodles is a lot of work, so we wouldn't get it every time we visited their farmhouse in Lancaster County, Pennsylvania, just on rare occasions. Pot pie was said as one word, kinda like pah-pie. It was until I was in upper elementary school before I was introduced to what others called potpie. Even for years after that, I couldn't understand why they called the baked aberrations pot pie.
Getting this recipe was a bit of a challenge. Like all good family heirloom recipes this wasn't written down. When I asked my Grandma for the recipe several years, she tried to write it out for me. I attempted to make and had to call her to have her help me figure out what she meant and what I was meant to do. I still use making pot pie as an excuse to call and talk to her.
The noodles are basically an egg pasta (duh, right?). I used the Pennsylvania Dutch method of rolling it out, which is pure elbow grease. I think I may be sore tomorrow from my rolling workout (I am serious--it used serious abs and arm muscles). I understand now why I didn't attempt to make this last winter when I was a 5 + months pregnant. The recipe itself goes fast if you have cooked chicken and broth in the freezer, which I did. The whole house smells wonderful. There is no better cold winter's day meal.
My Grandma's recipe didn't include kohlrabi. I've also made this with some turnips thrown is as well. The original versions only has carrots, peas, celery, and potatoes. I however, use this recipe as a good excuse to use up some of the root vegetables that have been collecting in my fridge.
January 2018 edit: Last fall I went to Lancaster and watched my uncle make this. He wasn't fighting with the dough nearly as much as I normally do. It doesn't need to be so hard, I realized as I watched. Thus I did some research when I got home, tweaked the recipe the a bit and now my noodles are even better!!
Grandma's Boiled Pot Pie
2 qts + 2 c chicken broth**
3 c cooked chicken, chopped**
pinch of saffron
3 medium sized potatoes, cut into large bite-sized chunks
1 c celery, diced
2 - 3 carrots, sliced
1/2 - 1 c frozen peas
2 kohlrabi, peeled and diced
a teapot full of boiling water
Dough
2 1 /2 c flour
1/2 t salt
2 eggs + 1 egg yolk
1 t butter
1/4 - 1/2 c water
**can substitute one whole uncooked chicken. Cover chicken with water in a large kettle and boil until cooked. Use the liquid for the chicken broth. Remove the chicken from the bone when it is cool enough to handle.
To make the dough:


Mix flour, eggs, and butter together with a fork in a large bowl. Add water, starting at 1/4 c and continue to mix. Add up to a 1/2 c of water, until dough holds together (it shouldn't be gritty or coarse). Transfer to counter and knead until dough feels soft and "dough-like" (almost like bread, not quite that far, but almost). Form into 2 round balls. Let sit for 15 - 30 minutes. Roll out on a floored surface as thinly as possible. Cut into 2 - 3 inch squares with a knife. If the middle of the dough is significantly thicker than the edges, continue to roll out squares after they are cut or cut the edges first, roll at the middle some more, and then cut the middle. Set aside. Do not stack the dough. It will stick together and you'll have to start all over again (with the rolling out).

Once the dough has been cut, begin the soup. Bring the chicken broth to a boil in a large soup pot. Crumble a pinch of saffron into the boiling water. Add the potatoes and kohlrabi and cook just until the potatoes are tender. Drop the dough squares over the potatoes when the broth is boiling vigorously. Do not overlap dough. Broth should boil over squares before more dough is added. Occasionally add some carrots and celery. Once almost all the dough has been added, add the peas. If the pot pie is starting to look dry and there is not much broth boiling over the dough, add some boiling water (the boiling water is better than cold water because it allows the pot pie never to stop boiling). Continue until all dough has been added. Add the cooked chicken last. Taste and season with salt and black pepper as desired. Serve hot!
Tuesday, December 1, 2009
Lasagna-Style Baked Ziti
Two years ago, I could not get enough of swiss chard. I was thrilled with every bunch we received and would trade it for it in the trade box. Last year, I was sad because insect pests made the swiss chard crop smaller. I thought I would be totally thrilled with getting swiss chard this year, in November, no less.
I wasn't. I haven't figure out why. I was thrilled to have this recipe though, that didn't accentuate the taste of the chard, at least until I can get used to it again. Everyone liked this recipe, even I had some ground up tastes. I served leftovers to our neighbor kids (who were 3 and 1 1/2) and they also both liked it. This was an easy recipe to make, the most time consuming parts were sauteing the meat (which you could leave out, if you desire) and grating the cheese.
Lasagna-Style Baked Ziti
adapted from The Kitchn at Apartment Therapy
12 oz penne
1 T olive oil
1 lg onion, chopped
2 cloves garlic, minced
1/2 lb lean ground beef or Italian bulk sausage
4 c marinara/pasta sauce (1 26-oz jar)
4 c spinach or swiss chard, thick stems removed and coarsely chopped
1/2 c ricotta
1/2 c Parmesan, grated
1 c mozzarella, grated
Cook pasta according to package directions. Drain and put into a 9 x 13" pan. Meanwhile, heat the oil in a large skillet over medium heat. Add onion and garlic and cook, stirring occasionally, until they begin to soften, about 4 - 5 minutes. Add the meat and cook until it's no longer pink, 5 - 6 minutes, breaking up large chunks. If using swiss chard, put with the meat and cook until the chard wilts. Toss the pasta with meat and chard, marinara sauce, spinach (if not using chard), ricotta, and 1/4 c Parmesan in the baking dish. Sprinkle with mozzarella and remaining Parmesan. Bake in a preheated 400 degrees oven until the cheese melts, 12 - 15 minutes.
Wednesday, November 25, 2009
What we've Been Eating Lately
I've been revisiting some old favorite recipes while discovering some news as we go full force into the cool weather crops. Here's what we've been eating:
Kale, Bell Peppers, and Tomatoes in Autumn Vegetable Soup
Acorn Squash in Sausage Stuffed Acorn Squash
Kohlrabi in Chicken Pot Pie
Eggplant in Beef and Eggplant Shepherd's Pie
Butternut Squash in Thanksgiving Bundt Cake
Sweet Potatoes in Mashed Sweet Potatoes
Roma Tomatoes in Oven Dried Tomato Tart
Mustard Greens in Greens and Smoked Gouda Sandwiches
We've had the salad mix in salads. I didn't bring home the okra or peppers this time (unless it was bell peppers, I brought those home.)
Tuesday, November 24, 2009
Cranberry Pecan Rolls

I made this recipe this afternoon on a whim. I had seen it in Bon Appetit's November issue and thought, "Those sound good." While nursing the babe the other day, I was flipping through the magazine again and saw that I had dog-eared the page these were on. I decided why not. If they made too many for us to eat, I'd show up on Thanksgiving at my in-laws with these in hand.
I won't be doing that. I don't thing there will be a single roll left by then. These are not just good, but freakin' good. I think I've eaten three this evening (or maybe four?). Everyone loved them. If you want to play with this recipe and make them more healthy, substitute some whole wheat flour for the bread flour.
Go ahead, make these tomorrow. They'll be perfect to serve on Thanksgiving--either at your table or the table you are going to.
 Roasting the pecans
Cranberry Pecan Rolls
adapted from Bon Appetit magazine
1 c coarsely chopped pecans (or walnuts if you are not in the South)
1 1/2 c milk, warmed to 100 - 110 degrees Fahrenheit
1 1/2 t yeast
1 T brown sugar, packed
3 1/2 c (and possibly more) bread flour
1 1/2 t salt
2 T vegetable oil
1 large egg
1 c dried cranberries (use the sweetened ones)
1 lg egg, beaten for glaze
Turbinado sugar (optional)
Stir nuts in dry skillet over medium heat until toasted, about 5 minutes. (The easiest way to tell these are done is to smell them. When they are toasted, they will smell very fragrant, but not burnt.) Remove from heat and allow to cool.
Add yeast to milk and stir in brown sugar in a large mixing bowl. Allow to stand for 5 minutes or until the yeast has dissolved and is bubbly. Add 3 1/2 c bread flour, salt, oil, and egg. Mix with an electric mixer using a dough hook until a coarse ball forms. Add cranberries and cooled pecans. Mix dough until it is smooth and elastic. It should be slightly tacky (but not sticky). If dough is too sticky, add flour by tablespoonfuls. Remove from mixture and knead briefly on a floured surface to bring dough to a ball. Place in an large oiled bowl, turning to coat dough with oil. Cover with plastic wrap and set in a warm place to rise, until dough has doubled in size, about 1 1/2 - 2 hours.
Transfer dough to an unfloured surface. Divide dough into 12 - 18 equal sized pieces (if you divide it into 12 pieces, the rolls will be HUGE!! Divided into 18 pieces, the rolls are still generous in size). Form each piece into a ball, rolling briefly on unfloured surface (remember making play dough balls? Same idea). Place rolls on a parchment lined baking sheet, spacing them apart to give them a chance to rise (if more than 12 rolls, use two baking sheets). Cover loosely with plastic wrap and allow to rise until 1 1/2 times original size. Brush rolls with egg glaze and sprinkle lightly with turbinado sugar. Let rise while oven preheats to 425 degrees.
Place rolls in the oven and reduce oven temperature to 400 degrees. Bake 7 minutes. Rotate baking pans. Bake another 8 minutes or until rolls are golden and slightly firm to touch. Cool completely on a rack.
Saturday, November 21, 2009
Thanksgiving Bundt Cake

Here is another option if you are not a pie fan (I am not a huge pie fan, so I know there must be more like me out there) but still want a Thanksgiving type dessert. This baby is loaded--pumpkin, apples, cranberries, pecans, ginger, cinnamon, and nutmeg--everything that tastes like Thanksgiving but the turkey. Needless to say, this cake didn't last long at our house, between sharing it with preschool teachers, extended family, and eating it for breakfasts and snacks. It maybe made it twenty-four hours. I will make this again, and maybe even at a time other Thanksgiving.
I used frozen winter squash (either kabocha or butternut, not sure which) for this. Because the
liquid in the squash increases with thawing, I ran the squash through a fine sieve to get the excess liquid out. I was expecting to need to increase the cooking time as well, but didn't need to. I've renamed the cake from it's original name (All-in-One Holiday Bundt Cake) because Thanksgiving Cake just seems to sum it up better to me and is less words.
Thanksgiving Cake
from Baking: From My Home to Yours by Dorie Greenspan
2 c flour
2 t baking powder
1/2 t baking soda
2 t ground cinnamon
1/4 t freshly grated nutmeg
pinch of salt
1 1/2 t grated fresh ginger (1 t ground ginger)
10 T butter, at room temperature
1 c sugar
1/2 c packed brown sugar
2 large eggs, at room temperature
1 t vanilla
1 1/4 c pumpkin puree
1 lg apple, peeled, cored and finely diced
1 c cranberries, coarsely chopped
1 c pecans, coarsely chopped
Icing
6 T confectioners' sugar
2 T maple syrup
Stir together flour, baking powder, baking soda, cinnamon, nutmeg, salt, and ground (if you are using--not the grated ginger). Set aside. In a separate bowl, beat the butter and sugars together on medium speed (using an electric mixer) until they are light and fluffy. Add the eggs one at a time, and beat for 1 minute after each addition. Beat in the vanilla. Reduce the mixer speed to low and add the pumpkin, apple, and grated ginger (if you are using). The mixture will look curdled. With the mixer still on low speed, add the dry ingredients, mixing only until they are incorporated. Stir in the cranberries and pecans with a rubber spatula. Scrape the batter into a buttered and floured 9 - 10" Bundt pan. Smooth the top with a rubber scraper. Bake in a preheated 350 degrees oven on the center rack for 60 - 70 minutes (mine only took 60 minutes) or until a tester inserted into the center of the cake comes out clean. Cool in pan for 10 minutes, then unmold and cool on rack.
To make icing, sift 6 T of confectioner's sugar into a small bowl. Stir in maple syrup. Drizzle icing over cooled cake with a spoon. Allow icing to set a few minutes before serving.

Friday, November 20, 2009
Roasted Chicken Quarters with Glazed Sweet Potatoes
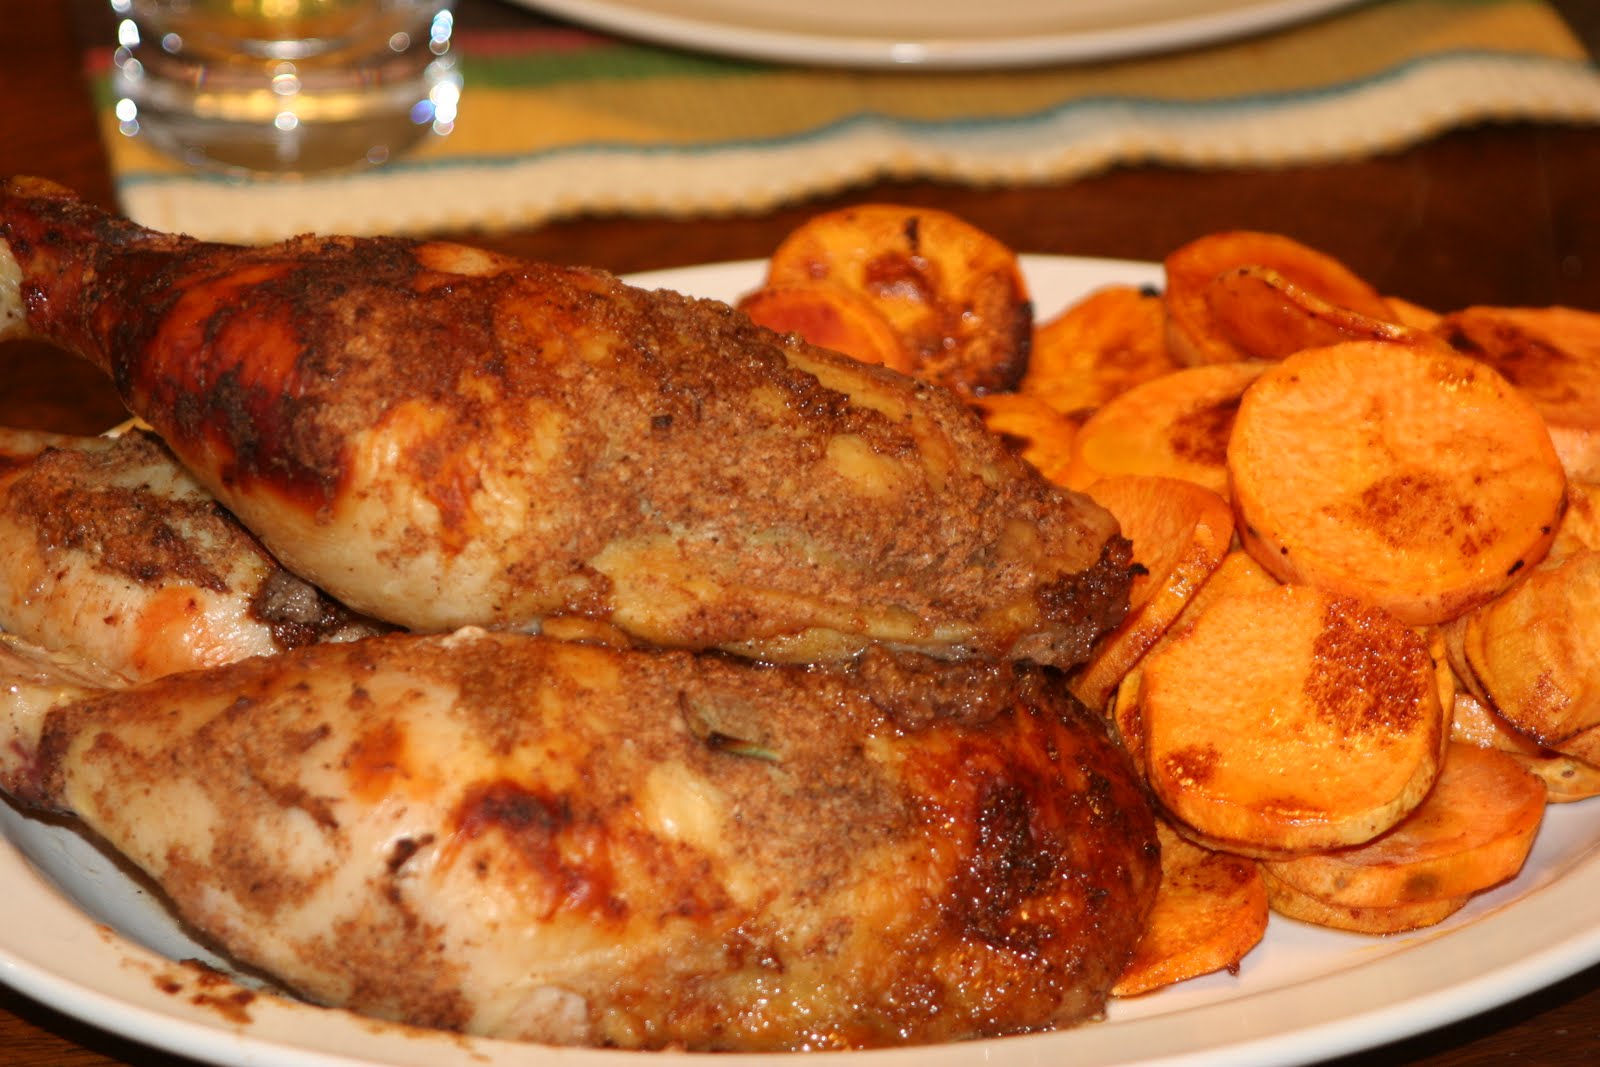 Let me get this out there first.
Start this recipe the night before (or morning of if you have that option) you plan on eating it. The chicken needs to marinate at least 8 hours before baking.
Ok, now that that's out of the way, I can rave about how much I love this meal. We all loved this meal. Between 2 adults and 2 children under the age of 5, we ate 3 chicken quarters. The recipe said it would serve four. That didn't take into account how much we loved it. M of course, decided she didn't like sweet potatoes this way either, but the rest of us really enjoyed it. I especially loved the mango chutney. I could have eaten that with a spoon from the jar. Because the chicken marinates for a while, most of the prep happens hours before you think about eating supper. That makes it perfect for our craziness right now. The only prep work in the hour before supper when the kids all go nuts simultaneously (it's a conspiracy, I'm sure of it! I think they get together in the middle of the night and decide how they'll act up while I am making supper the following day) is peeling and slicing the sweet potatoes. Couldn't be easier. I know what you are thinking when you read this recipe, "Surely I could fit the sweet potatoes and chicken on the same pan so I have less dishes to wash." Let me save you the trouble. You can't. Put the chicken on the middle oven rack and the sweet potatoes on the next rack down.
 I served this with rice. If I was on top of things, I would have a salad or a green vegetable as well. I'm not though and this meal was perfect with what we had.
Roasted Chicken Quarters with Glazed Sweet Potatoes
from Bon Appetit
Chicken
1/2 c coarsely chopped onion
4 cloves garlic, coarsely chopped
3 T apple cider vinegar
2 T honey
1/2 t ground allspice
1 T fresh ginger, peeled and coarsely chopped
1 1 /2 t fresh thyme, finely chopped (oops, I forgot this, I even had the time)
1 t salt
1 t ground black pepper
1/2 habanero or milder chile, like poblano, seeded, and coarsely chopped (optional)
1/2 t ground cinnamon
1/4 t ground nutmeg
2 1/4 - 2 1/2 lbs whole chicken leg-thigh pieces (should be 4 pieces, mine were big so we only had 3)
2 T olive oil (I forgot this, too)
Sweet Potatoes
2 T butter, melted
2 T honey
1 T fresh lime juice
1/2 t ground cinnamon
2 lbs sweet potatoes, peeled and cut into 1/3" rounds
Mango Chutney
Place the onion, garlic, vinegar, honey, allspice, ginger, thyme, salt, pepper, chile, cinnamon and nutmeg in a food processor. Puree marinade until a thick paste forms. Place chicken in a large resealable bag or plastic container and seal. Turn chicken to coat (or if using a plastic container, toss to coat before sealing the container). Refrigerate at least 8 hours or overnight, turning chicken occasionally.
Arrange chicken pieces, with marinade still clinging to it, on a rimmed baking sheet. Brush chicken with oil. Roast in a preheated 400 degrees oven until cooked through (internal temperature should be 180 degrees), about 45 minutes to 1 hour depending on the size of your chicken.
Meanwhile, whisk butter, honey, lime juice, and ground cinnamon in a large bowl. Add potato slices and toss to coat. Arrange potato slices in a single layer on an oiled baking sheet. Sprinkle with salt and pepper. Bake potatoes on a rack underneath the chicken until tender, about 25 minutes.
Serve chicken with potatoes and topping with mango chutney if desired.
Another reason to make your own "pumpkin" for pies
I saw this article on NPR's website. I am betting canned pumpkin prices are going to spike. This is just another good reason to make your own "pumpkin" (any orange winter squash like kabocha, butternut, etc) for pies and desserts.
Thanksgiving!
Thanksgiving is fast approaching as evidenced in my committing to bring food to my in-laws today and the cranberry relish and mashed sweet potatoes I am taking today to the preschool Thanksgiving feast. Yay for Thanksgiving. It's the only US holiday truly centered around food.
Here are some posts with some good Thanksgiving feast type dishes. Most of these dishes feature ingredients you can find locally in Austin, Texas this time of year.
A Brine and Aromatic for a Turkey (plus a little info about Heritage Turkeys)
Arugula Autumn Salad
Cranberry Salsa
Pumpkin Chocolate Cheesecake (for those who want something other than Pumpkin Pie)
Apple Pie
Mashed Sweet Potatoes
Pumpkin Torte
Sausage Stuffed Acorn Squash
Whole Wheat Bread (you could easily just shape this into dinner rolls too)
Cranberry Relish
Arugula Bread Pudding (would make a great dressing recipe)
Happy Cooking and Happy Thanksgiving!
Thank your farmer next time you see him/her and remember to celebrate the bounty we have received from the earth.
Thursday, November 19, 2009
Cranberry Relish
 There are two camps of people who eat cranberries for Thanksgiving: those who like it sliced, straight out of a can, and those who like a homemade version made with raw cranberries. I am sure it comes as no surprise that I like homemade cranberry relish for Thanksgiving. I have two versions that I make. One version is more of a cranberry salsa which is wonderful on turkey, in turkey sandwiches, and as a dip for tortillas. That recipe is here. My other version is a normal cranberry relish which can feed a crowd and relies heavily on fruit. I made this for my kids' preschool Thanksgiving today.
  All it takes, plus sugar and crushed pineapple
Cranberry Relish
from Recipes to Cherish
1 - 1 1/2 pounds cranberries (raw)
2 apples, unpeeled, cored, and quartered
2 oranges, one peeled and one unpeeled, quartered
1 c crushed pineapple
1 - 1 1/2 c sugar
In a food processor, process the cranberries until they are finely ground. Transfer to a bowl. Then process the apples, and then oranges, doing each fruit separately. Combine apples, oranges, cranberries, and crushed pineapple in bowl. Taste. Add more processed cranberries if necessary. Add 1 c of sugar and mix well. Taste. If the relish is still overly tart, add more sugar until you reach desired sweetness.

Wednesday, November 18, 2009
Beans and Tomato Casserole
There is a time and place for casseroles. For example, when you are taking food to a family with a new baby or because of an illness or death, casseroles are called for. They freeze well and only need to be popped in the oven. Casseroles also come in handy for evenings that you want to eat supper and be done or make supper ahead of time. While the casserole cooks, all the prep dishes are washed making after dinner chaos less so. With three kids, the casserole has a big draw. However, my husband does not love casseroles. I do. However, he'll tolerate them if it means he doesn't need to clean up the kitchen after supper (and he loves them if someone else makes them for us).
I needed to use up my tomatoes that have been ripening on my window sill (yes, I know it would have been much faster to ripen them in a paper bag, but then I wouldn't have been able to enjoy watching them ripen). I was going to use them for a fish recipe, but it turns out, I didn't have any fish in the freezer. I didn't want a recipe that was a lot of work, so I turned to Bittman, who has no problem at all with easy casseroles.
I enjoyed this recipe, Curtis tolerated it and M had nothing to do with it because apparently she doesn't like dishes that have cheese cooked into it or white beans now. J ate about his normal portion for supper. I will make this again and Curtis will enjoy having a clean kitchen the moment the dishes from the table are put away and the leftovers have gone into the fridge. This will make 4 servings as a main dish.

Bean and Tomato Casserole
adapted from How to Cook Everything, by Mark Bittman
4 c (2 15-oz cans) cooked beans (I used cannellini beans, but you could use whatever you had or a combination), drained and rinsed
4 tomatoes, sliced
1 lg onion, chopped
1 1/2 c cheddar cheese, grated
2 T fresh oregano, chopped
1 t fresh thyme leaves
Saute onions in a little bit of oil in a pan until tender. In the bottom of a greased 2 qt casserole dish, put 1/2 the beans, followed by a layer of tomatoes, onions, and then a sprinkling of the herbs and cheese. Repeat. Bake in preheated 400 degrees oven for 20 - 30 minutes, or until the cheese is bubbly and hot.
Tuesday, November 17, 2009
Butternut Squash Bisque Reprise
Last year, I thought I had perfected my butternut squash bisque. Upon making that recipe this year, I was slightly disappointed and I think I may have spoken too soon. There are a few changes I would make to my bisque recipe so I am republishing it--with my suggested changes and in recipe (instead of narrative) format. My changes, use between 1 - 1 1/2 t minced fresh ginger, reduce the cream to 1/2 c (as a starting point, add more if you want a creamier, richer soup, or stop there if you think it's creamy enough).
Curtis and I both enjoyed this. M ate it after I told her it Tyranasaurus Rex soup (because it was the color of T-Rex's on M's new favorite PBS show, Dinosaur Train). I'll need to remember that trick for future meals. Maybe she'll eat the food if I don't tell her what's in it. :) This well make 4 moderately sized servings.
Butternut Squash Bisque (Take 2)
1/2 large onion, chopped
1 - 1 1/2 t fresh ginger, minced
1 1/2 lbs butternut squash (or other orange winter squash), peeled and chopped
2 carrots, chopped
2 1/4 c chicken stock
1 t orange zest (optional)
1/4 c chopped parsley
dash of nutmeg
1/2 t salt
freshly ground black pepper
1/2 - 1 c heavy cream
Saute onion and garlic in a soup pot for 5 minutes in a little olive oil. Add squash and carrots and saute for 3 more minutes. Ad the chicken stock and orange zest and bring to a boil. Lower heat, cover, and simmer vegetables for 30 minutes, or until squash and carrots are tender. Add parsley, nutmeg, salt, and pepper. (You can do through this point ahead of time). Puree the soup in batches in a food processor or blender until mixture is smooth and creamy. Be sure to take the cap in the center of the lid off to allow the heat to escape without spewing soup everywhere. Return bisque to soup pot and add 1/2 c heavy cream. Stir in cream and taste. If you desire a richer, creamier soup, add remaining heavy cream. Heat until the bisque is hot. Garnish with croutons if you wish.
Monday, November 16, 2009
Risotta with Winter Squash and Collards
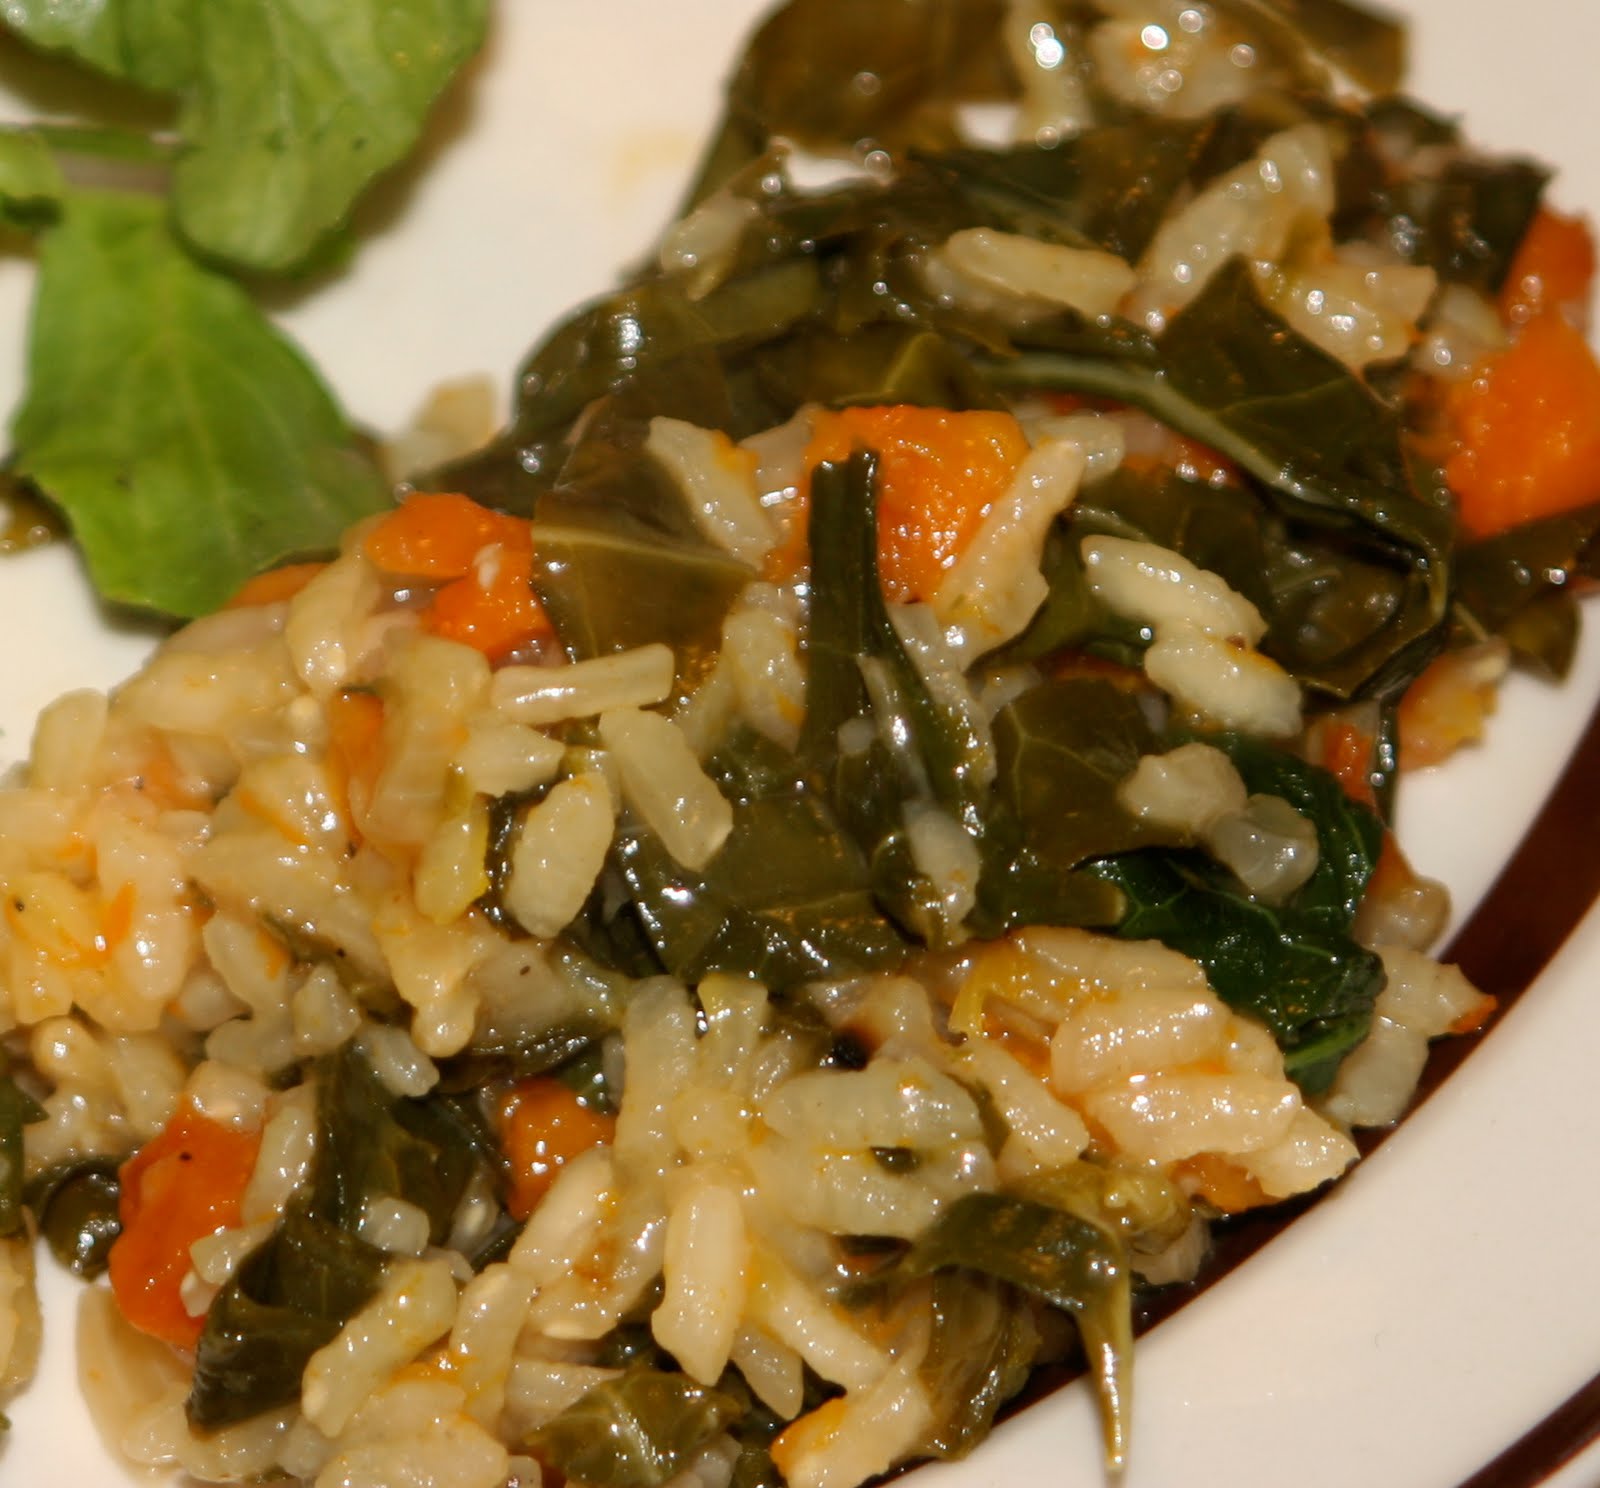
I made risotto for the first time last fall and discovered how much I loved it. Curtis and I really liked the dish--it was quite tasty and rather healthy too between the orange winter squash and the sturdy leafy greens. I will definitely make it again, even though the kids didn't eat it. These proportions make enough to serve 3 - 4 adults as a side dish. I roasted the squash and blanched the collards in the afternoon and then just assembled it at dinner time.
Risotto with Winter Squash and Greens
adapted from the New York Times
3/4 lb winter squash (of the orange variety--kabocha, butternut, etc), peeled, seeded and cut into 1/2" dice
1 T extra virgin olive oil
salt and freshly ground pepper, to taste
1/2 lb collard greens or kale, stemmed and washed
1 qt chicken stock
1 small onion, chopped
2 large garlic cloves, minced
3/4 c arborio rice
1/4 c dry white wine
pinch of saffron
1/4 c freshly grated Parmesan cheese
1 - 2 T flat leaf parsley, chopped (optional)
Toss the squash with 1/2 T olive oil, season with salt and pepper, and spread on a well oiled baking sheet. Roast in a preheated 425 degrees oven for 30 minutes, stirring every 10 minutes , or until the squash is tender and caramelized. Set aside. Meanwhile, blanch the collard greens in a large pot of boiling, salted water. Blanch for 4 minutes and then cool immediately by plunging into ice water and rinsing it with cold water. Drain and squeeze out any extra water. Chop coarsely. (You can do to this point ahead of time).
Bring the stock to a simmer in a saucepan. Heat the remaining oil in a medium saucepan and add the onion. Saute for three minutes or until the onion begins to soften. Add the garlic and a dash of salt. Cook for another minute and add the rice. Cook, stirring, until the grains of rice are separate. Stir in the wine and cook over medium heat, stirring constantly. When the wine has almost evaporated, add the collard greens, a third of the squash and the saffron. Stir in a ladleful or two of the simmering stock, enough to just cover the rice. Bring to a slow boil. Cook, stirring frequently until stock is just about absorbed, then add another ladleful of stock. Continue in this way, adding more stock when the rice is almost dry, until the rice is tender all the way through, about 20 - 25 minutes. Taste and adjust seasonings. Add the remaining roasted squash and another 1/2 c stock to the rice. Stir in Parmesan and parsley and remove from heat. Serve immediately.
Friday, November 13, 2009
Sausage and Olive Sandwiches

The best thing about sandwiches for supper is they are easy to adapt for everyone tastes. I won't admit how naked J and M's sandwiches were. However, Curtis and I really enjoyed ours. The only thing I would change about this is adding a smear of goat cheese next time. That would elevate this sandwich to perfect category. These proportions will serve 2 adults easily.
Sausage and Olive Sandwiches
adapted from Gourmet
1/4 c green olives, finely chopped
1/2 T extra-virgin olive oil
4 slices of crusty bread like ciabatta or 2 ciabatta rolls
2 bratwurst, andouille, or other flavorful fully cooked sausages, split (I used Opa's from Fredricksburg)
1/4 c bottled piquillo or roasted red peppers, cut into strips
1 c arugula, stemmed (if not baby arugula)
soft goat cheese (optional)
Combine olives and oil and then spread on bottom slices of bread. Heat a grill pan or heavy skillet over medium high heat until hot, then heat sausages until hot, about 8 minutes. To make sandwich, layer peppers, then sausage and then arugula over olive layer. Spread goat cheese on top piece of bread and cover sandwich.
Thursday, November 12, 2009
Tarte Tatin or Upside Down Apple Pie

I love apple desserts. Curtis would stick solely to apple pies, but I like a little variety--apple cake, apple brown betty, and now tarte tatin. I found this version of tarte tatin in Baking: From my Home to Yours by Dorie Greenspan. The recipe itself was pretty easy with not very much hands on time--the most time intensive thing was peeling, coring and quartering the apples. Caramelizing the apples took time, but most of that time, I ignored it. I just checked periodically to make sure the sugar wasn't burning.
Overall, I really liked this recipe for several reasons. 1) I made it in my cast iron skillet. 2) It looks nice when served and it appears I put a lot of time into it. 3) It tastes good. I'll make this again, but next time, I'll caramelize the apples longer and add a little bit of cinnamon to the apples.
Tarte Tatin
from Baking: From My Home to Yours by Dorie Greenspan
1 sheet (8 oz) frozen puff pastry (you can make other dough for this, but who can beat a puff pastry?), thawed
1/2 c unsalted butter
3/4 c sugar
8 - 9 firm apples, such as Gala, Cameo, Crispin, or Granny Smith, peeled, quartered, and cored
Roll out thawed puff pastry sheet on a lightly floured surface. Cut the dough into a circle that is 1" larger in diameter than the pan you are using (you can estimate this). Transfer to a baking sheet lined with parchment paper, prick all over with a fork, and refrigerate until you are ready to use it.
Put a 9 - 10" cast iron skillet over medium heat and add the butter. After it has melted, swirl it around in the pan so it coats the side with a thin layer of butter. Sprinkle the sugar over the butter and remove from heat. Cover the butter and sugar with a layer of apples, peeled sides down in concentric circles. Squeeze as many as possible into the first layer because they will shrink with cooking. Cut the remaining apple quarters in half and layer the leftover apples over top. (pictured at top) Put the pan over medium heat and cook until the sugar turns a deep caramel color. Depending on how hot you are cooking it, it will take 15 - 30 minutes. Check occasionally to be sure the sugar isn't burning and turn down heat if necessary. (If deep caramel color isn't achieved, like in my case, it will still be really good).
Remove from heat and top with refrigerated puff pastry dough, tucking excess edges in at the sides. Bake in a preheated 375 degrees oven for 35 - 40 minutes or until the pastry is baked through and puffed. Upon removing from the oven, cover the skillet with a large rimmed serving plate. With confidence and speed, and wearing good oven mitts, turn the tart out onto the platter and remove the pan. Let stand for 10 minutes before serving.

Wednesday, November 11, 2009
Apologies
I apologize for the silence for the past week. We've had some unexpected health events turn up in our house and I consequently have done almost no cooking this past week, thanks to meals from friends which miraculously showed up at our house. My CSA box went unused and unfortunately, the highly perishable foods of eggplant and okra didn't make it to see me start cooking again. I am skipping my CSA box this week, in hopes of using some of last week's "leftovers."
Tonight is our last meal of dinner brought to us (and a good one at that--real Puerto Rican Arroz con Pollo!). I went to the grocery store today and made my menu for the coming week. Hopefully, by tomorrow night or Friday, new recipes will be forth coming. I am excited about using my arugula, sweet potatoes, finally ripened tomatoes, and butternut squash.
I am looking forward to being back, friends.
Tuesday, November 3, 2009
Rigatoni with Sausage-Tomato Sauce and Arugula
The hunt for arugula recipes continues. So far, I am not complaining, especially when I get led to recipes like this.

We all loved this dish. This sauce makes twice as much as needed for the amount of pasta. I recommend freezing half of the sauce and getting it out next time you want some quick and delicious pasta and sauce.
Rigatoni with Sausage-Tomato Sauce and Arugula
adapted from Bon Appetit
1 T olive oil
1 lg onion, chopped
3 garlic cloves, chopped
1 - 1 1/2 lbs fresh mild sweet Italian sausages, casings removed (can also use hot Italian sausage if you would prefer)
1/2 c dry red wine
1 (28-oz) can diced tomatoes in juice
1 (28-oz) can crushed tomatoes
8 oz rigatoni (a fat penne pasta)
2 c (packed) fresh arugula, stemmed
1/2 c fresh basil leaves, thinly sliced
1 T fresh oregano, chopped
Parmesan cheese, grated
Heat oil in large pot over medium heat. Add onion and saute until translucent, about 4 minutes. Add garlic and stir 1 minute. Add sausage; cook until browned, breaking up with back of spoon, about 5 minutes. Drain drippings from pot. Add wine, diced tomatoes with juice, and crushed tomatoes. Increase heat and bring to a boil. Reduce heat to low and simmer 30 minutes to blend flavors, stirring occasionally. Meanwhile, cook pasta in a large pot of boiling water until al dente. Drain. Stir in basil and oregano into sauce. Season sauce with salt and pepper. Put pasta in bottom of large pasta bowl. Top with the arugula. Cover arugula with hot sauce and allow arugula to wilt before serving. Sprinkle with Parmesan
Monday, November 2, 2009
Mashed Sweet Potatoes
Sweet Potatoes are one of those vegetables I don't mind at all if they seem to reproduce in my pantry. They keep much better than those leafy greens and are more versatile than okra or eggplant.
My parents were in town this past weekend, it was a wonderful time. Curtis wanted to smoke some ribs on the Big Green Egg and I was looking for a recipe to using sweet potatoes to go with it. The mashed sweet potatoes from Eastside Cafe came to mind. (aaahh...Eastside Cafe, how I love thee. Why haven't been there since forever? Oh yeah, the infant attached to my hip). This recipe is nothing like Eastside Cafe's version. However, I love them. They are creamy and sweet with a pecan crunch.
If you don't want such a sweet topping, I think you could easily cut the topping in half without sacrificing the dish (in fact, I just may try that next time). I am including a half a recipe---5 lbs of sweet potatoes seemed like too much for 4 adults and 2 occasionally picky kids (M didn't eat it, but J thought it was great). This recipe makes a 9 x 9" pan and I'd say it would easily serve 6 - 8 adults as a side.
Mashed Sweet Potatoes
adapted from Bon Appetit
1/2 c (packed) brown sugar
1/4 c pecans, chopped
2 T chilled butter, cut into 4 pieces
2 1/2 lbs sweet potatoes, peeled and cut into 1 1/2" pieces
2 large eggs
1 1/2 T maple syrup
1 T vanilla
1/2 T lemon juice
1 t salt
Mix sugar, pecans, and butter in a small bowl. Cover and chill until ready to use. Meanwhile, cook the sweet potatoes in a large pot of boiling salted water until very tender. Drain. Let stand in colander for 15 minutes. Use an electric mixer to mash the sweet potatoes. Blend until sweet potatoes are smooth. In a separate large bowl, beat eggs, syrup, vanilla, lemon juice and salt. Mix in pureed sweet potatoes. Spread sweet potato mixture in a buttered 9 x 9" baking dish. (If you are making this ahead, stop here. Sprinkle pecans on top just before baking). Sprinkle pecan topping evenly over top of mixture. Bake in a preheated 350 degrees oven until sweet potato mixture is set and topping bubbles, about 1 hour. Let stand 15 minutes before serving.
Thursday, October 29, 2009
Pasta, Sausage and Bean Ragout

It was rainy and cold the other day and just the kids and I for supper. I was hankering for Butternut Squash Bisque, but didn't really want to make it without Curtis being here and I didn't know how well the kids would eat it. I searched for something more kid friendly and found this. It was a winner. Both kids loved and even wanted to eat the ragout (pronounced ragu) next day for lunch.
I changed up the recipe a little. The original recipe called for 6 oz of spinach. I don't have spinach. I have lots and lots of arugula in my fridge. Curtis ended up making it home for supper and I experimented with the arugula for our ragout. In the bottom of the bowl, I placed some coarsely torn arugula leaves. I topped it with the hot soup and then tossed it to help wilt the arugula. It was wonderful. I am pleased to have found a soup I can use arugula in. It added to the flavor and used a lot (you can use as much or as little arugula as you want).
Pasta, Sausage, and Bean Ragout
adapted from Bon Appetit
2 T olive oil
1 lg onion, diced
4 garlic cloves, minced
1 lb mild bulk Italian sausage
1 (28-oz) can diced tomatoes (with juice)
4 c chicken stock
1 (15-oz) can cannellini beans, drained
1 1/2 c fresh basil, chopped
2 t dried oregano
1/4 t dried crushed red pepper (optional)
1/2 c elbow macaroni
1/2 - 1 c per serving of coarsely torn arugula
1/3 c Parmesan cheese, grated
Heat oil in a large soup pot over medium-high heat. Add onion and garlic and saute 6 minutes. Add sausage and saute until brown, breaking up sausage, about 5 minutes. Add tomatoes (with juice), broth, beans, 1 c basil, oregano, and dried crushed red pepper. Simmer 15 minutes to blend flavors, stirring occasionally. Add pasta and cook uncovered until tender, but still firm to bite, about 10 - 15 more minutes. Mix in 1/3 c cheese and remaining 1/2 c basil. Season with salt and pepper. To serve, put torn arugula leaves in bottom of soup bowl. Ladle ragout into bowls and gently toss with arugula. Top with additional cheese if desired.
Wednesday, October 28, 2009
Olive Oil Salt Bread
With our soup the other night, I thought we needed some bread. However we had no bread in the house and it was too late for me to make my honey whole wheat bread. I remembered seeing a recipe for olive oil and salt bread in my Mark Bittman cookbook so I checked it out.
This is the perfect bread to go with soup recipe! It takes about the same time to bake as it does to make a good soup (45 minutes of baking time). The only thing I don't like about it is that it seems to be taunting me that I can't make biscuits (it is basically a type of biscuit--baking powder helps it rise instead of yeast). We all really liked it. Curtis and I dipped it in a little olive oil (I had some orange infused olive oil that I used). J and M also really liked it. I also liked cooking it in my black (cast-iron) skillet. There's just something about putting a black skillet into the oven to bake in that makes me happy.
Be sure to sprinkle the top with coarse salt at the halfway point. The salt on top was my favorite part about it, I believe. You can change the the add-ins to whatever you want. I also thought about adding some sun-dried tomatoes or rosemary or oregano. You can make it to match your soup! This uses a food processor to make it. I am sure you can also make it by hand. Just mix the ingredients together with a wooden spoon and briefly knead on a lightly floured surface.
Olive Oil Salt Bread
from How to Cook Everything by Mark Bittman
1/3 c olive oil
3 c all-purpose flour
1 T baking powder
1 t salt, preferably coarse or sea salt, plus coarse salt for sprinkling
1 c warm water
Add-in's:
1/4 - 1/2" grated Parmesan Cheese
2 T (or more) chopped black olives
Put the flour, baking powder and salt in a food processor fitted with a dough blade (the plastic one that came with the machine) and turn on. While the machine is running pour in the olive oil, then 3/4 c of the warm water through the feed tube. Process for 30 seconds. If the dough is too dry, add remaining water, 1 T at a time. If it is too wet, add a more flour, 1 T at a time. Process again if needed. The dough should be well-defined, not very sticky, and an easy to handle ball. Place the dough in a well oiled 8" oven-proof skillet or square baking pan. Press it until it fits the edges. Flip it over and press again. Cover with foil and bake for 20 minutes in a preheated 375 degrees oven. Remove foil, sprinkle top with a little coarse salt, and bake another 20 - 25 minutes, until the top is golden and springs back when touched gently. Cool briefly and then cut and serve. This is best warm but will keep for up to a day.
This is the perfect bread to go with soup recipe! It
 takes about the same time to bake as it does to make a good soup (45 minutes of baking time). The only thing I don't like about it is that it seems to be taunting me that I can't make biscuits (it is basically a type of biscuit--baking powder helps it rise instead of yeast). We all really liked it. Curtis and I dipped it in a little olive oil (I had some orange infused olive oil that I used). J and M also really liked it. I also liked cooking it in my black (cast-iron) skillet. There's just something about putting a black skillet into the oven to bake in that makes me happy.
Be sure to sprinkle the top with coarse salt at the halfway point. The salt on top was my favorite part about it, I believe. You can change the the add-ins to whatever you want. I also thought about adding some sun-dried tomatoes or rosemary or oregano. You can make it to match your soup! This uses a food processor to make it. I am sure you can also make it by hand. Just mix the ingredients together with a wooden spoon and briefly knead on a lightly floured surface.
Olive Oil Salt Bread
from How to Cook Everything by Mark Bittman
1/3 c olive oil
3 c all-purpose flour
1 T baking powder
1 t salt, preferably coarse or sea salt, plus coarse salt for sprinkling
1 c warm water
Add-in's:
1/4 - 1/2" grated Parmesan Cheese
2 T (or more) chopped black olives
Put the flour, baking powder and salt in a food processor fitted with a dough blade (the plastic one that came with the machine) and turn on. While the machine is running pour in the olive oil, then 3/4 c of the warm water through the feed tube. Process for 30 seconds. If the dough is too dry, add remaining water, 1 T at a time. If it is too wet, add a more flour, 1 T at a time. Process again if needed. The dough should be well-defined, not very sticky, and an easy to handle ball. Place the dough in a well oiled 8" oven-proof skillet or square baking pan. Press it until it fits the edges. Flip it over and press again. Cover with foil and bake for 20 minutes in a preheated 375 degrees oven. Remove foil, sprinkle top with a little coarse salt, and bake another 20 - 25 minutes, until the top is golden and springs back when touched gently. Cool briefly and then cut and serve. This is best warm but will keep for up to a day.
Tuesday, October 27, 2009
Peanut Apple Salad
I love this salad. I know Curtis isn't a fan (which is why I took this to our church's fall festival potluck) but I didn't know what the kids would think. They both liked it. J ate every bit of it, but M stuck to just the apples. It was an easy sell--"It's just apples and peanut butter."
8 apples, diced (they don't need to be peeled)
1/2 c celery, diced
1/2 c raisins
1/2 c pecans or walnuts
1/4 c shredded coconut
1/2 c peanut butter
1/2 c mayonnaise
1/4 c milk
1/4 c sugar
Combine apples, celery, raisins, nuts, and coconut in a very large bowl. Set aside. Combine remaining ingredients and pour over the apple mixture. Toss to coat the apples. Serve. Keep leftovers refrigerated.
Monday, October 26, 2009
Pork and Tomatillo Stew

The other day I walked into my neighbor's house. It smelled absolutely wonderful. I asked her what she was making and all I caught was pork and tomatillo (I was too distracted by the aroma). When I got home I immediately put tomatillos on my grocery list and set about finding a recipe that had pork and tomatillos in it.
What I made didn't necessarily smell like what her house smelled like, but it was good nonetheless. The recipe reminds me of New Mexico Posole, but without the hominy (which is just fine with me!!). The tomatillos added a wonderful tartness that wasn't overpowering. We all liked and it will definitely be put on my list of repeatable meals.
Pork and Tomatillo Stew
adapted from Food and Wine.com
2 T oil
1 1/2 pounds boneless pork loin, cut into 3" (or smaller is fine too) chunks
salt and freshly ground pepper
2 lrg celery stalks, finely diced
1 small red onion, finely diced
1 Anaheim chile (also known as Poblano or any other mild green chile), seeded and finely diced
2 garlic cloves, minced
2 t mild chile powder (I found a New Mexico chile powder that is mild and has wonderful flavor)
1 T cumin
pinch of dried oregano
2 c chicken or beef stock
1 c carrots, 1/2" diced
12 oz potatoes, peeled and cut into 1" dice
1 (28-oz) can diced tomatoes
1 lb tomatillos, husked, rinsed and cut into 1" dice
hot sauce
cilantro, chopped
tortillas
lime wedges
Heat the oil in a medium soup pot. Season the pork with salt and pepper and cook over high heat until browned on 2 sides, about 2 minutes per side. Add the celery and onion and cook over medium heat, stirring occasionally until softened, about 7 minutes. Add the diced chile, garlic, chile powder, cumin and oregano and cook, stirring frequently until fragrant about 3 minutes. Add the chicken stock and bring to a boil. Add the carrots, potatoes, tomatoes, and tomatillos, cover an simmer over low heat until the pork is cooked through, about 25 minutes. Transfer the pork to a plate and shred with two forks. Meanwhile, simmer the stew over moderate heat until thickened, about 10 minutes. Transfer the shredded pork into the stew and season with salt and pepper. Serve and garnish with hot sauce, cilantro, tortilla chips and limes.
Subscribe to:
Posts (Atom)